Tuesday, July 17, 2018

Configuring High Availability for Windows Server and a FreeNAS iSCSI target using Cisco Meraki Switches


This post will go over how to setup a 10 gig link with a 1gig failover between Windows and FreeNAS using a Cisco Meraki Stack.  The FreeNAS Server is setup using a FAILOVER link aggregation which allows the FreeNAS Server to keep it's IP address in the event of a switch or link failure.  The Meraki Stack has the Windows Server setup for LACP for aggregation on port 1 on 125.46 and port 24 on 125.47.  FreeNAS is set up for LACP for aggregation on port 1 on 125.27 and port 24 on 125.46.  LACP automatically disables the slower port and it is used in a FAILOVER mode as shown in the image below.

Meraki Stack Setup


The Windows Connection is setup as two different network interfaces with 2 different IP addresses.  As shown in the image below there is a 10 gig network interface and a 1 gig network interface.  These interfaces cannot be aggregated together, if you do they will not operate properly.
Windows Network Interface Setup


FreeNAS Network Setup For FAILOVER aggregation

The Windows Server for the Hyper-V Server or just as the host has actually two different IP addresses as stated before.  This should not be a problem if your using it as a Hyper-V host as the VM's that you are running will get it's traffic from the failover connection should the primary connection fails.


Before our failover here are some benchmarks of our FreeNAS connection using the iSCSI Connector


As you can see we are pretty much saturating the network bandwidth of the 10gig link, and now when we cause a failure (in this case I disconnected the 10Gig link) the Storage hesitates for a few seconds before re-routing the network traffic through the failover link.


Windows Showing a failure in the 10 gig link


Once the failure in the link is auto detected port 1 on 125.47 is no longer disabled in the Meraki Stack and the server continues to operate as it should just at a reduced capacity and performance.


The Meraki enables the 1gig link to allow network traffic to continue to flow to the iSCSI target


The Windows server and FreeNAS continue to operate and communicate with eachother but in a reduced capacity until the primary 10 gig link can be restored.

When failing the link back there is no noticeable interruption that I was able to notice from Windows, FreeNAS or the switches.  The only noticeable interruption was when the failure occurred and I doubt it would be noticeable unless it was some application that need to work in real time.  During the failover I wouldn't even call the event a hiccup it went that smooth.  My testing included killing the power from an entire switch in the stack, and killing each link on both switch on both servers.

I must say I was really very impressed by how well the failover worked and I can't wait to get this setup into our production environment.


Approving, Adding and Removing Apps using the Faronics Deep Freeze MDM for Android

This post will go though how to Approve, add and remove apps to your android device using the Faronics Deep Freeze MDM

1. Login to the Deep Freeze MDM


2.  Go to MDM -> Apps


3. If you have approved apps they will be listed as shown below. To approve new apps select add apps


4. This will open up a google play store. Here you can browse or search for apps you want to approve.


5. Select the app you want to approve (in this example MS Word)


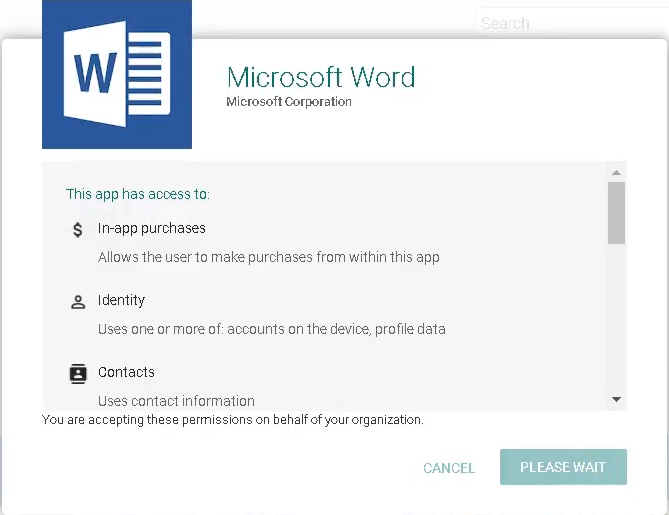
6. Press the approve button to approve the app. You will get additional messages about permissions for the app


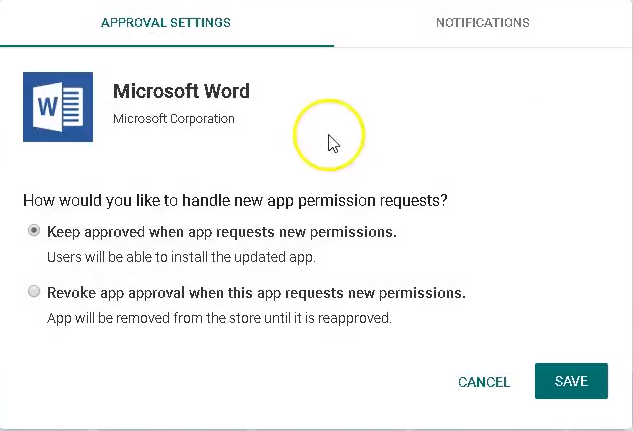
7.  When finally get through the prompts you will have to choose an option when approving apps. You will want to select the first one, as it allows for the device to be updated. The other option you will have to login to the MDM to approve the updates in the app


8.  With the App now approved (or if it doesn’t show up right away use the “Sync” button beside the add apps button. You need to add the app to a group to install and maintain the app


9.  In the groups select the group you want to add the app to. In this case “test group”


10.  Select the Apps Tab and check the apps you want to apply (install) to the group devices


11.  Then hit save located next to the group name


12.  It could take up to 10 minutes for the devices to sync and apply the settings you have changed. You can do a forced sync by going to Devices -> select the device you want to apply and press the Push Assigned Apps button.


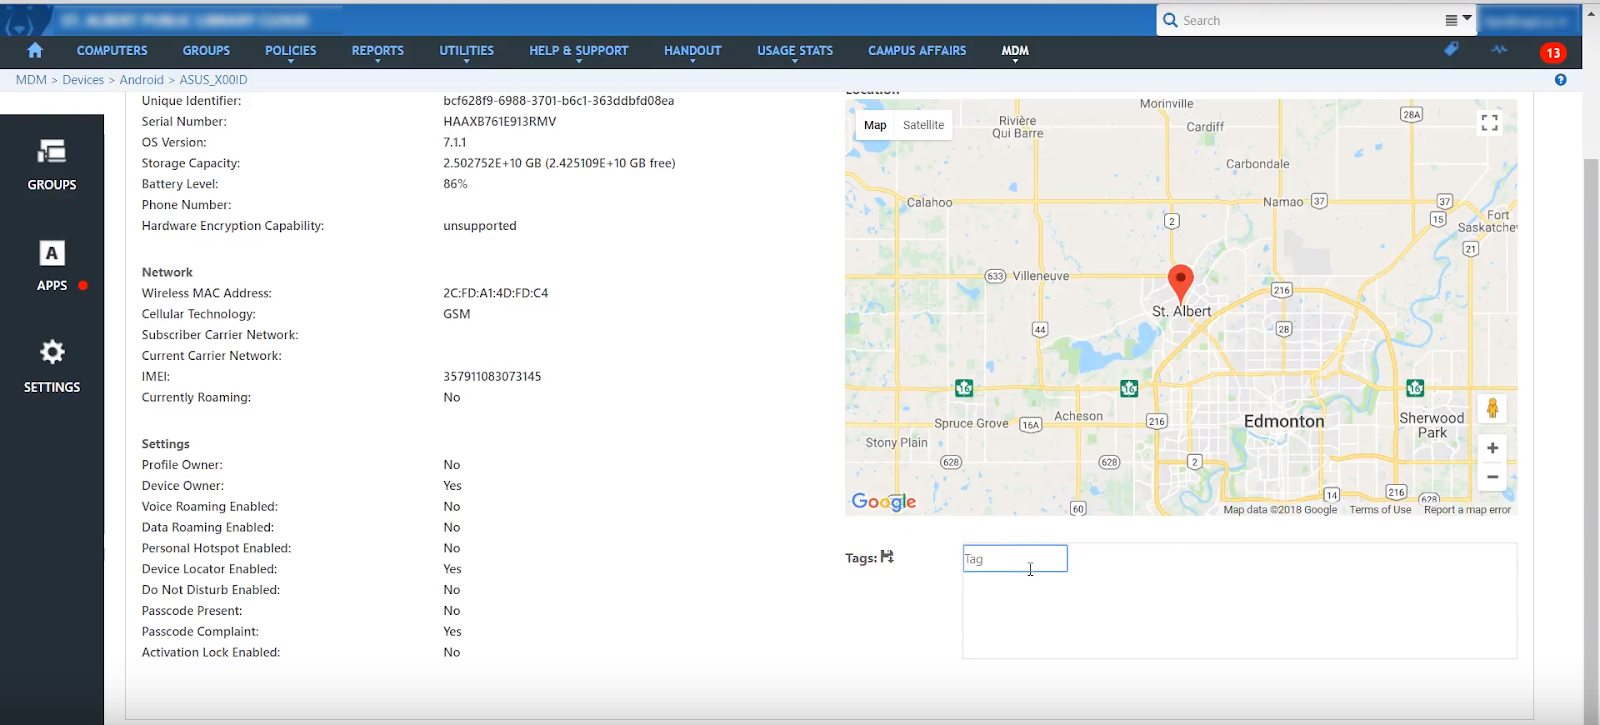
13.  Go to Devices -> Select the device you want to work with and I would recommend adding the TAG for the group and a tag for the name/number of the device.  Faronics MDM doesn't seem to keep the names of the device. 


Friday, July 13, 2018

Setting up Android on Feronics MDM


I've been working on setting up android devices on an MDM. My organization has a Meraki subscription but it is quite pricey compared to using Google, or Deep Freeze. At first I tried to setup Google Admin for managing the devices but it requires to much manual input from users for applying updates. It also affects how BYOD acts when connected. My organization has a subscription to Deep Freeze Premium, which also looks like it has MDM capability. So after briefly doing some configuration on our Meraki MDM, we thought we would give the Deep Freeze MDM a try as it was only 1/3 the price of the Meraki MDM per device.

The Process for setting up the Google Apps with a third party EMM (Enterprise mobility management) is the same, whether it is Cisco Meraki or Faronics Deep Freeze.  You can view my Setup Video on my YouTube Page Here.  The setup for setting up the Deep Freeze MDM is pretty simple, but I had gone though some documentation from Cisco for their Meraki MDM which was really useful for understanding the process for the Deep Freeze MDM.


I highly recommend reading them.
https://documentation.meraki.com/SM/Deployment_Guides/Android_Enterprise_Deployment_Guide
https://documentation.meraki.com/SM/Device_Enrollment/Android_Enrollment

Google Account Management

Managed Google Play eliminates the need for users to use personal Google accounts—it simply uses the same managed accounts that are used for Android enterprise.

If an organization happens to use G Suite, then the users will already have managed corporate Google accounts. For everyone else, EMM vendors can create managed Google Play accounts on the fly—they offer no personal customization, they’re there purely to facilitate application management.

Gsuite Account Management

You need a user account
Google Device Policy App

Setting up the managed play store is much simpler then with a GSUITE account especially with the lack of user account and the generic nature of the the Managed Play Store setup which is what we wanted.

Login to your Google Apps Account go to security


Scroll to Manage EMM Provider for Android

Click on Generate Token

Then login to your MDM provider.  Select your enrollment type (In this case I want Managed Play Store Account)


Click through and enroll.


And your android devices are now managed by your MDM (In my case Faronics)

Friday, July 06, 2018

How to Fix/Setup Teaming and VLans while using Hyper-V on Server 2012, 2012R2 and 2016


If you want to see my youtube video on this post you can view it here.
I've recently had an issue where I got an error getting Vlan and teaming info from the Intel network driver I had installed on server 2012R2.  I had a similar issue back in September of last year with Server 2012 where I couldn't edit, view, add or remove vlans on my Windows 2012 Server.  This month I all of a sudden got an error on almost all our Server 2012R2 systems.  The error is "Get Team Info Failed" as shown below.  


After doing some research and finding this post by Intel about a similar issue; I came across this post which was published in October of 2017 showing how Intel expects you to setup network teaming and Vlans in Windows Server.  Previously our organization setup the all teaming and vlans in the Intel driver as shown below.


Intel Teaming Setup in the Intel Driver


List of Vlans in the Intel Driver
Setting up our nic teaming and vlan networks this way we were susceptible to our settings getting corrupt, over written, moved, or just missing https://www.intel.com/content/www/us/en/support/articles/000007376/network-and-i-o/ethernet-products.html

There is no error or performance difference that I can tell when the driver gets corrupted or missing except when you want to add/edit/remove vlans or edit the teaming on the adapters.  As displayed in the settings below.


Intel Driver Settings


Intel Team Settings on Corrupt/Missing Driver


Settings on Corrupt/Missing Driver


Vlans on Missing/Corrupt Driver.

The way Intel recommends the driver gets setup in Windows is significantly different and since we are using Intel networking hardware I have changed our setup for the servers following Intel's documented setup for Windows Server.  Now since this happened on our production servers, it was a bit tricky to get it changed over to the Intel documented setup.

STEP 1:  First thing we need to do is make sure no one and no service is using the server at the moment, so we will want to pause any backup jobs and either shutdown or move off any VM's running on the server where we are making these changes.  For expediency I recommend downloading the latest Intel drive and keeping it somewhere accessible, as well as documentation with how your server is connected to your switches so you can specify your Native Vlan and any associated tags.


STEP 2:  In Hyper-V (if running) go to the virtual switch manager and set all of your virtual switches to private network.  This will disassociate the switch from any setup VLANs on the host and will allow you remove and update the driver.  Be sure to apply the settings once all your networks have been changed.


Virtual Switch Manager - Setting to Private will allow you to remove and update your intel network driver.
STEP 3:  Remove/Upgrade the Intel network driver (if applicable)


Remove and Update Drivers if Applicable.

STEP 4:  Setup Teaming on your Hyper-V Server

Go to your local server manager and where NIC Teaming is Disabled, click on the Disabled Text.


Enable NIC Teaming by clicking on the Disabled Text


Before creating your team you will want to read this post from Microsoft about the Teaming and Load Balancing Features in windows server to best decide what you will need for your Teaming configuration.  For my purposes I am using a two port LACP LAGG with Dynamic load balancing.

If you have more then one interface/adapter select the ones you want to team and by either shift or Ctrl clicking the interfaces/adapters then from the Tasks menu select Add to New Team

Select the network adapters you want to team and select add to team under the task menu

Now with your team created you can add your VLANs.  You need to select your team in the Teams box on the left of side then under Tasks select Add Interface


Add VLAN interfaces by selecteing the Team and under tasks select Add Interface

This will come up with your settings for your default interface.  This will be your specified Untagged VLAN in your network switch.


Vlans are tied to the Microsoft Multiplexor Driver. 
The more networks you make the Multiplexor driver will auto increment.

As you add more VLANs you will need to specifiy the VLANS your adding by selecting Specific VLAN and inputing the VLAN number.  The Vlan is tied to the Microsoft Network Adapter Multiplexor Driver.  As you add VLANs the number of the Multiplexor Driver will Auto Increment up.  So if you added VLAN 500 the Multiplexor Driver will be Multiplexor Driver #2, and if you added VLAN 300 after it would be Multiplexor Driver #3 and so on.

When you go to reset your Hyper-V virutal switches you will need to remember or have documented which VLAN is associated with which Multiplexor Driver.  In the case below the switch is associated with the untagged vlan which is Multiplexor Driver.  Apply your settings and your done.


The Hyper-V Switches will select the Multiplexor driver so it is important to know which Vlan you have associated with which multiplexor driver number.  You can get the properites of the VLAN from the local server console to find out the multiplexor driver number.

Now you have fixed your network driver and VLans with how Intel recommends for setup is done on Server 2012, 2012R2 and 2016.

Sunday, July 01, 2018

How to bypass Java MD5 Security Setting to Run Java iKVM Viewers

You can view a video of the post on my youtube page.

A bit of background: Oracle issued a critical patch to Java in April 2017, JAR files signed using MD5 will no longer be considered as signed by the Oracle JRE. Affected MD5-signed JAR files were no longer be considered trusted and as a result will not be able to run by default, such as in the case of Java applets or Web Start applications.  Now this basically affects any iKVM managers for servers by Supermicro, Lenovo, or any vendor that shipped a remote console that uses java.  By default if you try run these redirected consoles you will be denied.  The fix for this is pretty simple but requires you to bypass disabling the MD5 filter.   You can find out more about this change here.

Please note this post assumes you have a 64 bit version of Java Installed.

Use notepad or a text editor (I prefer sublime text) and run the program as Administrator


Open the file C:\Program Files\Java\$JAVA_VERSION\lib\security\java.secuirty as shown below


You will need to edit the around line 615, I recommend copy and pasting the line and removing the MD5 from the jdk.jar.disabledAlgorithms as shown below then save the file.


Then you will need to open the JAVA Control Panel and whitelist the DNS Name or IP Address (I typically use IP Address) so that we can run the Java Applet.  Enable Java content for browser and Web Start Applications, change the security level to high and and the server to the Exception List as shown below.

Then you will be able to run iKVM java applets from your severs so you can manage them.  You will still get a couple popup prompts about running the Java applets, but after accepting them you will be able to run it.


Then you can manage your server as though you were sitting right in front of it.


You can view a video of this blog post here

Friday, June 15, 2018

Manual Veeam Failover Procedure for Hyper-V

I was tasked with updating our Hyper-V servers with firmware updates from our vendor.  Unfortunately the firmware on our Hyper-V machines were sorely out of date (by allot) and when I patched the backup server I found it took about 20 - 30 minutes to update each firmware patch.  There were 10 patches at 20 - 30 minutes at a time and there was not a choice in skipping any version of them; so we had to do all 10 and they went from V144 to V452.  At the start of this project we were at V124.  Now having done the setup for the Hyper-V servers and the Veeam Backup and Replication suite.  I like processes and I always learn something and then I try put it into a process if I get hit by the "proverbial bus" or if it is something that will be required to do again at some point.  This time I learned is it doesn't hurt to have a checklist/plan when your dealing with keeping services up when your doing patching.

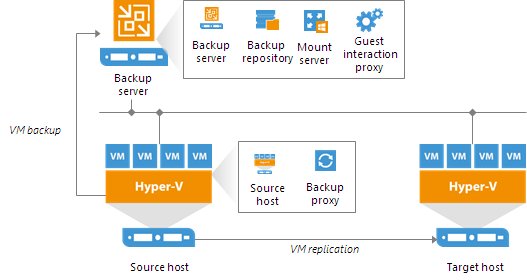
Below is a diagram of a simple Veeam Backup and Replication deployment, the environment I work in has a similar setup. 


Veeam Hyper-V Simple Deployment Model

Now this is great, it works well, in the past I would just failover all the VM's in the order they need to go but what I didn't realize is I didn't need to do that.  The devil is in the details so in this sanitized version of my new process documentation is what needs to happen when you are doing an failover to do maintenance on your primary production Hyper-Visor.

It is a good idea to have a document of what is running on the Hyper-V Server and the level of service the VM is at.  This is a sample of a document I do use.

The mistake I made was failing over the entire VM appliance, which really wasn't necessary but it was nice to make sure that the meltdown and spectre patches I had applied on the Backup Hyper-Visor did not adversely impact our performance (except for the sql server which seemed to have a noticeable impact).  

What I should have done is shutdown the non-essential servers and manually replicated the data on the essential servers before I started.  I had done it earlier that day but I should have done it before I began the failover process.
SQL ServerEssential
Tomcat / Java Server 1Essential
Tomcat Server 2Essential
Windows Cron ServerNon-Essential
Windows Task ServerNon-Essential
Windows Task Server 2Non-Essential
Windows Reporting ServerNon-Essential
SIP2 ServerEssential
Tomcat Server 3Non-Essential
This would have saved me allot of time and headache when failing back to production because I wouldn't have had to fail back all the VM's I could have just turned on the virtual machines I had turned off, especially since this was done mostly during off hours.

So this post essentially comes down to this.

Failover:

  1. Shut off all VM's that can be shut off.
  2. Disable all Veeam Backup & Replication Jobs so they don't run during the process just giving errors
  3. Disable any other backup jobs on the host.  Disable any VM's that are set to auto start.
  4. Run the replication job on the VM you are about to put into failover.  If VM's need to be failed over in a particular order make sure you do so.
  5. Once the Replication job is put the VM into failover
  6. Repeat steps 4 - 6 for any VM's that need to be running during this time.
Proceed with host patching.  Once finished start Failback

Failback:

  1. Failback VM's.   If they need to be failedback in a particular order make sure you do so
  2. Once VM is failed back; confirm failback if there are no issues.
  3. Enable VM auto startup if required
  4. Enable host backup jobs
  5. Enable Veeam backup and replication jobs
  6. Turn on any VM's that have been shut off during the process

Do a services check if required.

Updating your godaddy certs during the G2 intermediate hierarchy to the TLS Root CA - R1 hierarchy

  If you use godaddy TLS certificates you should be aware of some changes during the transition from the G2 certificates to the new R1 Certi...