How to do an in place upgrade of server 2012R2 to 2016 and then upgrading Veeam from Version 11 to version 12.
Step 1 - Downloaded the software below.
- Server 2016 Standard Edition, With Key on Hyper-V host
- Veeam Backup and Replication V12, - on VM
- Veeam Data Platform Essentials, -on VM
- Veeam Licience - on VM
I did the upgrade in the following order
- Upgrade to server 2016
- Upgrade Veeam backup and Replication
- Upgrade Enterprise Manager
- Upgrade Veeam
Step 2 - Disable all backup and replication jobs
Step 3 - Backup the SystemSince this is a VM I shutdown the system and did a full export, incase I have to roll back.
Step 4 - Upgrade to server 2016. Since this VM is on a cluster I will need to remove it from the cluster roll first.
Once removed I can add the server 2016 disk to the VM
Now I can startup the machine and start the upgrade process
Mount and run the DVD and start the upgrade process.
I selected server 2016 Desktop experience
Select keep personal files and apps otherwise it will remove Veeam.
Once the system is ready, you will have to confirm the upgrade as it recommended to do a clean install of the system. However for this system we need to do a in place upgrade.
When the install is successful, you will see it is upgraded to server 2016. You may need to activate your system again so have your windows key ready.
After the upgrade Veeam should be horribly broken. We can however proceed with the upgrade.
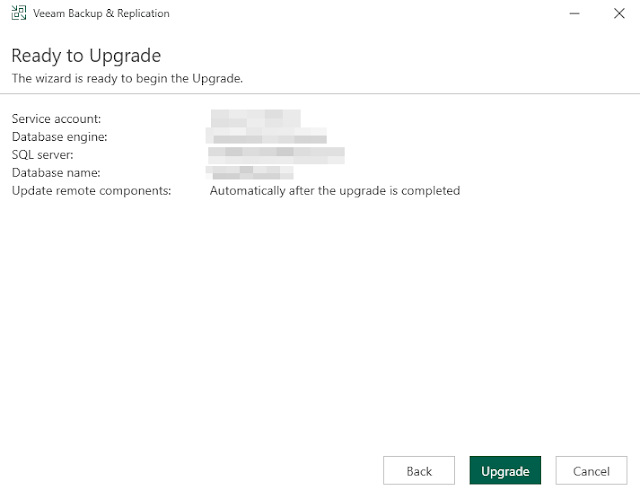
Mount the Veeam ISO and begin the upgrade. We need to upgrade Enterprise manager first and we may need up run the installer a couple times rebooting after installs. Click through until you start the install process.
Once the system has installed and rebooted we will update. Re-Run the Veeam 12 installer and update anything else that needs to be updated as shown below.
After the upgrade the SQL Server agent may have been set to disabled because of the server 2016 upgrade. You will have to change it back to automatic or manual depending on how you want to run your system. Then run the Enterprise Manager and finish the setup.
Proceed to upgrade the Enterprise Manager
After the upgrade we are now able to access the Enterprise Manager
Now we will upgrade the Backup & Replication part of Veeam
Once the installer finishes launch the backup & replication console; re-enable your backup jobs and update the clients on any systems you are running backups.
After launching the software you may encounter a permission error when trying to access the Veeam storage server and replication server. This is due to some hardening Microsoft did to mitigate an exploit.Access Denied. (Exception from HRESULT: 0x80070005 (E_ACCESSDENIED))
After looking into the error I found that this was caused by a security update in Windows
https://www.veeam.com/kb4185
https://forums.veeam.com/veeam-agent-for-windows-f33/dcom-hardening-on-windows-server-june-cu-t81317.html
It turned out to be a DCOM error and to fix the issue you need to add a registry key on the Hyper-V Hosts using Veeam. In regedit go to the following path:
Path : HKEY_LOCAL_MACHINE\SOFTWARE\Microsoft\Ole\AppCompat
add the following key as a dword 32bit (without the quotes):
"RequireIntegrityActivationAuthenticationLevel" and set the value to 0
Once that is done the update to Server 2016 and Veeam 12 is complete.
The backups will start working like it has always been running server 2016 and Veeam 12.