Showing posts with label Server. Show all posts

Tuesday, June 28, 2022

How to get the SQL Express Offline Installer

When working in a test environment you don't exactly want something to have internet access; so you need to be able to download files in an offline setting.  I had this need when I was working on a SQL numbering issue where SQL server added 1000 to the item count.  Not particularly helpful and annoying to fix.  The SQL version I was working with was 12 (or 2014) for those at home keeping track by year.  At any rate I needed to fix this 1000 item count but part of the issue was that the count is a primary key.

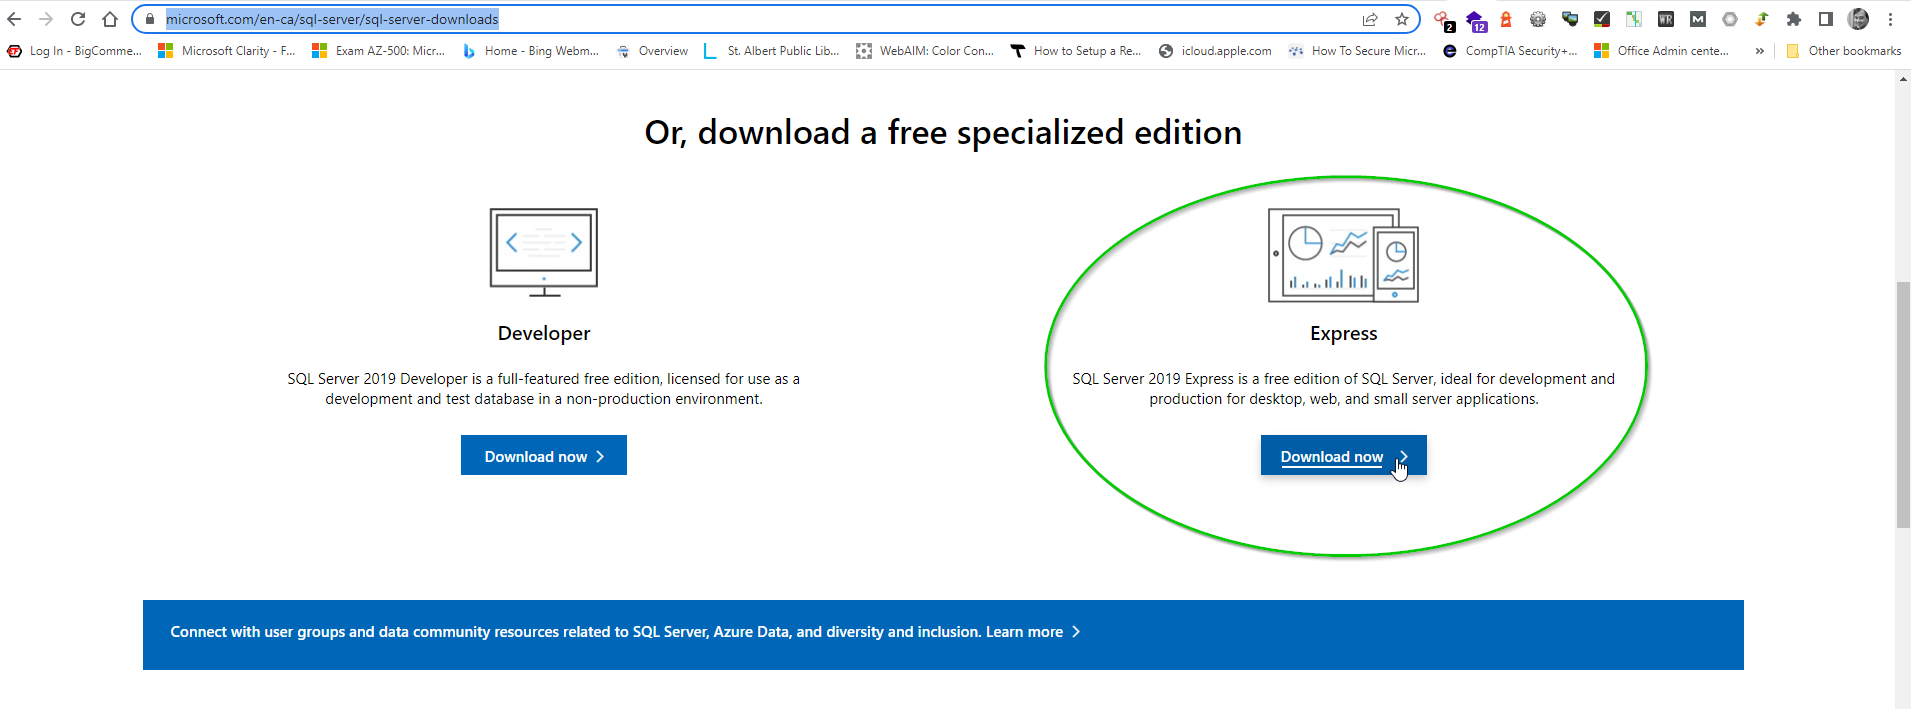
To get the offline install of SQL Server in this case we are going to use Express 2019, we need to go to https://www.microsoft.com/en-ca/sql-server/sql-server-downloads

https://www.microsoft.com/en-ca/sql-server/sql-server-downloads

When you download the Express download you will get a Application download called SQL2019-SSEI-Expr.  


Run the application.  When the application runs you get three options.  Basic, Custom and Download media which we are going to do.


When you select download media you get a few more options.  For the purposes of what I want I am selecting Express Advanced.


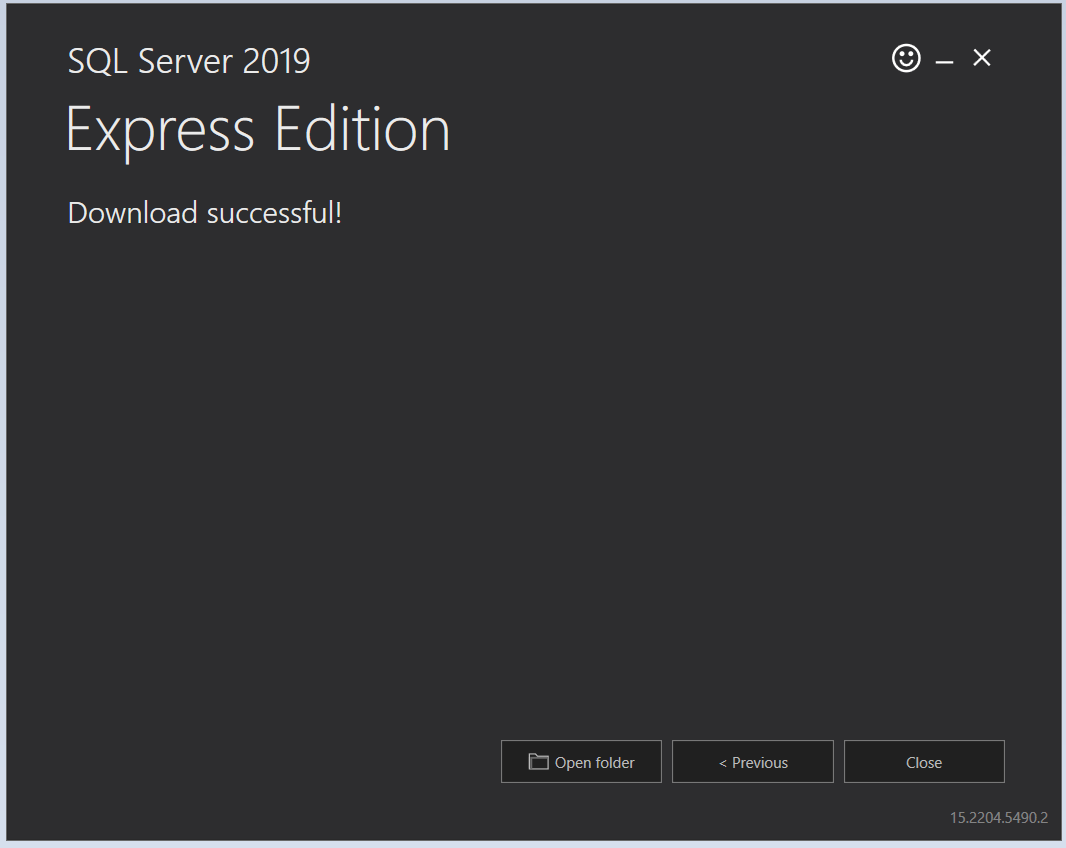
After pressing download; it will download to the directory where you have specified it to download.  In my case C:\Users\Trevor Tye\Downloads


Here I have it in my download directory.


Thursday, March 10, 2022

Disable windows server automatic updates

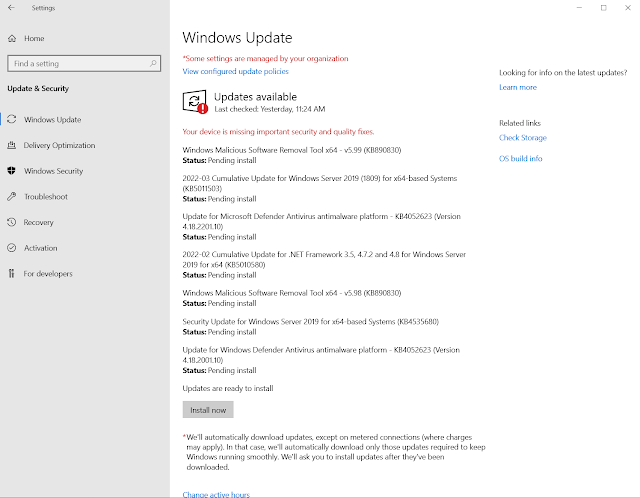
Automatic updates can be a huge bane for IT Administrators, especially if it is a server you have to have up and you don't have any scale to keep the service up while your reboot servers.  I have some specific server I have to manage that get rebooted at specific times but there are some services that have to shutdown manually or the software on the server gets very cranky.  To that end here is how you go about disabling windows update by changing Windows Update to manual.  By default Automatic updates are automatically configured as shown below.


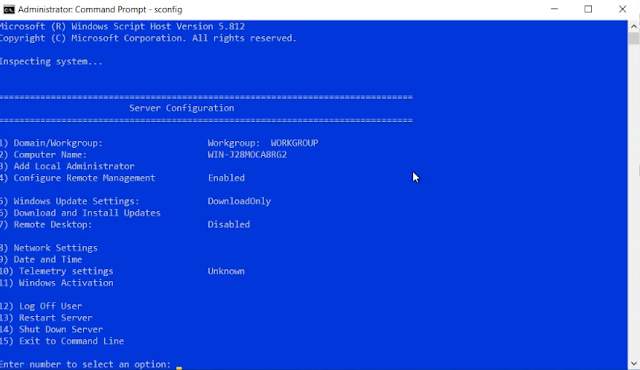
There are two snapins we are going to work with SCONFIG and GPEdit an we are going to change all the windows updates to manual.  Type the command SCONFIG in run, powershell, or cmd 

1 – SCONFIG

  1. Open a CMD PROMPT as an Administrator
  2. Type SCONFIG and press ENTER
  3. Type 5 and press ENTER
  4. Type M for Manual (or D for Download Only) and press ENTER


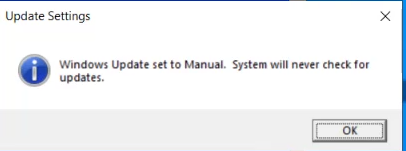
When the computer is finished you will get a prompt saying updates are sent to manual.


GROUP POLICY


  1. Click START and type GPEDIT.MSC and press ENTER (or open the GROUP POLICY MANAGEMENT CONSOLE and open an existing GPO or start a new one)
  2. Expand COMPUTER CONFIGURATION > ADMINISTRATIVE TEMPLATES > WINDOWS COMPONENTS > WINDOWS UPDATE
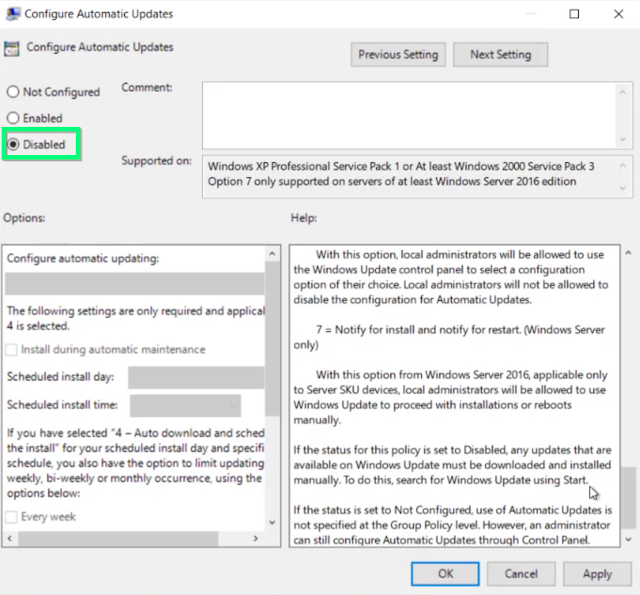
  3. Double click on CONFIGURE AUTOMATIC UPDATES
  4. Select either DISABLED (equivalent to MANUAL) or ENABLED and select what you would like from the drop down list


Then hit apply and ok.
  1. Now Double-click "No auto-restart with logged on users for scheduled automatic  updates Installation”


    Select the Enabled option and click “Apply.”

  2. Then enable the Turn off auto-restart for updates during active hours


    That's it.  If you go into your windows update, you should now see the updates are paused.
    That's it Windows updates should be now disabled.

    You can view the YouTube video here.  https://youtu.be/vQ4fBBlbTdA


Thursday, May 21, 2020

How to install, setup and deploy a remote desktop server

I put this blog post and video together to document setting up a basic RDP Server for setting up access for organizations that need to quickly move users from an on site workstation based setup to a mobile VPN based work environment.  I had set this up in anticipation that my organization would be required to work from home because of CORVID-19.  To take care of the VPN I used our PFSENSE firewall to handle the VPN connection.

How the setup was done you can find the documentation here for site2site VPN  https://optionkey.blogspot.com/2019/12/setting-up-site-to-site-vpn-on-pfsense.html or  client2site VPN https://optionkey.blogspot.com/2017/03/setting-up-pfsense-with-openvpn-using.html.  Almost all users were setup using client to site.

For the setup of the server 2019 Hyper-V virtual I machine, I downloaded the Server 2019 ISO on a trial basis from microsoft https://www.microsoft.com/en-us/cloud-platform/windows-server-trial (RDP is 120 day trial).  The server was configured with the following specs 24 Gigabytes of dynamic ram (use non-dynamic setting for better performance), a quad core CPU and 127GB disk.  You can view a full video of the install, setup and configuration on my youtube channel https://www.youtube.com/watch?v=mQG8TN_yf6Q

What this post will do:

This post will help you get a RDP server setup without a domain and it will explain the process of letting local users to connect and use the RDS server, and then connect it to a domain to get some additional features such as App-V, additional user permissions, etc.


Setup:

After your initial install of Windows, you will want to go to the add and remove features tab in server manager.


Select a Role-based or feature-based installed


Install roles and features you want for a RDP Server I use the following:

● .net 3.5
● Multipath IO
● Network Load Balancing
● Remote Server Admin Tools
● Remote Desktop Services
● Remote Access
● Multipath IO

● Network Load Balancing
● Remote Desktop Licensing Diagnoser Tools
● RAS Connection Manager
● Windows Internal DB
● Windows Standards Based Storage Management
● Simple TCP/IP Services


When installing the services select the following:

● Remote Desktop Session Host
● Remote Desktop Connection Broker
● Remote Desktop Gateway
● Remote Desktop Licencing
● Remote Desktop Web Access


To install all these features you will need to specify the additional source as well in my case it is D:\sources\sxs


Installing these services and features will take several reboots.  Once the installation is finished local machine users can login to the server with remote desktop services.  However without a domain, we can't really use services like App-V.  The App-V service is available by ip/machine dns resolution https://$IPADDRESS/rdweb/ but will not have any published apps available.  If your setting up a remote desktop server your doing this because you have multiple users that need to login to your network remotely so most likely your going to use active directory for managing this.  So to get all the features for the remote desktop services you will need connect your system to the domain.  I renamed the machine from the auto generated WIN-HM7LU99C2OG TO RDSv8 and connected the server to the domain controller I was using.


Once you've rebooted the system and are on the domain, go manage -> Add Roles and Features


Select "Start the Remove Roles and Features Wizard"


Now select Remote Desktop Services Installation


Since we are using a single server select our server RDSv8 select the Quick Start.


We want to still use our session-based desktop deployment


Select the RDSv8 server


Once everything has finished installing reboot the server


After reinstalling the services after renaming the machine and connecting to the domain, you can then access remote app and published applications by the URL https://$COMPUTER.DOMAIN/rdweb.    Now your regular RDP session server is available but no you also have App-V and by default the calculator, paint and wordpad are default apps that are available for use.


Something which I recommend doing if your using the RDP server the traditional way instead of using app-v, I would recommend disabling the server manager at login.

Disable server manager on login:

Click on Start > Run.
Type GPEDIT> MSC > hit OK.
The Local Group Policy Editor snap-in will open.
The policy that we are interested in can be found by expanding the following: 

Computer Configuration\Administrative Templates\System\Server Manager.


Now if users can connect to the network using the VPN, you should be able to access the remote desktop server and have access to all the apps that are available on the server.

Once I finished installing the server, I installed Office 2019 as a trial.  Now we had got it licensed before the licence period expired; so I included a link in the Reference Links to how to extend the trial (though I have not tried it myself)


Reference Links


Tuesday, February 25, 2020

SNMP and Network Printing in Windows

SNMP can be pretty useful, it is used for collecting and organizing information about managed devices on IP networks.  It allows you to get information about a device such as a printer.  Why do I bring this up because if you not careful, it can cause your windows printers to appear offline depending on how your printer driver is configured.

Now when we setup printers we don't deviate to far from the defaults if at all.  However because we have a number of printers that are under contract and to automate the submission of the use count we were asked to install a piece of software called FMAUDIT.  Now the setup of the software was really easy but you don't get to control any of the settings until after you've installed the software.  By then it has scanned your network, I would prefer to have it ask me to scan the network while it is install or if I would prefer to add the network later (forewarning to anyone installing the software).  The software uses SNMP to scan the network and add all printers using the SNMP community name "scanme1".  It added all my printers with "scanme1" to it's database, So I decided to change the SNMP of our contract printers to something else lets call it "scanme2".  When I did that the software got the printers and did what it needs to do.  However the Windows printservers suddenly put the printers offline because the driver is using SNMP to talk to the printer.

To view this go to Printer Properties -> Ports -> Configure Ports


Printer Properties Dialog Box

and in the configure ports dialog box you have the option of enabling or disabling SNMP Status and if you have it on but the community name is not correct the printer shows as offline (Which makes total sense).


SNMP Location in the Configure Driver

As you can see below the image is showing that the printer JLL-Toshiba-Copier is offline.


SNMP Community name mismatch causes a printer to show up offline

So you have two options for fixing this issue.
  1. Make sure that the SNMP community name in the driver is set to the same as the printer 
  2. disable the SNMP status for the windows driver.  
It is pretty useful to have so I just changed the name from SCANME1 to SCANME2, and the printer came back with no problem.  Remember by default windows enables SNMP lookup so do keep that in mind.


Making sure the community name is the same or disabling SNMP in the driver will bring the printer back online.

Thursday, February 06, 2020

Renaming an Windows Essentials Server

I have a few servers setup with server essentials because I have some software I wanted to run on Windows server but couldn't use full server and Windows 7 and 10 were not desirable.  I recently needed to change the name on one of these servers but it was a little tricky.  As shown below the server is currently named SIP

The server to be renamed
Unfortunately, when we get the item's properties, the name and domain change is not available. 

Name and Domain change is not available.
 Edit the registry and go to the entry HKLM\System\CurrentControlSet\Services\CertSvc

Edit the registry
 You can export the key if to back it up, I have found it is not necessary.

Export the CertSvc
 Delete the CertSvc registry

Delete the CertSvc registry entry.
Once you remove the key and reboot you will then be able to change the name of the system.

Now able to rename the server

When you change the computer name you will see this warning.  If you are using AD users be careful, It did not affect the server I was using but just be mindful.

Essentials warring on renaming

After you change the name and reboot your computer name will be changed.

Name Change
After changing the name and rebooting the system we can see that our system name is changed and we can still login to the system despite the warning.

System renaming is complete

You can see my full 8 minute video on how to do this on my YouTube page https://youtu.be/DP76WpqlUFo


References
https://winadminnotes.wordpress.com/2015/11/19/renaming-the-windows-server-essentials/

Sunday, July 01, 2018

How to bypass Java MD5 Security Setting to Run Java iKVM Viewers

You can view a video of the post on my youtube page.

A bit of background: Oracle issued a critical patch to Java in April 2017, JAR files signed using MD5 will no longer be considered as signed by the Oracle JRE. Affected MD5-signed JAR files were no longer be considered trusted and as a result will not be able to run by default, such as in the case of Java applets or Web Start applications.  Now this basically affects any iKVM managers for servers by Supermicro, Lenovo, or any vendor that shipped a remote console that uses java.  By default if you try run these redirected consoles you will be denied.  The fix for this is pretty simple but requires you to bypass disabling the MD5 filter.   You can find out more about this change here.

Please note this post assumes you have a 64 bit version of Java Installed.

Use notepad or a text editor (I prefer sublime text) and run the program as Administrator


Open the file C:\Program Files\Java\$JAVA_VERSION\lib\security\java.secuirty as shown below


You will need to edit the around line 615, I recommend copy and pasting the line and removing the MD5 from the jdk.jar.disabledAlgorithms as shown below then save the file.


Then you will need to open the JAVA Control Panel and whitelist the DNS Name or IP Address (I typically use IP Address) so that we can run the Java Applet.  Enable Java content for browser and Web Start Applications, change the security level to high and and the server to the Exception List as shown below.

Then you will be able to run iKVM java applets from your severs so you can manage them.  You will still get a couple popup prompts about running the Java applets, but after accepting them you will be able to run it.


Then you can manage your server as though you were sitting right in front of it.


You can view a video of this blog post here

How to make google calendar more secure

With the rash of spam and phishing attempts lately, I would recommend making the following changes to your google calendar settings to secur...