Showing posts with label Android. Show all posts

Thursday, April 28, 2022

Google EMM Update Causes Organization Email Issues on Android

Before looking into the google admin issue I thought it was a problem with my device and wiped it clean, after that didn't work I looked into google admin for google workspaces.  

Here is some background on how the EMM provider was being used before today.  The EMM provider was setup to use with organization purchased devices, and the organization did not want to associate personal devices with the EMM provider (meraki in this case) and the changes google has made to their policy won't allow you to use Google for Staff (personal) devices and the EMM provider for organizational devices.  It seems that google now throws everything to the EMM provider if you have your domain associated with one.

I had to remove the EMM provider from the organization otherwise it was treating the device as an organizational purchased device.  When Google has made to Google Workspaces EMM Provider this caused Android devices in the organization to lose access to their Work Email. 

The organization requires data access control on devices so the only way I could get this to work was to embrace google work profiles; which isn't the best user experience but is the only way I could get this working. Google sent a notice in 2017, about the EMM Provider changes but a reminder about the coming changes would have been nice.

In an email to google about the issue, they replied with the following.

Thank you for contacting Google Workspace Support. This is ****** and I will be assisting you about how to fix the sync error you are encountering due to the old Device policy app that you are still using for your Android device. It is a pleasure assisting you. 


Before we begin I would like to set the proper expectations about our new Android Device Policy app that replaced the Google Device Policy app. There is current known issue about the new Android Device Policy app that is still being checked by our Product Engineers, about a possible limitation of some Android Devices that cannot install the new Android Device policy app. And even if the app was installed, the Android device just could not be managed or simply said, the Android Device Policy app is not compatible with the Android device.

However, in order to fix the sync issue these are the steps to follow.

Resolution: If the device is for work and personal use:
Re-register your device by removing your work profile and then adding back your Google Workspace account and work profile. 


  • Open your device settings. 
  • Tap Accounts and then Remove work profile.
  • Tap Delete to confirm.
  • Go to I’m using my own personal device and follow the steps to add your Google Workspace account and work profile.
  • Assisted how to uninstall Device Policy app and install Android Device Policy app.
  • remove Workspace Profile.
Next steps:

How do I switch to the Android Device Policy from the Google Device Policy app?
If your device is for work and personal use and it "has a work profile":
  • Remove the work profile.
  • Open the Settings app and tap Accounts.
  • Add the work account again and set up Android Device Policy.
  • (A work profile is required for Android Device Policy.)

My device is for work and personal use and "doesn’t have a work profile":
  • Open the Google Apps Device Policy app.
  • Tap Unregister.
  • The work account is removed from the device.
Open the Settings app and tap Accounts.
  • Add the work account again and set up Android Device Policy.
  • During enrollment, you must set up a work profile because it's required for Android Device Policy.

Please check this help article for reference for the above steps: 

About Android Device Policy: https://support.google.com/a/users/answer/9453213


If you have an issue on a Tablet that simply is not compatible with the Device Policy app. The only option we have is to change the Mobile management for Android Device. You currently have a Custom Mobile Device management that is set to Advanced. You can change this to Basic, the good thing about this is the Android Device Policy app is no longer needed. And this will simplify your log ins to any Device similar to your iOS devices.

To change the Mobile Device management to Basic:
From the Admin console > click Devices > Mobile &endpoints > Settings > Universal settings.
On the next page > click General > Mobile management > change Android Mobile management to Basic. Please note: Only do this, if you believe you have no real need of the Advanced Mobile management option for your Android devices.

Here are some helpful link(s) that you can use:

Set up basic mobile device management: 
https://support.google.com/a/answer/7400753

We value your time and effort in contacting us. That is why, I'm keeping this case open. If our resolution does not work, kindly reply to the email and provide me your phone number and best time of call, so that I can work further with you on this. It's either we can do a screen sharing session or if you send me a video or screen shot of the error that will help me identify the issue. This case will remain active and can be reopened within 30 days.


If there are other concerns aside from what we've discussed, our main priority is to provide the best support experience, with this in mind, if you need assistance during this time feel free to reply to my email or call us or initiate a chat session for immediate help and this is the link for reference https://support.google.com/cloudidentity/answer/7668654 . We have 24/7 support and any of my colleagues will be glad to help.

Don't forget to generate a PIN should you give us a call. You can refer to this article for instructions on how to do so https://support.google.com/a/answer/60233.

Thank you for choosing Google Workspace and have a wonderful day.

Sincerely,
 

*****
Google Workspace Support


Here are some additional information linked below

https://www.blog.google/products/android-enterprise/da-migration/
https://developers.google.com/android/work/device-admin-deprecation


To resolve the issues I removed the EMM provider so google workspaces would handle the MDM for android; as there can't really have a separation of the two anymore it seems.
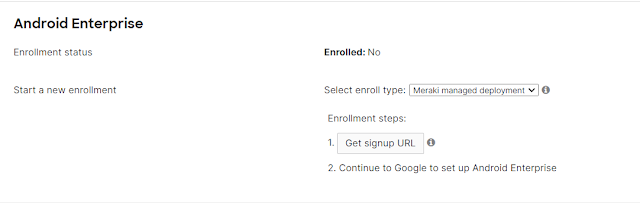
So in the MDM (Meraki) I removed android enterprise from the google domain, so android devices are just managed by google workspaces.


Once that was done after a few minutes I was able to start to get my work profile working correctly from google by adding a work profile.  Here are the universal settings for how android devices are setup.

Universal Settings

You must ensure that work profile setup is enable on in your Android Settings


For users to connect their android devices they require a work profile. This will be slightly different for every android device but the steps would be relatively the same.

Remove your current work account from your device, Please note that you will only be able to have one work account associated with a device at a time (so if you need other accounts you will have to find a work around)


1 - Add the account by pressing the arrow next to your name and email.


2 - Select "Add another account".


3 - Select Google for the Account.
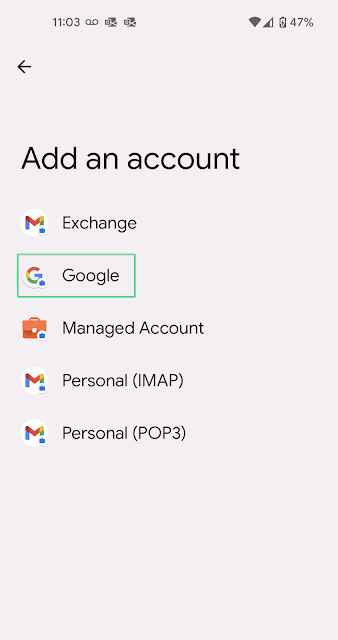


4 - Enter in your Email and Password


5 - Accept the Terms Of Use


6 - Install Google Device Administrator


7 - Press Install
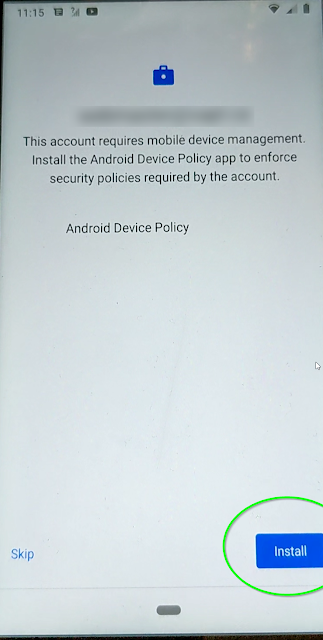


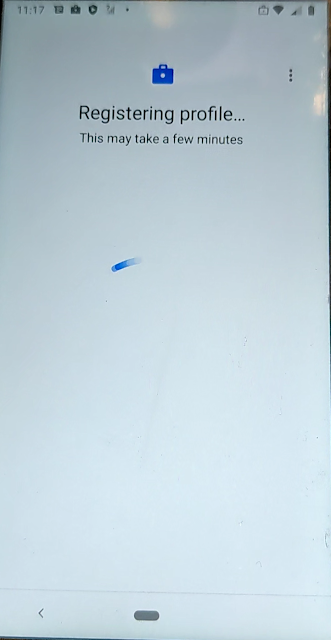
8 - Create your google work profile. It will take about 5 to 10 minutes to create the work profile.  So Please be Patient.


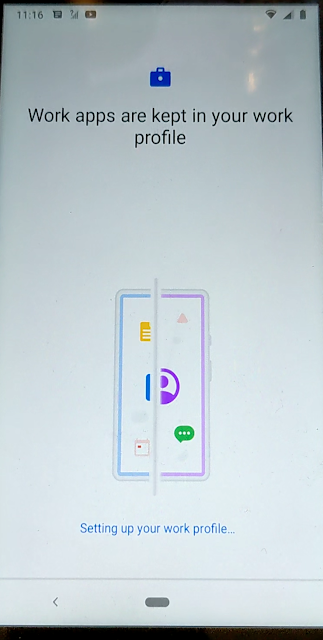
Setting up google work profile


Screen after accept and continue


Almost Finished


When it is finished it should show you the added account.


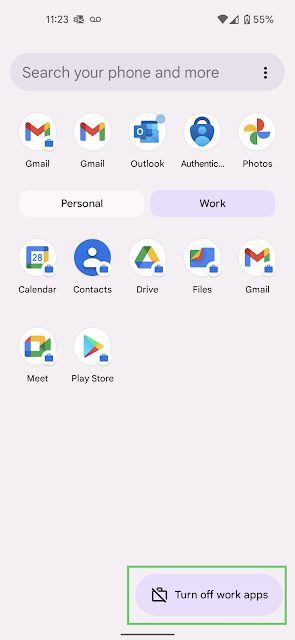
Now you will have two different apps. Work Apps and Personal Apps.


Personal


Work


Work apps are shown by the little briefcase on the app.
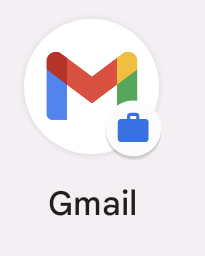


Work apps can be paused (turned off) which will stop notifications from reaching you which can be enabled or disabled from the apps drawer.


In your Gmail app you can switch from personal and work email easily but you have to go from the account icon in the top right to switch.


I understand why google set things up like this; putting the separation between work and personal settings, making it easier to wipe devices, and remove access, etc.  It isn't as "user friendly" as I would have liked it to be and it will be a transition for some users.

Tuesday, July 17, 2018

Approving, Adding and Removing Apps using the Faronics Deep Freeze MDM for Android

This post will go though how to Approve, add and remove apps to your android device using the Faronics Deep Freeze MDM

1. Login to the Deep Freeze MDM


2.  Go to MDM -> Apps


3. If you have approved apps they will be listed as shown below. To approve new apps select add apps


4. This will open up a google play store. Here you can browse or search for apps you want to approve.


5. Select the app you want to approve (in this example MS Word)


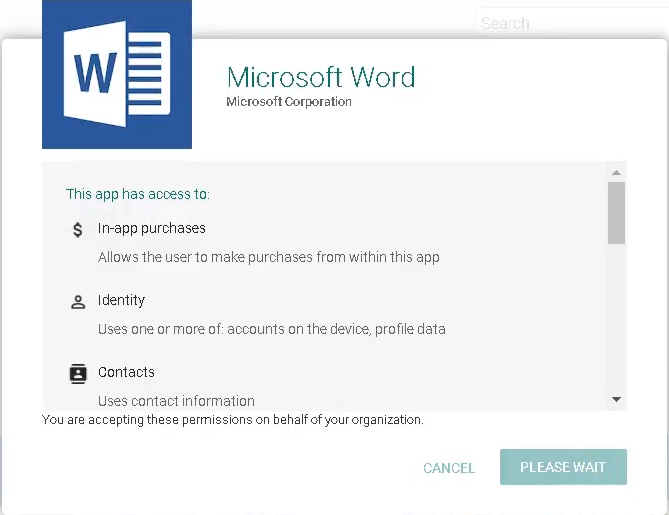
6. Press the approve button to approve the app. You will get additional messages about permissions for the app


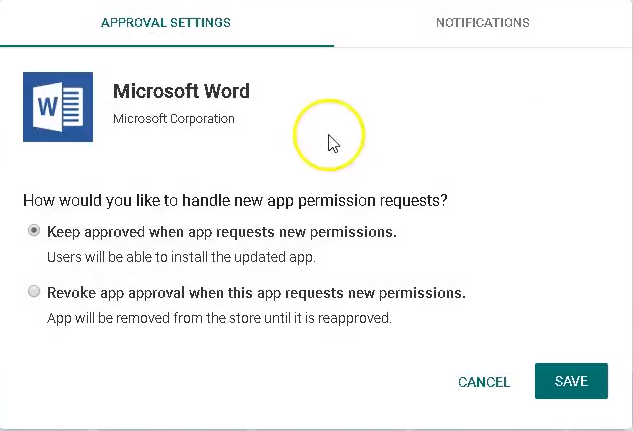
7.  When finally get through the prompts you will have to choose an option when approving apps. You will want to select the first one, as it allows for the device to be updated. The other option you will have to login to the MDM to approve the updates in the app


8.  With the App now approved (or if it doesn’t show up right away use the “Sync” button beside the add apps button. You need to add the app to a group to install and maintain the app


9.  In the groups select the group you want to add the app to. In this case “test group”


10.  Select the Apps Tab and check the apps you want to apply (install) to the group devices


11.  Then hit save located next to the group name


12.  It could take up to 10 minutes for the devices to sync and apply the settings you have changed. You can do a forced sync by going to Devices -> select the device you want to apply and press the Push Assigned Apps button.


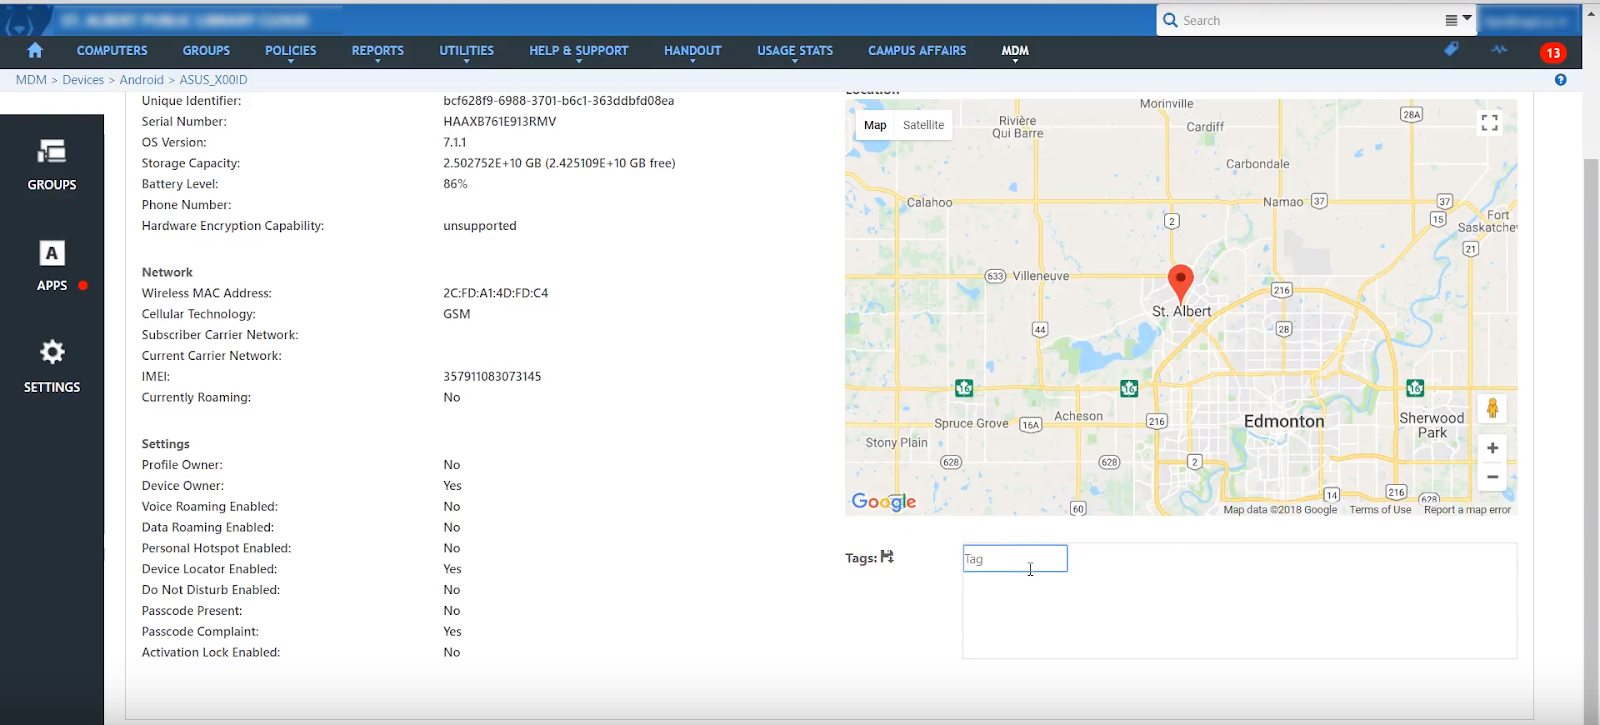
13.  Go to Devices -> Select the device you want to work with and I would recommend adding the TAG for the group and a tag for the name/number of the device.  Faronics MDM doesn't seem to keep the names of the device. 


Friday, July 13, 2018

Setting up Android on Feronics MDM


I've been working on setting up android devices on an MDM. My organization has a Meraki subscription but it is quite pricey compared to using Google, or Deep Freeze. At first I tried to setup Google Admin for managing the devices but it requires to much manual input from users for applying updates. It also affects how BYOD acts when connected. My organization has a subscription to Deep Freeze Premium, which also looks like it has MDM capability. So after briefly doing some configuration on our Meraki MDM, we thought we would give the Deep Freeze MDM a try as it was only 1/3 the price of the Meraki MDM per device.

The Process for setting up the Google Apps with a third party EMM (Enterprise mobility management) is the same, whether it is Cisco Meraki or Faronics Deep Freeze.  You can view my Setup Video on my YouTube Page Here.  The setup for setting up the Deep Freeze MDM is pretty simple, but I had gone though some documentation from Cisco for their Meraki MDM which was really useful for understanding the process for the Deep Freeze MDM.


I highly recommend reading them.
https://documentation.meraki.com/SM/Deployment_Guides/Android_Enterprise_Deployment_Guide
https://documentation.meraki.com/SM/Device_Enrollment/Android_Enrollment

Google Account Management

Managed Google Play eliminates the need for users to use personal Google accounts—it simply uses the same managed accounts that are used for Android enterprise.

If an organization happens to use G Suite, then the users will already have managed corporate Google accounts. For everyone else, EMM vendors can create managed Google Play accounts on the fly—they offer no personal customization, they’re there purely to facilitate application management.

Gsuite Account Management

You need a user account
Google Device Policy App

Setting up the managed play store is much simpler then with a GSUITE account especially with the lack of user account and the generic nature of the the Managed Play Store setup which is what we wanted.

Login to your Google Apps Account go to security


Scroll to Manage EMM Provider for Android

Click on Generate Token

Then login to your MDM provider.  Select your enrollment type (In this case I want Managed Play Store Account)


Click through and enroll.


And your android devices are now managed by your MDM (In my case Faronics)

Thursday, December 12, 2013

Backing up your Android Phone's Stock Rom and Recovery

Backing up your Android Phone's Stock Rom and Recovery

Have you ever wanted to mod your new android phone but wanted a way to get back to the factory settings without having to mod the phone first?  It is possible to do but you need a few things, the Android Dev tools, fast boot, and some command line know how.  For this example I will be using a HTC One X on the Telus Network.

With HTC you have to get a developer token which can be obtained from http://www.htcdev.com.  You will have to sign up as a dev to get your developer token.  HTC has a great tutorial on how to unlock your bootloader on the htcdev site.
Once your bootloader is unlocked you can now download a 3rd party rom manager (don't worry we are just going to boot off it; were not installing it yet - also make sure you have enabled USB Debugging in the developer tools).  I used TWRP, it is more compatible with my device then clockworkmod is.  Once downloaded (I renamed the downloaded rom manager to recovery.img) and moved it into my fastboot directory on my computer.


Here is a look at the fastboot directory on my computer

Now the fun can begin; make sure you have all the files you need in the directory your working out of, in my case the fastboot directory.  Your phone should be plugged in via usb to your computer then I used adb to reboot my phone into the bootloader

C:\fastboot>adb reboot bootloader

Then I booted off the recovery.img file in my fastboot directory.

C:\fastboot>fastboot boot recovery.img


Then your phone should boot off the custom recovery rom without installing it.  Then you can make a backup using the recovery rom.  Once done reboot into the phone's system and load a file manager like ES File Explorer to get the files off using dropbox or some other means.

Now you have a backup of your stock phone and you can now mod your phone to your heart's content.

Update:  I forgot to mention that with HTC you also have to update your boot.img file using the commandline interface.  To get the boot.img file you can get it by extracting it from your backup or the zip file from your thrid party rom like cyanogenmod.

C:\fastboot>fastboot flash boot boot.img

Updating your godaddy certs during the G2 intermediate hierarchy to the TLS Root CA - R1 hierarchy

  If you use GoDaddy TLS certificates you should be aware of some changes during the transition from the G2 Intermediate certificates to the...