FreeNAS uses ZFS which provides a read cache in RAM, known as the ARC, to reduce read latency. FreeNAS adds ARC stats to top(1) and includes the arc_summary.py and arcstat.py tools for monitoring the efficiency of the ARC.
The OptionKey is a Technology blog. How to tips and useful documentation on Apple, Microsoft, Open Source Project.
Tuesday, September 15, 2020
FreeNAS What is a L2ARC Cache and why is it useful?
FreeNAS uses ZFS which provides a read cache in RAM, known as the ARC, to reduce read latency. FreeNAS adds ARC stats to top(1) and includes the arc_summary.py and arcstat.py tools for monitoring the efficiency of the ARC.
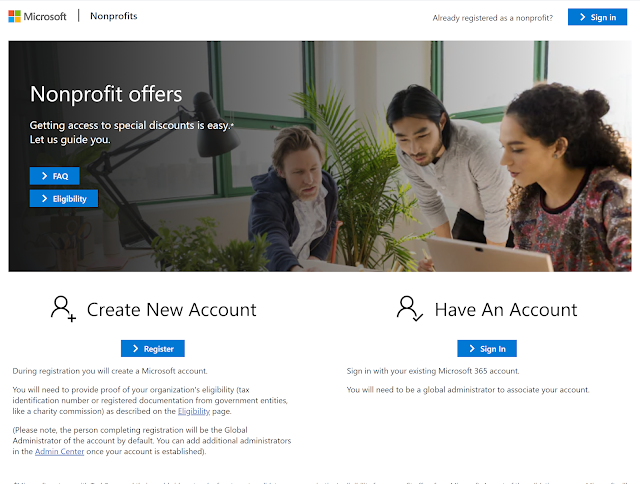
Setting up Microsoft for Non-Profits
Google has been given access to GSUITE for a while now and I've setup several non-profits with this and do occasionally help them administrate it if required. Now Microsoft is getting in the game (and this is a good thing) now giving Office 365 for free for non-profits.
- a techsoup account
- a domain, ie. $yourdomain.ca
- an email on that domain that can receive email. This may require setting up an email alias if you don't have your own server
- a way to verify your registration. I recommend using a business or corporation number
- picture of registration information
When you go to login you can use the non-profit portal to login. Typically you will be logging in with the format $user@$domain.onmicrosoft.com
Once you login to the non-profit portal you see your status and quick links for github, linkedin, and more Microsoft services that are available to you.
When you sign in to office.com you will be taken to a dashboard.
From here you can go into the office admin, non-profit portal, etc. At least for this non-profit I am showing you the dashboard for they are allowed up to 25 unique users.
Friday, September 11, 2020
Installing a small footprint version of Ubuntu Desktop for Ubuntu Server
When I install a Linux server like Ubuntu Server, I occasionally do require a desktop but I don't want all the additional software that comes with the gui like LibreOffice, Thunderbird, etc. Don't get me wrong, this is all great software for a client desktop but it isn't something that one might want on a server. To achieve a small desktop footprint I do the following:
- Get and install updates
"sudo apt-get install update" - Get and install upgrades
"sudo apt-get install upgrades" - Install lightdm
"sudo apt-get install lightdm" - Install Unity
"sudo apt-get install unity" - Install ubuntu desktop
*** Important update ****
When I went to setup a new lite version of ubuntu server when I tried to use the latest version of Ubuntu Server 20.04.02 and ran
"sudo apt-get install --no-install-recommends ubuntu-desktop"
I got the following error
"Command line option --no-install-recommends is not understood in combination with other options"
In previous versions of Ubuntu the command works fine such as in 16.04.07 but in Ubuntu 20.04.02 I had to use
"sudo apt-get install ubuntu-desktop-minimal"
So please note this important change if you are trying to create a minimal version of a linux desktop; this may also affect other distros.
Then continue with the other installs
"sudo apt-get install compizconfig-settings-manager"
"sudo apt-get install firefox"
"sudo apt-get install net-tools"
Friday, September 04, 2020
Setting up Papercut print release system for Linux
 |
| Ramsey Public Library Envisionware Print Release System |
However after investigating upgrade options and the cost for adding an additional location and coinop for the release station it was not a cost effective solution since new hardware would be required for both locations and there was just not the budget for it. Not to mention the difficulty of managing two release systems that were non-centralized.
Ramsey Public Library uses an envisionware print release system, I know from the experience I've had with it; it's ok but it is quite lacking and expanding they system it is currently on to windows server from windows 10 pro would be quite the expense as it would require more then 2 machines with server if we ever got over 30 clients and we were right on the cusp of being.
 |
| ITC 5400 COINOP |
Now Papercut is a centralized print management solution, that works on Linux or Windows and is actually pretty light on system requirements. At a glance you would think for just managing client side printing the NG version would all that is required however it didn't quite do all that was desired from the printing side so it was decided to go with the MF version. The project started with a decision to go with a Ubuntu 18 LTS virtual server on Hyper-V to host the papercut MF software.
You can view Papercut's System Requirements I found on Hyper-V these settings work pretty good for a workgroup of of about 40 clients.
Processor: 2 Core
Here are the CDN links for the papercut software if you want to try it yourself.
Linux:
https://cdn1.papercut.com/web/products/ng-mf/installers/mf/19.x/pcmf-setup-19.1.5.52403.sh
Setting up Papercut on Ubuntu Server 18.03 LTS / 20.04 LTS
There are a couple things you need to know before you can install papercut on Linux.
- The "ROOT"/Administrator must be called papercut
- The user must have sudo access for the install
For this install I'm going to use the following credentials:
- username: papercut
- password: papercut
- Get and install updates
"sudo apt-get install update" - Get and install upgrades
"sudo apt-get install upgrades" - Install lightdm
"sudo apt-get install lightdm" - Install Unity
"sudo apt-get install unity" - Install ubuntu desktop
"sudo apt-get install --no-install-recommends ubuntu-desktop"
"sudo apt-get install compizconfig-settings-manager"
"sudo apt-get install firefox"
"sudo apt-get install net-tools"
- restart
- Install and configure cups
"sudo apt-get install cups (should be already installed)" - add the papercut user to the printer admin for cups
sudo usermod -a -G lpadmin "$USERNAME" - Install Samba
"sudo apt-get install samba" - add the papercut user to the sudoers list
sudo vi /etc/sudoers
papercut ALL=(ALL:ALL) ALL - Install papercut
chmod 777 "PATH TO PAPERCUT".sh
sudo ./"PAPERCUT INSTALLER"
Error opening PDF's In Chrome with Adobe Acrobat: PDF edit, convert, sign tools enabled
If you start having trouble opening PDF's in chrome or edge you might need to check for the " Adobe Acrobat: PDF edit, convert, sig...

-
When working in a test environment you don't exactly want something to have internet access; so you need to be able to download files in...
-
To see a video of the Rustdesk installation visit https://www.youtube.com/watch?v=t7UobpjDsRY and if you like the content please like and s...
-
The organization I work for uses Lenovo Thinkpads and we purchased Lenovo USB C docks for those laptops and on the two of the new Gen 11 Int...


