Showing posts with label REMOTE Connection. Show all posts

Thursday, May 21, 2020

How to install, setup and deploy a remote desktop server

I put this blog post and video together to document setting up a basic RDP Server for setting up access for organizations that need to quickly move users from an on site workstation based setup to a mobile VPN based work environment.  I had set this up in anticipation that my organization would be required to work from home because of CORVID-19.  To take care of the VPN I used our PFSENSE firewall to handle the VPN connection.

How the setup was done you can find the documentation here for site2site VPN  https://optionkey.blogspot.com/2019/12/setting-up-site-to-site-vpn-on-pfsense.html or  client2site VPN https://optionkey.blogspot.com/2017/03/setting-up-pfsense-with-openvpn-using.html.  Almost all users were setup using client to site.

For the setup of the server 2019 Hyper-V virtual I machine, I downloaded the Server 2019 ISO on a trial basis from microsoft https://www.microsoft.com/en-us/cloud-platform/windows-server-trial (RDP is 120 day trial).  The server was configured with the following specs 24 Gigabytes of dynamic ram (use non-dynamic setting for better performance), a quad core CPU and 127GB disk.  You can view a full video of the install, setup and configuration on my youtube channel https://www.youtube.com/watch?v=mQG8TN_yf6Q

What this post will do:

This post will help you get a RDP server setup without a domain and it will explain the process of letting local users to connect and use the RDS server, and then connect it to a domain to get some additional features such as App-V, additional user permissions, etc.


Setup:

After your initial install of Windows, you will want to go to the add and remove features tab in server manager.


Select a Role-based or feature-based installed


Install roles and features you want for a RDP Server I use the following:

● .net 3.5
● Multipath IO
● Network Load Balancing
● Remote Server Admin Tools
● Remote Desktop Services
● Remote Access
● Multipath IO

● Network Load Balancing
● Remote Desktop Licensing Diagnoser Tools
● RAS Connection Manager
● Windows Internal DB
● Windows Standards Based Storage Management
● Simple TCP/IP Services


When installing the services select the following:

● Remote Desktop Session Host
● Remote Desktop Connection Broker
● Remote Desktop Gateway
● Remote Desktop Licencing
● Remote Desktop Web Access


To install all these features you will need to specify the additional source as well in my case it is D:\sources\sxs


Installing these services and features will take several reboots.  Once the installation is finished local machine users can login to the server with remote desktop services.  However without a domain, we can't really use services like App-V.  The App-V service is available by ip/machine dns resolution https://$IPADDRESS/rdweb/ but will not have any published apps available.  If your setting up a remote desktop server your doing this because you have multiple users that need to login to your network remotely so most likely your going to use active directory for managing this.  So to get all the features for the remote desktop services you will need connect your system to the domain.  I renamed the machine from the auto generated WIN-HM7LU99C2OG TO RDSv8 and connected the server to the domain controller I was using.


Once you've rebooted the system and are on the domain, go manage -> Add Roles and Features


Select "Start the Remove Roles and Features Wizard"


Now select Remote Desktop Services Installation


Since we are using a single server select our server RDSv8 select the Quick Start.


We want to still use our session-based desktop deployment


Select the RDSv8 server


Once everything has finished installing reboot the server


After reinstalling the services after renaming the machine and connecting to the domain, you can then access remote app and published applications by the URL https://$COMPUTER.DOMAIN/rdweb.    Now your regular RDP session server is available but no you also have App-V and by default the calculator, paint and wordpad are default apps that are available for use.


Something which I recommend doing if your using the RDP server the traditional way instead of using app-v, I would recommend disabling the server manager at login.

Disable server manager on login:

Click on Start > Run.
Type GPEDIT> MSC > hit OK.
The Local Group Policy Editor snap-in will open.
The policy that we are interested in can be found by expanding the following: 

Computer Configuration\Administrative Templates\System\Server Manager.


Now if users can connect to the network using the VPN, you should be able to access the remote desktop server and have access to all the apps that are available on the server.

Once I finished installing the server, I installed Office 2019 as a trial.  Now we had got it licensed before the licence period expired; so I included a link in the Reference Links to how to extend the trial (though I have not tried it myself)


Reference Links


Friday, March 31, 2017

Setting Up PFSENSE with OPENVPN using User Authentication

PFSense is a great firewall solution.  It is flexible, easy to customize and comes with built in VLAN and VPN support.  Now I am going to document this for setting up a User Authenticated Open VPN Server in PF using the local database that is in PFSENSE.  This will have to be modified for larger organizations; but would be great for smaller and mid-range shops.  This is the least secure way to set this up but is the easiest to setup.

A couple of things to note.

The PFSense OPENVPN client wizard automatically makes the routing for the WAN which is what is used in most setups as most organizations use one firewall.  If you re-run the export wizard and if you made a change to the rule it will reset any changes you made to the WAN.

If you are using PFSENSE with CARP FAILOVER, you must select the CARP address and change any firewall ports/forwards and NAT/Outbound rules.  On your OPENVPN Server make sure the interface is set to your CARP address as well.

Before you proceed you should install the openvpn-client-export package as seen below.


What this tool does is it adds a client export utility which really just allows you to download a .ovpn of your firewall connection for the Open VPN client.  It makes it really easy to make the .ovpn file you need to use with the Open VPN client.


PFSense supports 3 Server Modes for OPENVPN


The OpenVPN Server Mode allows selecting a choice between requiring Certificates, User Authentication, or both. The wizard defaults to Remote Access (SSL/TLS + User Auth). The possible values for this choice and their advantages are:
  • Remote Access (SSL/TLS + User Auth)
    • Requires both certificates AND username/password
    • Each user has a unique client configuration that includes their personal certificate and key.
    • Most secure as there are multiple factors of authentication (TLS Key and Certificate that the user has, and the username/password they know)
  • Remote Access (SSL/TLS)
    • Certificates only, no auth
    • Each user has a unique client configuration that includes their personal certificate and key.
    • Useful if clients should not be prompted to enter a username and password
    • Less secure as it relies only on something the user has (TLS key and certificate)
  • Remote Access (User Auth)
    • Authentiation only, no certificates
    • Useful if the clients should not have individual certificates
    • Commonly used for external authentication (RADIUS, LDAP)
    • All clients can use the same exported client configuration and/or software package
    • Less secure as it relies on a shared TLS key plus only something the user knows (Username/password)

More in depth documentation can be found here at https://doc.pfsense.org/index.php/OpenVPN_Remote_Access_Server#Authentication

This tutorial will help you setup a Remote Access (User Auth) setup.  There are a few things you need to setup before you begin.
  1. Have a user setup that you plan on using for OPENVPN
  2. Setup up a Certificate
  3. Run the OPEN VPN Wizard
  4. Open Your Firewall ports and setup your routing properly.

STEP 1.  Create a OPENVPN User

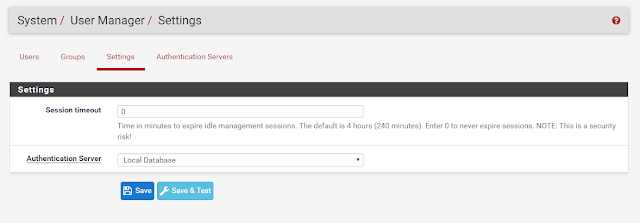
I would highly recommend using something separate from the built in account; not only is it best practice it would be stupid to use default account.  Depending on your setup if your using groups etc, you will need to add permissions for what you want.  To just access the network you don't need to have the user setup as a member of the Admins group.  Now you can restrict their access to gui controls in the firewall etc. Just remember this user has access to the firewall so lock it down as best you can.  PFSense supports LDAP and Radius as well as local database.  We will be using the local database installed in PFSense which is used for user management.


STEP 2 - Create your Certificate

You could setup letsencrypt though there is no really good way of automating the renewal of the TLS Certificate every 90 days yet.  For our purposes we are going to use a self-signed certificate.  Create a internal Certificate Authority which is used for self signing.  I used the default a 2048 bit key length with a sha256 digest.  We are creating the Certificate (which is shared for all remote user access) so that the tunnel is encrypted.  The default lifetime of the Cert is 10 years.


Here is a sample of what the cert should look like.


And you should create an internal Certificate Revocation List.  This will allow you to revoke the certificate incase you lose control of the private key.


STEP 3 - OPENVPN Wizard

This is basically a fill in the blank wizard.  When you finish it will generate a OPENVPN server and exported client settings.  This is the easiest way to create the .ovpn file and recommend using it and making changes to the .ovpn file after the fact.


The tunnel network is the network that the client is using to connect to the network you want to access.  An example is the client using the OpenVPN client would have an ip address on the virtual network 192.168.2.0/24 and is trying to the actual LAN network of 192.168.1.0/24.  So the client would get an IP of 192.168.2.3 and would be able to access the NAS on 192.168.1.50.  You may need to add the push "route 192.168.1.0 255.255.255.0" in the advanced section otherwise the routing may not work as expected.  I have found for the most part this is required and further down if your using this to VPN into an Active Directory Network and want to access DFS shares you will also have to push out DNS settings.


After the wizard is completed you will see your VPN Server like in the image below.


You will want to go into the settings and make a few changes.


You will want to make sure that the server mode is set to Remote Access (User Auth) and your interface is what it needs to be WAN or CARP Typically.

You will then want to go to the client Export option. (This is a plugin in PFSense so make sure you install it first.)
Here you can download all your OPENVPN Config Options


4. Confirm your Firewall Ports and Routing are working properly.

Your firewall rules should look something like this.


The exported OpenVNC settings file looks something like this.


persist-tun


persist-key

cipher AES-256-CBC

auth SHA256

tls-client

client

remote X.X.X.X YYYYY udp

lport 0
auth-user-pass
ns-cert-type server
comp-lzo adaptive

-----BEGIN CERTIFICATE-----

-----END CERTIFICATE-----
setenv CLIENT_CERT 0
#
# 2048 bit OpenVPN static key
#
-----BEGIN OpenVPN Static key V1-----

-----END OpenVPN Static key V1-----
key-direction 1


UPDATE:

If you want access to DFS Shares though AD, you will want to push all traffic through the VPN.  Check the Redirect Gateway.  The default is 10 Concurrent Connections.

I've also set the DNS Server Enable pointing to the DNS for the AD Controllers and I've also enabled Block Outside DNS, and Force DNS cache update.

I've also added a few additional options for custom options for the DNS Server.

push "route xxx.xxx.xxx.0 255.255.255.0"
push "dhcp-option DNS xxx.xxx.xxx.xxx"

You may also have to update your Active Directory settings to enable slow-link mode. (see below)


Once you connect to your VPN you will be working in offline mode because your not connected to the domain right away.  If you click the work online on the client the DFS shares will come right up.


Crontab changes in Linux 26.04 vs previous versions

I use a small Linux server to control the turning on and shutting off our client stations with crontab.  The system I typically use is Ubunt...