Showing posts with label sql. Show all posts

Wednesday, March 11, 2026

Automating SQL Data Dump and SFTP File Transfer with Powershell and WinSCP on Windows


We work with a third party that takes care of a few systems for us that we automated and to make that work we had to script an automated process to export data from our SQL server and automatically upload it to an SFTP Server.

For this setup we are using WINSCP for doing the file transfer and a combination of a bat file and powershell for exporting the data out of SQL and automating the process.  I am using windows for automating this process.

What will be required:


So install powershell and WINSCP on to the system.  

Open powershell as and administrator and install the Clobber the WINSCP Module and the SQLServer module

Install-Module -Name PowershellGet
Install-Module -Name SQLServer
Install-Module -Name WinSCP

Once done we will make two files, they will be running from the same directory.
SQLDataExport.ps1 and gen_sql_data.bat
The powershell file is fairly straight forward. It essentially gets and runs the sql query and saves it to a directory as a txt or csv.

SQLDataExport.ps1

$serverInstance = "$address, $port" 
$databaseName = "$databaseName" 
$Username = "$databaseUser" 
 $Password = "$databasePassword" 
$filePath = "$PATH\$FILENAME" + (Get-Date).ToString("yyyyMMddTHHmmss") + ".txt" 

Import-Module SqlServer 

$sqlQuery = "$YOURSQLQUERY" 

Invoke-Sqlcmd -ServerInstance $serverInstance -Username $Username -Password $Password -Database $databaseName -TrustServerCertificate -Query $sqlQuery | Out-File $filePath -Encoding UTF8


BatFile (This is where all the FTP Magic happens)

@ECHO OFF
powershell.exe -executionpolicy remotesigned -File $PATHTOPOWERSHELLSCRIPT.ps1

timeout /t 120

echo "FTP Started" >> seed_exReport.rpt
date /t >> exReport.rpt
time /t >> exReport.rpt
echo option batch abort > ftpPutCmds.txt
echo option confirm off >> ftpPutCmds.txt


echo open sftp://$USERNAME@$SFTPURL -privatekey=$SFTPPRIVATEKEY.ppk -passphrase=$PASSWORD -hostkey=acceptnew >> ftpPutCommands.txt
echo option transfer binary >> ftpPutCmds.txt
echo cd seed >> ftpPutCmds.txt
echo put $SQLDATA_*.txt >> ftpPutCmds.txt
echo close >> ftpPutCmds.txt
echo exit >> ftpPutCmds.txt


"C:\Program Files (x86)\WinSCP\WinSCP.exe" /console /script=ftpPutCmds.txt /log="$PATH2Error.log" /loglevel=1* /logsize=5*100M
echo "FTP Finished" >> seed_exReport.rpt
IF EXIST *.txt (move *SQLDATA_*.txt Old\) REM move old file to a folder called old
date /t >> exReport.rpt
time /t >> exReport.rpt
echo. >> exReport.rpt

Once done you can setup the task scheduler to run the batfile.  You will need the script to start in the directory that the bat file and powershell file are in.

Tuesday, June 28, 2022

How to get the SQL Express Offline Installer

When working in a test environment you don't exactly want something to have internet access; so you need to be able to download files in an offline setting.  I had this need when I was working on a SQL numbering issue where SQL server added 1000 to the item count.  Not particularly helpful and annoying to fix.  The SQL version I was working with was 12 (or 2014) for those at home keeping track by year.  At any rate I needed to fix this 1000 item count but part of the issue was that the count is a primary key.

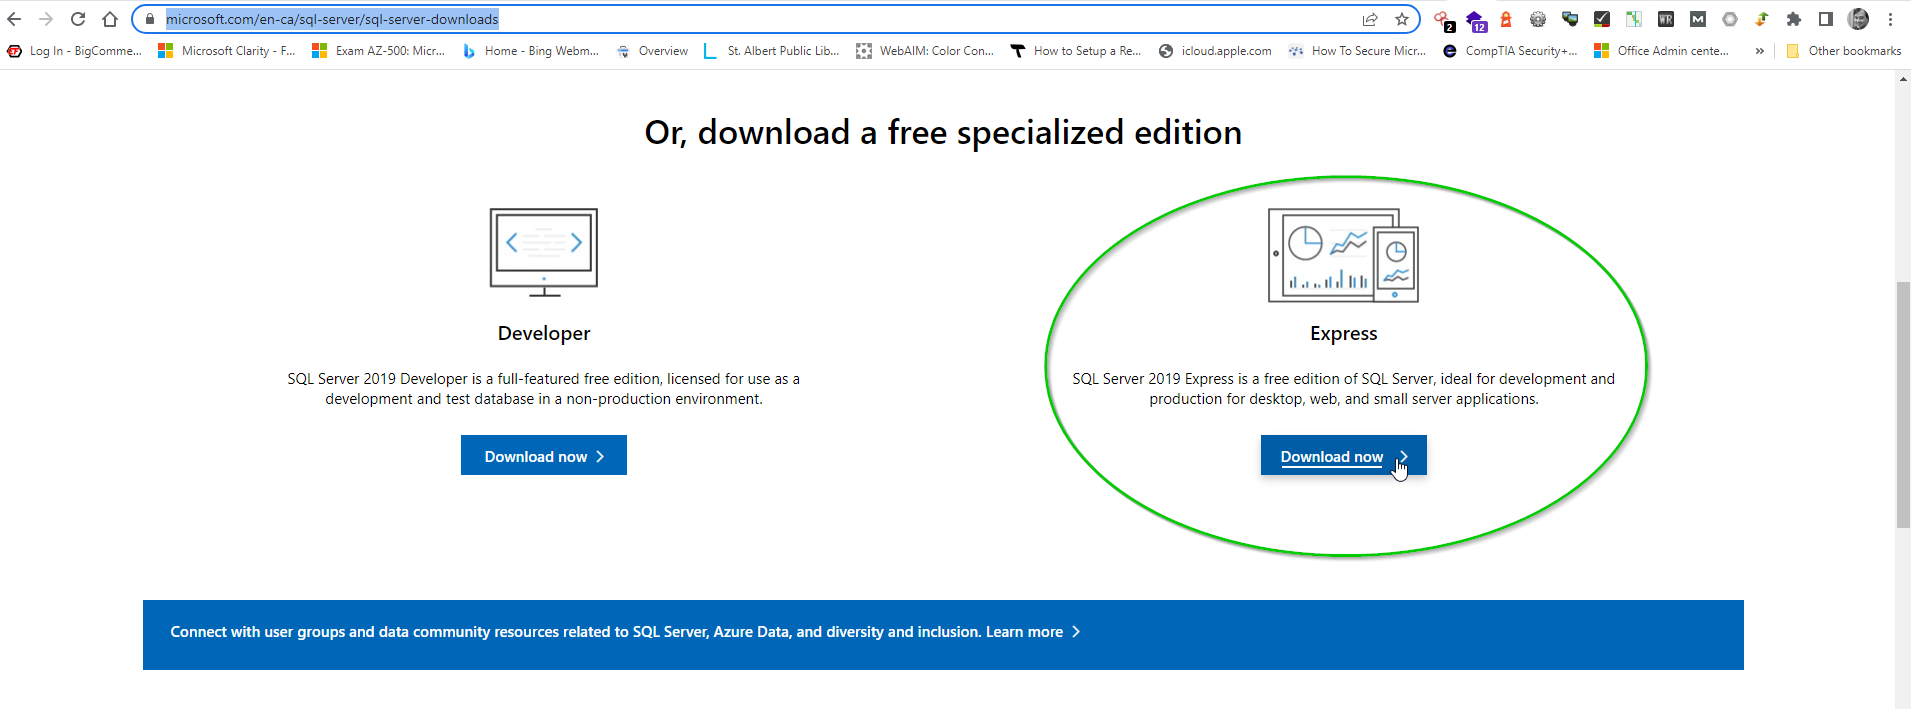
To get the offline install of SQL Server in this case we are going to use Express 2019, we need to go to https://www.microsoft.com/en-ca/sql-server/sql-server-downloads

https://www.microsoft.com/en-ca/sql-server/sql-server-downloads

When you download the Express download you will get a Application download called SQL2019-SSEI-Expr.  


Run the application.  When the application runs you get three options.  Basic, Custom and Download media which we are going to do.


When you select download media you get a few more options.  For the purposes of what I want I am selecting Express Advanced.


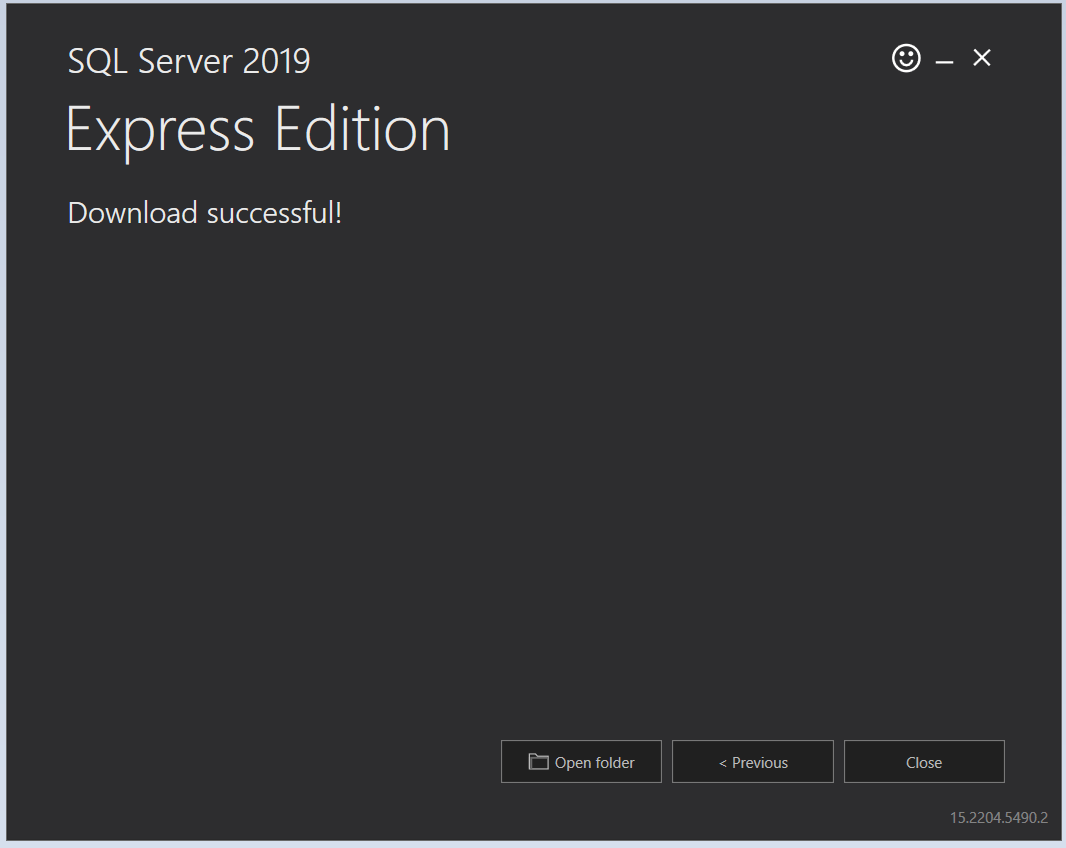
After pressing download; it will download to the directory where you have specified it to download.  In my case C:\Users\Trevor Tye\Downloads


Here I have it in my download directory.


Wednesday, August 25, 2021

SQL for recovering a pull list on Horizon ILS

The Horizon ILS has a list of holds where the report is run but if the list is not kept it is lost and you have to run a sql script to recover the list.  You will require sql studio, and a login to the database.  Once logged in.

Select your ILS DATABASE using SQL Studio or change "$ILSDatabase" in the script below to be the name of your ILS Database and it will automatically select the database for you.


 USE [$ILSDATABASE]

 GO

update request set fill_date = NULL, fill_location = NULL,
fill_item# = NULL where
fill_date = datediff(dd,'01 jan 1970',getdate())

and fill_location = '$location' and request_status = 0


Below is a sample of what the script looks like in SQL Studio.


In the script change $location with your location code that is setup in Horizon to recover the branch pull list.


Thursday, January 21, 2021

Fix For Kaspersky Security Center 11 Error Opening localhost:13291


Kaspersky Security Center Error Failed to establish connection with the
remote device (location: http://localhost:13291) connection has failed

Kaspersky Security Center 11 Error

SQL express is great if you have to run or install programs such as Kaspersky Security Center, however if you don't turn on your Database maintenance scripts you can have a problem with your database getting to large and it will run out of space.  This will cause security center to stop working which is a problem.  As you can see the SQL database only has .64 MB of space available, which is why Kaspersky Security Center crashes and won't launch


Below is how I came to fix my issue with Kaspersky Security Center when my SQL express database got to full.  If your looking for the really quick fix, using SQL management Studio run 

TRUNCATE TABLE dbo.wus_upd_metadata

on your Kaspersky Security Center Database mine is called KSC then shrink your database in sql management studio.  This will get your Kaspersky management studio back up and working, however my process to getting to the fix is below so enjoy!


I started the troubleshooting process by making a copy of the av server, in this case since it is a VM, I did an export and set it up on a different host and setup the virtual switch to be an Internal switch so I can transfer files using the VM host.

With the database being SQL Express and it being completely full I had to upgrade the edition of SQL server to a trial or developer database.  You will also need SQL Management Studio.  Since this is a copy of the production system, I upgraded the database to sql 2016 dev edition from 2014 express edition to run a shrink database script.  Since I am using SQL Server Express 2014 we will be upgrading to SQL Server 2016 developer edition to get Kaspersky Security Center to load so we can shrink the database.  You will need a myvisualstudio account to download the iso, in my case for SQL Server 2016

Run the installer and select Installation -> Upgrade from a previous version of SQL Server


Select The edition, I am changing from express to developer edition


Accept the terms of use


If your offline, you will get an error about not being able to contact Windows Update Service.  You can continue


Then you will get a list of checks for upgrade rules and warnings/errors if there are any


Select your sql server instance you want to upgrade


Select the features you want to upgrade


Select your instance configuration


Then upgrade your sql server


Now that the system is upgraded we need to reboot to enable the changes


After our reboot Kaspersky Security Center will now run because the dev version give you more space then express so I used this to do some checking on the database and to see if Kaspersky could shrink the database enough to go back to express.


Now we can run the script to shrink the database.  Under Administration Server go to tasks and database maintenance.  You can view this article on Kaspersky's support website


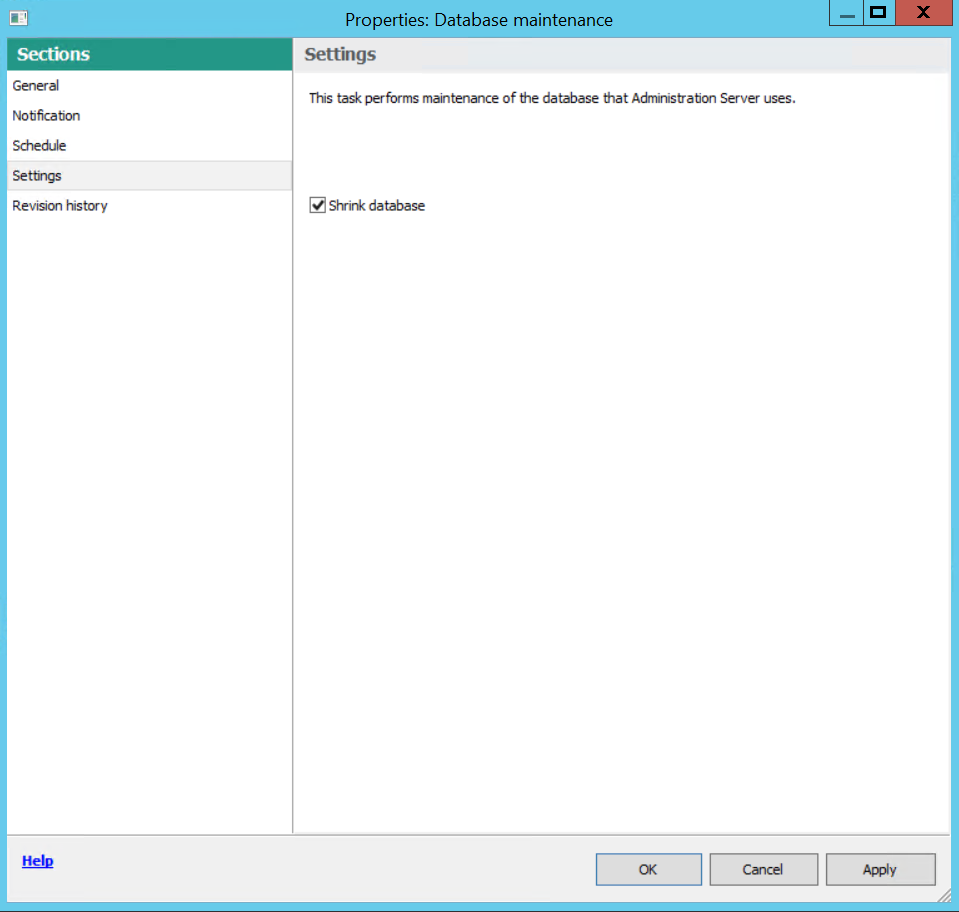
To enable shrinkage on the database right click on Database Maintenance -> go to properties -> Settings and make sure shrink database is checked.


then hit apply and ok.

Now we will run a maintenance script which was provided by Kaspersky, which can be downloaded from my server here.  However if you do want to get a hold of this I recommend opening a ticket with Kaspersky at support.kaspersky.com

In an administrator cmd prompt

go to the extracted folder path in commnad line, I put the script in C:\Users\Administrator\Desktop
run start.cmd


After running the script our database is now down to 9925.44 Mb with 2.66 MB of available space not much but it should be able to run on our system now.  However I do think that this problem will come up again so I needed to find a way to prune some of the data in the database.


The next set of processes you will need Microsoft SQL Server Management Tools.

What I did was run a sql query to find our largest tables.  Here is a great script from https://dataedo.com/kb/query/sql-server/list-10-largest-tables which I used to find the largest table.

select top 10 schema_name(tab.schema_id) + '.' + tab.name as [table], cast(sum(spc.used_pages * 8)/1024.00 as numeric(36, 2)) as used_mb, cast(sum(spc.total_pages * 8)/1024.00 as numeric(36, 2)) as allocated_mb from sys.tables tab join sys.indexes ind on tab.object_id = ind.object_id join sys.partitions part on ind.object_id = part.object_id and ind.index_id = part.index_id join sys.allocation_units spc on part.partition_id = spc.container_id group by schema_name(tab.schema_id) + '.' + tab.name order by sum(spc.used_pages) desc;


We see that the table dbo.wus_upd_metadata is our largest table with 4 gig of data being stored there.  Now I don't work for Kaspersky but I would guess that wus has probably something to do with Windows Update Services and I would bet it isn't critical to running Kaspersky Security Center

Table Nameused_mballocated_mb
dbo.wus_upd_metadata4270.234271.41
dbo.wus_upd_prerequisite1907.661907.79
dbo.ev_event1399.921402.85
dbo.wus_upd_driver1178.421178.52
dbo.wus_upd_revision489.21489.78
dbo.wus_upd_file123.76124.68
dbo.wus_upd_product118.73119.44
dbo.wus_upd_digest73.4173.72
dbo.wusx_upd_revision41.9143.09
dbo.wus_upd_superseded41.2842.24

Then I ran a new query TRUNCATE TABLE dbo.wus_upd_metadata, then I shrank the database using sql management studio.


After that we can see our database is now about 6Gb in size and to reclaim the space by right clicking on the database (KSC) and selecting Tasks -> Shrink -> Database


Once the database was finished shrinking you can see the properties on the database.


Now I don't want to run into this problem again, so I am going to go into Files and change the Autogrowth/Max Size to 1% and 8192MB for storage.


Now this process will work for fixing you Kaspersky Security Center if you happen to run out of database space, however it has a great side effect of upgrading your version of SQL server.  In this case going from 2014 to 2016.

Truncating the database table dbo.wus_upd_metadata and shrinking the database did not seem to have any major effect on our AV software, as now we can now go in and manage Kaspersky Security Center.


Thursday, January 07, 2021

Microsoft SQL Management Studio Connection Parameters

Connecting to an SQL server remotely is pretty easy but occasionally you might need some additional help, such as if your sql database uses a non standard port.  You have a couple of options for logging into your sql server but I'm going to cover 2 ways of connecting using the Database Engine login method.


As shown if you change the server type to Database Engine then you can put either the machine name or IP address (I have ipaddress because it's easy) with a comma then the port; if your database uses a NON-STANDARD Port (something other then 1443) make sure there are no spaces before or after the comma as shown above.  Set the Authentication method to SQL Server Authentication, put in your database username and password, then connect.

The second method is using the "Additional Connection Parameters".  You must have the database hostname or ip in the server name, then select options.


You will see a number of tabs that will be displayed and you want to select "Additional Connection Parameters" but be warned this is sent in clear text.


You can then put in your connection parameters in the box displayed above.  You can't just put in the connection string you do have to put in the server name or ip in the server name field on the login tab; once that is done the Connection string overrides the GUI settings.

below is a sample connection string:

SERVER=$IP,$PORT;USER=$DBUSER;PASSWORD=$DBPASSWORD

A successful connection will then be displayed in the Object Explorer as shown below.


Friday, April 24, 2020

Upgrading From SQL Compact DB to SQL Express (LocalDB)

As of version 7.2.107.4 (Jan 2020) of lansweeper it was the last to support sql compact (express) as it was removed in version 7.2.108.6.  Doing a simple double click upgrade is not possible, and the process for doing the migration is pretty straight forward.  

I have a video here of the whole migration.

If your running a version lower then 7.2.108.6 you need to upgrade to 7.2.108.6.  You can see your version of lansweeper after you login by going to Configuration -> Your Lansweeper License


Before you start make a backup of your Lansweeper data.  To do that in my documents folders I created two folders labelled 721086 and 8013014.  In 721086 with the previous versions of lansweeper (in my case 721054) just in case you have to recover, and repeat the process for your upgrade to version 8013014.  In there after stopping the Lansweeper Server and IIS Express Services


Go to your Lansweeper program directory (typically C:\Programs (x86)\Lansweeper) and backup 2 Folders SQLData and Key.  Key has your encryption key (if enabled) and SQLData has your SQL COMPACT and SQL Express databases (SQL Express only after you have upgraded to version 7.2.108.6)


You can read about the entire process from this Lansweeper KB
https://www.lansweeper.com/knowledgebase/backing-up-your-installation/

Lansweeper has done a great job automating this, after you upgrade to version 7.2.108.6 your database will be converted, it takes about 5 minutes.  Once the installer has finished you will see a new service called Lansweeper LocalDB Service.


To upgrade to version 8 download the lastest version of Lansweeper https://www.lansweeper.com/update-lansweeper/ and repeat the steps from the beginning of the blog but save the SQLDATA and Key to the 8013014 directory.  Once done you will be on the latest version of lansweeper (at the time of this post).  The version of SQL Express Lansweeper is using is version 2014.


If you want to upgrade the database you can follow this KB from Lansweeper, https://www.lansweeper.com/knowledgebase/moving-your-database-from-sql-compact-to-sql-server/

***UPDATE***

After this update I had an issue with email tickets being 10 tickets lower then the last Lansweeper ticket. To fix the issue I reset the ticket id counter as described in https://www.lansweeper.com/knowledgebase/resetting-the-ticket-id-counter/
The section we want to follow is the "Resetting the ticket ID counter if you are using SQL LocalDB or SQL Server" and before you go ahead and do that be sure to take a backup of your Lansweeper LocalDB https://www.lansweeper.com/knowledgebase/backing-up-your-installation/#heading2


I will be doing a post about doing this later.


Reference

https://www.lansweeper.com/knowledgebase/sql-compact-deprecated/
https://www.lansweeper.com/knowledgebase/sql-compact-deprecated/#heading2
https://www.lansweeper.com/news/installing-lansweeper-end-of-support-for-sql-compact/
https://www.lansweeper.com/knowledgebase/moving-your-database-from-sql-compact-to-sql-server/
https://www.lansweeper.com/knowledgebase/resetting-the-ticket-id-counter/

Removing Show Recent History and Recently Open Documents from Windows Explorer

How to remove the Recent History and Recently Open Documents from Windows Explorer Using the Registry Editor Press the Windows Key + R, type...