Showing posts with label google. Show all posts

Monday, August 21, 2023

How to setup postfix on Ubuntu Server as a SMTP Email Relay

Setting up an SMTP Email Relay or Email Forwarder are used in organizations where applications that need to send email can where it is not dependent on an individual being logged in.  The typical example would be for email marking, but it can also be for the Photocopier in the office or any other number of commonly used devices that people use where it sends email.  The relay service allows you to use a generalized email setup by the organization.  Most commonly these are setup as "no-reply" or something to that effect.  To facilitate the setup of the mail forwarder/relay we will be using a Google Non-Profits email account.  The first thing you will need to do is setup the account, then login to the account and setup the account for use with "less secure app access".

Create the account, and set the password.  In this case I am using something called myemailservice


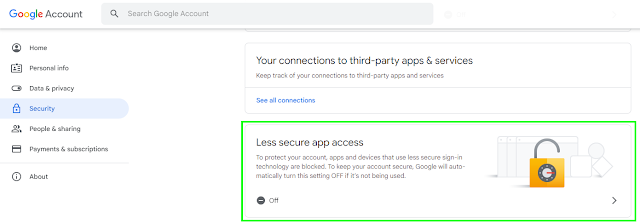
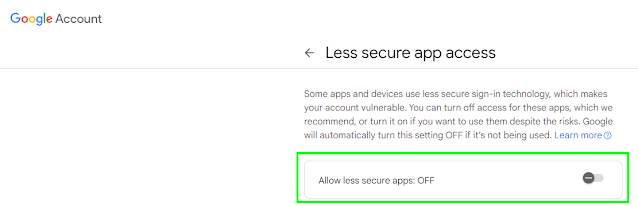
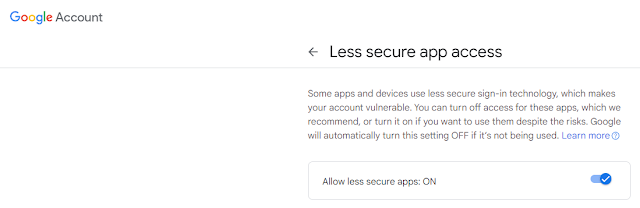
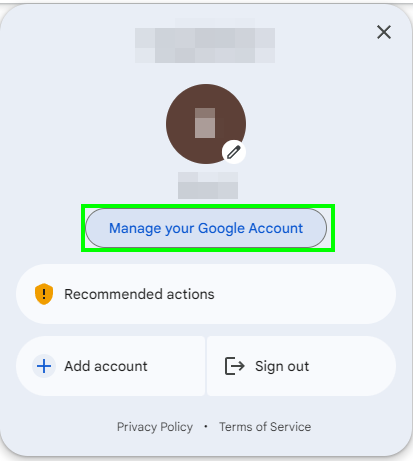
Then login to the account and setup "less secure app access" you can do this by using this link https://myaccount.google.com/lesssecureapps or by managing your Google Account as shown below.


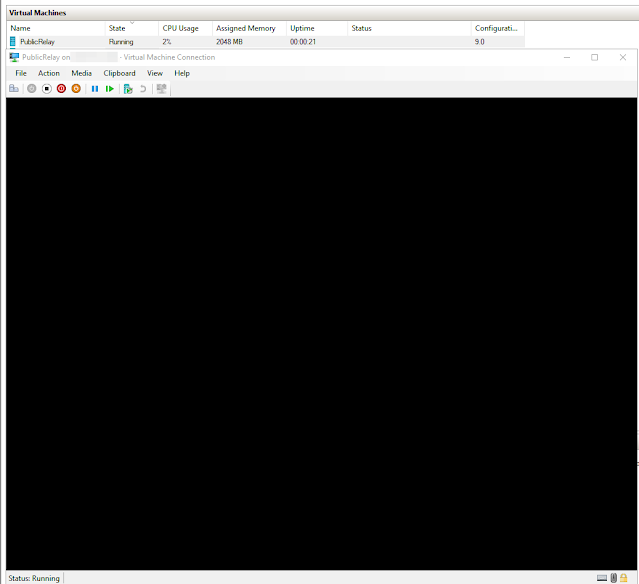
Once that is done we can now do the setup for our relay server.  I am setting it up on Hyper-V using Ubuntu 22.04LTS.  I have given it 2 cores, a min 2GB Ram with dynamic memory management up to 8GB and a 40GB drive.  Obviously, networking, etc, etc, etc.  Also because it is linux don't forget to change the security boot setting to Microsoft Cert Authority.


When installing Ubuntu Server I am going to do my typical setup; minimized, no GUI, Live patching, vim, Powershell and ssh access for the default install.

After installation login and update the system, and set your timezone.  By default ETC is typically used.  If you know your timezone like I do you can manually specify it.  

sudo timedatectl set-timezone America/Edmonton


To verify the setting use the command timedatectl or ls -l /etc/localtime
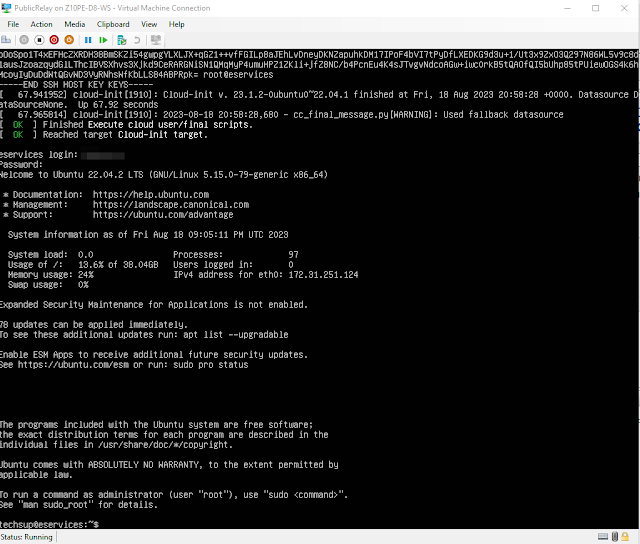


Now we will install our postfix smtp relay

Install Postfix

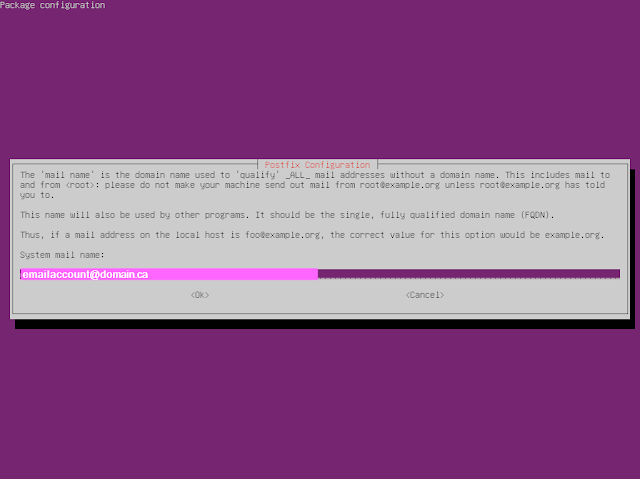
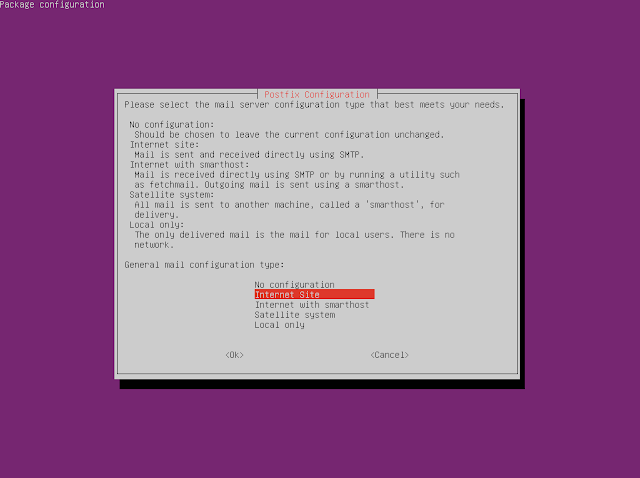
sudo apt-get install postfix and set the mail configuration to "Internet Site"


Postfix doesn't natively support SASL authentication so we must install a module for SASL authentication support.  You can read more about it here

https://www.postfix.org/SASL_README.html

 sudo apt-get install libsasl2-modules postfix mailutils


Once installed we need to configure post fix.

sudo vi /etc/postfix/main.cf and set myhostname to the FQDN


Then we need to add the following

relayhost = [smtp.gmail.com]:587

smtp_sasl_auth_enable = yes

smtp_sasl_password_maps = hash:/etc/postfix/sasl_passwd

smtp_sasl_security_options = noanonymous

smtp_use_tls = yes


Also don't forget to add any networks you want to be able to send email from via smtp.  You will have to add the host or network range to the mynetworks variable as shown below.


Now we need to make our password map.  This will allow us to connect to the google account we are going to use to send the emails via smtp.  The file will be located in /etc/postfix/sasl_passwd

sudo vi /etc/postfix/sasl_passwd

in the file put the following

[smtp.gmail.com]:587 $youremailaccount:$accountpassword

and save and exit.

Change the permissions of the file so it is only readable by root

sudo chmod 600 /etc/postfix/sasl_passwd

restart postfix to apply our changes.

sudo systemctl restart postfix

To test our setting use the following 

echo "This is a test email body." | mail -s "Subject" -a "From: $fromemail@yourdomain.ca" youremail@domain.ca

I also use this depreciated powershell command for testing as well

Send-MailMessage -From '$fromemail@domain.ca' -To '$toemail@domain.ca' -Subject '$SomeSubject' -smtpserver 'DNS or IP to relayserver' -port '25'

Here are some important commands you will want to keep when using the relay server

postqueue - p

run all messages 

sendmail -q

get mail queue

postqueue -f 

flush the mail queue


Sources

https://support.google.com/accounts/answer/6010255?hl=en#zippy=%2Cif-less-secure-app-access-is-on-for-your-account

https://www.faqforge.com/linux/how-to-relay-email-from-postfix-mail-server-to-gmail-on-ubuntu/

https://www.cyberciti.biz/faq/how-to-configure-postfix-relayhost-smarthost-to-send-email-using-an-external-smptd/

https://www.tutorialspoint.com/configure-postfix-to-use-gmail-smtp-on-ubuntu

https://blog.iron.io/how-to-flush-a-postfix-mail-queue/

Thursday, April 28, 2022

Google EMM Update Causes Organization Email Issues on Android

Before looking into the google admin issue I thought it was a problem with my device and wiped it clean, after that didn't work I looked into google admin for google workspaces.  

Here is some background on how the EMM provider was being used before today.  The EMM provider was setup to use with organization purchased devices, and the organization did not want to associate personal devices with the EMM provider (meraki in this case) and the changes google has made to their policy won't allow you to use Google for Staff (personal) devices and the EMM provider for organizational devices.  It seems that google now throws everything to the EMM provider if you have your domain associated with one.

I had to remove the EMM provider from the organization otherwise it was treating the device as an organizational purchased device.  When Google has made to Google Workspaces EMM Provider this caused Android devices in the organization to lose access to their Work Email. 

The organization requires data access control on devices so the only way I could get this to work was to embrace google work profiles; which isn't the best user experience but is the only way I could get this working. Google sent a notice in 2017, about the EMM Provider changes but a reminder about the coming changes would have been nice.

In an email to google about the issue, they replied with the following.

Thank you for contacting Google Workspace Support. This is ****** and I will be assisting you about how to fix the sync error you are encountering due to the old Device policy app that you are still using for your Android device. It is a pleasure assisting you. 


Before we begin I would like to set the proper expectations about our new Android Device Policy app that replaced the Google Device Policy app. There is current known issue about the new Android Device Policy app that is still being checked by our Product Engineers, about a possible limitation of some Android Devices that cannot install the new Android Device policy app. And even if the app was installed, the Android device just could not be managed or simply said, the Android Device Policy app is not compatible with the Android device.

However, in order to fix the sync issue these are the steps to follow.

Resolution: If the device is for work and personal use:
Re-register your device by removing your work profile and then adding back your Google Workspace account and work profile. 


  • Open your device settings. 
  • Tap Accounts and then Remove work profile.
  • Tap Delete to confirm.
  • Go to I’m using my own personal device and follow the steps to add your Google Workspace account and work profile.
  • Assisted how to uninstall Device Policy app and install Android Device Policy app.
  • remove Workspace Profile.
Next steps:

How do I switch to the Android Device Policy from the Google Device Policy app?
If your device is for work and personal use and it "has a work profile":
  • Remove the work profile.
  • Open the Settings app and tap Accounts.
  • Add the work account again and set up Android Device Policy.
  • (A work profile is required for Android Device Policy.)

My device is for work and personal use and "doesn’t have a work profile":
  • Open the Google Apps Device Policy app.
  • Tap Unregister.
  • The work account is removed from the device.
Open the Settings app and tap Accounts.
  • Add the work account again and set up Android Device Policy.
  • During enrollment, you must set up a work profile because it's required for Android Device Policy.

Please check this help article for reference for the above steps: 

About Android Device Policy: https://support.google.com/a/users/answer/9453213


If you have an issue on a Tablet that simply is not compatible with the Device Policy app. The only option we have is to change the Mobile management for Android Device. You currently have a Custom Mobile Device management that is set to Advanced. You can change this to Basic, the good thing about this is the Android Device Policy app is no longer needed. And this will simplify your log ins to any Device similar to your iOS devices.

To change the Mobile Device management to Basic:
From the Admin console > click Devices > Mobile &endpoints > Settings > Universal settings.
On the next page > click General > Mobile management > change Android Mobile management to Basic. Please note: Only do this, if you believe you have no real need of the Advanced Mobile management option for your Android devices.

Here are some helpful link(s) that you can use:

Set up basic mobile device management: 
https://support.google.com/a/answer/7400753

We value your time and effort in contacting us. That is why, I'm keeping this case open. If our resolution does not work, kindly reply to the email and provide me your phone number and best time of call, so that I can work further with you on this. It's either we can do a screen sharing session or if you send me a video or screen shot of the error that will help me identify the issue. This case will remain active and can be reopened within 30 days.


If there are other concerns aside from what we've discussed, our main priority is to provide the best support experience, with this in mind, if you need assistance during this time feel free to reply to my email or call us or initiate a chat session for immediate help and this is the link for reference https://support.google.com/cloudidentity/answer/7668654 . We have 24/7 support and any of my colleagues will be glad to help.

Don't forget to generate a PIN should you give us a call. You can refer to this article for instructions on how to do so https://support.google.com/a/answer/60233.

Thank you for choosing Google Workspace and have a wonderful day.

Sincerely,
 

*****
Google Workspace Support


Here are some additional information linked below

https://www.blog.google/products/android-enterprise/da-migration/
https://developers.google.com/android/work/device-admin-deprecation


To resolve the issues I removed the EMM provider so google workspaces would handle the MDM for android; as there can't really have a separation of the two anymore it seems.

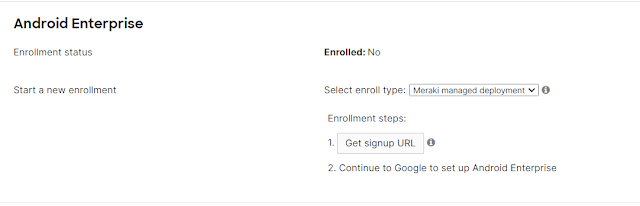
So in the MDM (Meraki) I removed android enterprise from the google domain, so android devices are just managed by google workspaces.


Once that was done after a few minutes I was able to start to get my work profile working correctly from google by adding a work profile.  Here are the universal settings for how android devices are setup.

Universal Settings

You must ensure that work profile setup is enable on in your Android Settings


For users to connect their android devices they require a work profile. This will be slightly different for every android device but the steps would be relatively the same.

Remove your current work account from your device, Please note that you will only be able to have one work account associated with a device at a time (so if you need other accounts you will have to find a work around)


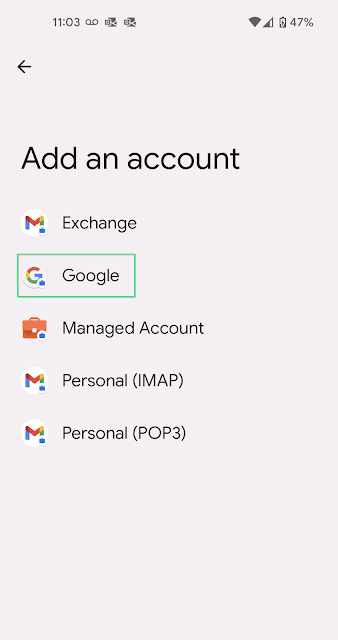
1 - Add the account by pressing the arrow next to your name and email.


2 - Select "Add another account".


3 - Select Google for the Account.


4 - Enter in your Email and Password


5 - Accept the Terms Of Use


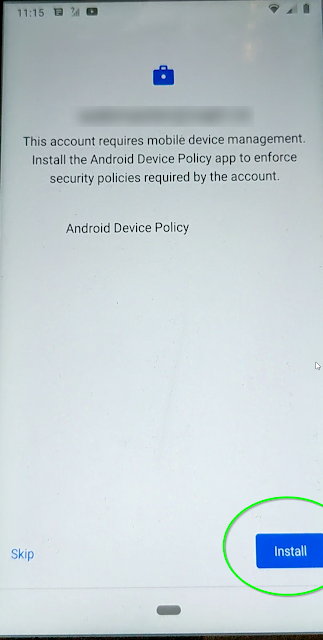
6 - Install Google Device Administrator


7 - Press Install


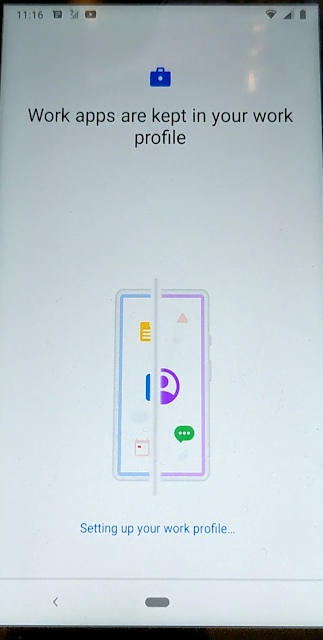
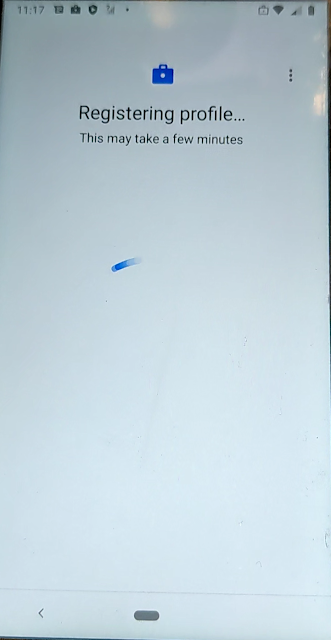
8 - Create your google work profile. It will take about 5 to 10 minutes to create the work profile.  So Please be Patient.


Setting up google work profile


Screen after accept and continue


Almost Finished


When it is finished it should show you the added account.


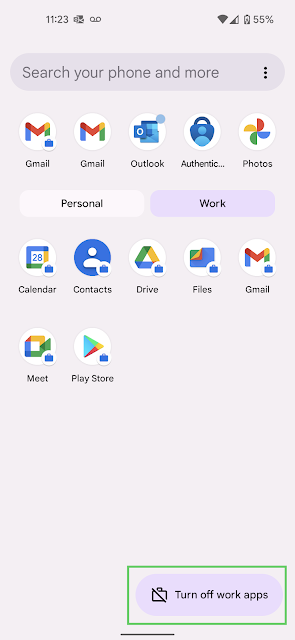
Now you will have two different apps. Work Apps and Personal Apps.


Personal


Work


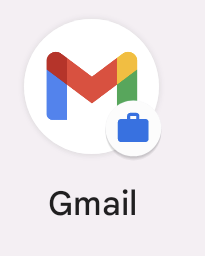
Work apps are shown by the little briefcase on the app.


Work apps can be paused (turned off) which will stop notifications from reaching you which can be enabled or disabled from the apps drawer.


In your Gmail app you can switch from personal and work email easily but you have to go from the account icon in the top right to switch.


I understand why google set things up like this; putting the separation between work and personal settings, making it easier to wipe devices, and remove access, etc.  It isn't as "user friendly" as I would have liked it to be and it will be a transition for some users.

Tuesday, September 28, 2021

Changing email setting for users in google group workspaces

Logged into google workspaces. You can control how you get emails from specific google groups however sometimes users may or may not get emails from groups. Here is how to fix it.

1. Go to groups.google.com. It should automatically take you to "My Groups" if not select "My Groups"


2. Go to People -> Members

You can change subscription and posting settings here.


Under subscriptions change subscription to Each Email if you want to get the emails for all emails.


This will change or reset the email settings for the user on the google group.

Thursday, January 07, 2021

Giving User and Group Management Permission in Google Workspaces


Google workspaces has made it much easier to delegate tasks or give users such as HR administrators and personnel permissions for creating users and email groups.  

This can be handy in a small or large organization and has be done with Microsoft using snap-ins for Active Directory for a long time.


Some basic permission for a user to be able to do this they need essential four rolls.

  • User Management Admin
  • Help Desk Admin
  • Groups Reader
  • Groups Editor

Once given permission to the users and the groups, a user can then add and remove users, add and remove users to groups, create and rename groups without being able to access any other area in google workspaces such as organizational units, machine and domain management etc.

Wednesday, July 03, 2019

Adding mx records to a webhost for sendmail use for Google Apps & Office 365

If your a google apps user or an organization that uses google apps and you would like to use a sendmail form on your 3rd party hosting provider such (greengeeks, bluehost, justhost, etc) you will need to add the following information to your hosting provider to allow your gsuite email to accept mail from the webhost.

If you don't do this your host will try to deliver the mail locally as the default is to associate all domain settings with the host, typically with a @ mx record for the localhost.  Below is a sample failed email from a webhost without the google mx records setup.

EMAIL FAILURE SAMPLE

Return-Path: <>
Delivered-To: webhostusername@mtl-node3.websitehostserver.net
Received: from mtl-node3.websitehostserver.net
by mtl-node3.websitehostserver.net with LMTP id 8GQACpV7fVynYi8AqIeWRg
for ; Mon, 04 Mar 2019 14:25:09 -0500
Return-path: <>
Envelope-to: webhostusername@mtl-node3.websitehostserver.net
Delivery-date: Mon, 04 Mar 2019 14:25:09 -0500
Received: from mailnull by mtl-node3.websitehostserver.net with local (Exim 4.91)
id 1h0tD3-00D8fw-3q
for webhostusername@mtl-node3.websitehostserver.net; Mon, 04 Mar 2019 14:25:09 -0500
X-Failed-Recipients: yourdomainemail@domain.ca
Auto-Submitted: auto-replied
From: Mail Delivery System
To: webhostusername@mtl-node3.websitehostserver.net
Content-Type: multipart/report; report-type=delivery-status; boundary=1551727509-eximdsn-1324812479
MIME-Version: 1.0
Subject: Mail delivery failed: returning message to sender
Message-Id:
Date: Mon, 04 Mar 2019 14:25:09 -0500
--1551727509-eximdsn-1324812479
Content-type: text/plain; charset=us-ascii
This message was created automatically by mail delivery software.
A message that you sent could not be delivered to one or more of its
recipients. This is a permanent error. The following address(es) failed:
  yourdomainemail@domain.ca
    No Such User Here
--1551727509-eximdsn-1324812479
Content-type: message/delivery-status
Reporting-MTA: dns; mtl-node3.websitehostserver.net
Action: failed
Final-Recipient: rfc822;yourdomainemail@domain.ca
Status: 5.0.0


To enable google mail forwarding we need to setup mx records that point to google to do this you go into you login to your cpanel


You need to modify your domain zone on the host.  Select Zone Editor


If there are any MX records setup, delete them.  Then add the following using zone editor. (change domain.ca to your domain).  You can also reference this google kb https://support.google.com/a/answer/140034?hl=en


Name TTL Class Type Record
domain.ca 14400 IN MX Priority: 1
Destination: aspmx.l.google.com
domain.ca 14400 IN MX Priority: 5
Destination: alt1.aspmx.l.google.com
domain.ca 14400 IN MX Priority: 5
Destination: alt2.aspmx.l.google.com
domain.ca 14400 IN MX Priority: 10
Destination: alt3.aspmx.l.google.com
domain.ca 14400 IN MX Priority: 10
Destination: alt4.aspmx.l.google.com

then save your changes.  You should now be able to send email to within your organization, but to make it a little bit more secure you should login to your google admin account and limit the scope of your third party hosted server.  To do that go to


Apps > G Suite > Settings for Gmail > Advanced settings

Add a SMTP Relay service

Now you would need to verify that your host supports pear php if you want to use smtp authentication as for TLS you will need to verify your host supports that as well. 


The same applies to Office 365 if your using it 


NameTTLClassTypeRecord
@3600INMXPriority: 1
Destination: MS=ms XXXXXXXX 
**Note:**This is an example. Use your specific Destination or Points to Address value here, from the table in Office 365. 
How do I find this? 

There are other settings you can include such as SPF if your host supports it.

These settings should allow you to email use php sendmail for google apps and office 365.

References:

https://support.google.com/a/answer/140034?hl=en
https://docs.microsoft.com/en-us/office365/admin/get-help-with-domains/create-dns-records-at-any-dns-hosting-provider?view=o365-worldwide
https://docs.microsoft.com/en-us/office365/admin/dns/create-dns-records-at-godaddy?view=o365-worldwide

Removing Show Recent History and Recently Open Documents from Windows Explorer

How to remove the Recent History and Recently Open Documents from Windows Explorer Using the Registry Editor Press the Windows Key + R, type...