 To create a bootable USB Disk in Mac OS X, You must have the Application of the version of Mac OS X that you want to install downloaded and extracted. Please make sure you have a mac and root access before proceeding.
So for this example we are going to use macOS Sierra. You must have the "Install macOS Sierra.app" and if your looking for step by step instructions it must be downloaded into your Applications Folder.
To download an older version of MacOS from Yosemite to Catalina, you can download the MacOS App using this url https://support.apple.com/en-us/HT211683
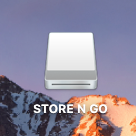
sudo /Applications/Install\ macOS\ Seirra.app/Contents/Resources/createinstallmedia --volume /Volumes/STORE \N \GO --applicationpath /Applications/Install\ macOS\ Seirra.app --nointeraction
You can modify this command line to use with any previous version of OS X if you can get a copy of the Install.app and replace the bolded text with the previous version of the OS X install.app for example "Install\ OS\ X\ El\ Capitan" and you must put \ $text so the mac can recognize spaces in the name. The \ is an "escape" and tells the OS that there is a "space" character.
***UPDATE***
You can find this on apple's knowledge base for the issue but they removed the application path for the USB installer.
sudo /Applications/Install\ macOS\ High\ Seirra.app/Contents/Resources/createinstallmedia --volume /Volumes/STORE \N \GO
https://support.apple.com/en-us/HT201372
***Pre High Seirra***
sudo /Applications/Install\ macOS\ Seirra.app/Contents/Resources/createinstallmedia --volume /Volumes/STORE \N \GO --applicationpath /Applications/Install\ macOS\ Seirra.app --nointeraction
Below is the log from my terminal screen. This could take up to 10 - 30 minutes depending on your system, and if may have to make adjustments if your file system is case sensitive or not.
At the end of this you will have a bootable USB device that you can do a system recovery, disk image, or a fresh install of your mac with.

Plugin a Flash Drive; I'm going to use a Verbatim 16GB USB Flash Drive. Open /Applications/Utilities/Terminal.app
sudo /Applications/Install\ macOS\ Seirra.app/Contents/Resources/createinstallmedia --volume /Volumes/STORE \N \GO --applicationpath /Applications/Install\ macOS\ Seirra.app --nointeraction
You can modify this command line to use with any previous version of OS X if you can get a copy of the Install.app and replace the bolded text with the previous version of the OS X install.app for example "Install\ OS\ X\ El\ Capitan" and you must put \ $text so the mac can recognize spaces in the name. The \ is an "escape" and tells the OS that there is a "space" character.
***UPDATE***
You can find this on apple's knowledge base for the issue but they removed the application path for the USB installer.
sudo /Applications/Install\ macOS\ High\ Seirra.app/Contents/Resources/createinstallmedia --volume /Volumes/STORE \N \GO
https://support.apple.com/en-us/HT201372
***Pre High Seirra***
sudo /Applications/Install\ macOS\ Seirra.app/Contents/Resources/createinstallmedia --volume /Volumes/STORE \N \GO --applicationpath /Applications/Install\ macOS\ Seirra.app --nointeraction
Below is the log from my terminal screen. This could take up to 10 - 30 minutes depending on your system, and if may have to make adjustments if your file system is case sensitive or not.
sudo /Applications/Install\ macOS\ Sierra.app/Contents/Resources/createinstallmedia --volume /Volumes/STORE\ N\ GO --applicationpath /Applications/Install\ macOS\ Sierra.app --no interaction
Erasing Disk: 0%... 10%... 20%... 30%...100%...
Copying installer files to disk...
Copy complete.
Making disk bootable...
Copying boot files...
Copy complete.
Done.
At the end of this you will have a bootable USB device that you can do a system recovery, disk image, or a fresh install of your mac with.


