Showing posts with label papercut. Show all posts

Friday, July 28, 2023

How to setup a ITC 5400 Paystation (Coin-Op) for use with papercut


I've recently just setup a new Coin-Op and printer to use with papercut. It is very fancy taking debit, credit bill and coins. This post will guide you though the settings for configuring the Coin-Op for use with Papercut and the settings for using credit/debit.

To start there is a config file from the vendor ITC.  It should be located in the “root/extensions/credit-sources” folder.  The filename is X5400CreditSource.properites. The papercut print release system communicates to the coin-op using a USB to Serial cable. I've had very good success with the FTDI chipset for these cables.


It has all the setting for communicating with the Coin-Op

##########################

## DEVICE CONFIGURATION ##

##########################


#

# Serial port identifier

#

port=COM3


###############################

## SERIAL PORT CONFIGURATION ##

###############################


#

# Baud rate to use on serial port

#

baud-rate=9600


#

# Data bits to use on serial port

#

data-bits=8


#

# Stop bit to use on serial port 

#

stop-bits=1


#

# Parity to use on serial port. Options are: 

#    [0] none 

#    [1] odd

#    [2] even

#    [3] mark

#    [4] space

#

parity=0


############################################

## ADVANCED CONFIGURATION; AVOID ALTERING ##

############################################


#

# Maximum number of write attempts to serial port (if the first should happen to fail)

#

retries-write=10


#

# Maximum number of read attempts to serial port (if the first should happen to fail)

#

retries-read=10


#

# Maximum number of tries to receive a valid response from the device

#

retries-valid=5


#

# Timeout for connecting to serial port

#

timeout-connect=750


#

# Timeout for reads/write to serial port

#

timeout-device-response=1000


#

# Timeout for receiving a valid message from device

#

timeout-messenger-receive=1500


#

# Time to wait for controller thread to finish 

#

interval-wait-end-session=750


#

# Time to wait before reading response once signaled its available

#

interval-wait-read=100


#

# Time to wait for RMI server to start

#

interval-wait-rmi=250


#

# Polling interval for response availability

#

interval-poll-messenger=25


#

# Polling interval for available credit

#

interval-poll-controller=50


#

# Interval for retrying read/writes

#

interval-retry=25


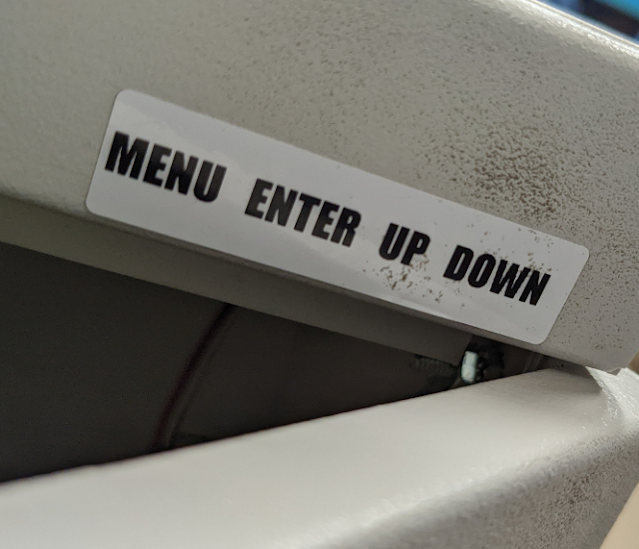
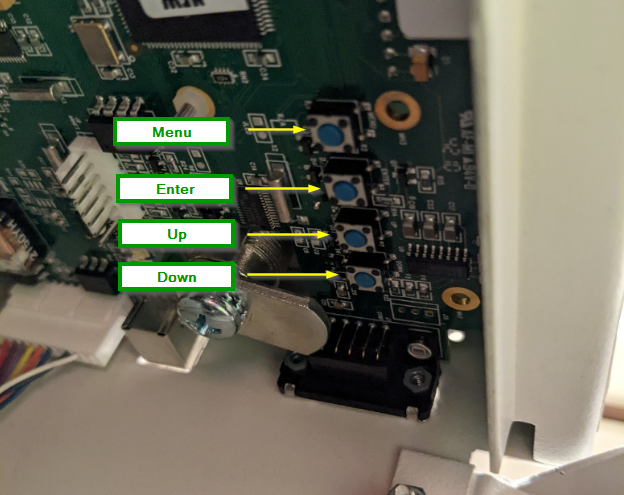
Ensuring thatOn the coin-op there are 4 buttons moving and modifying settings as shown below.
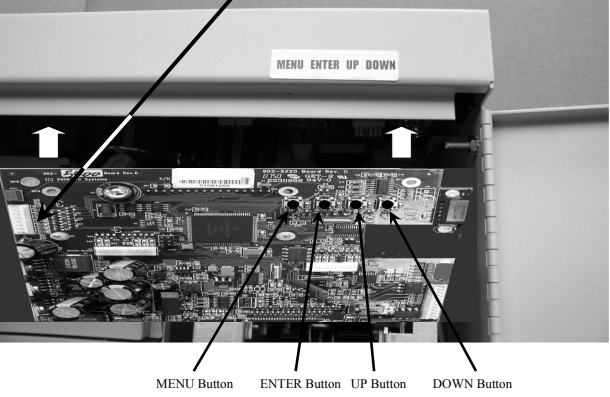

The MENU button moves you back a menu if you're in a level deeper than the first level; Enter will take you down the levels of the menu and UP/DOWN with cycle you though the menu or allow you to change options.  Below are what some typical settings could look like for the coin-op to operate properly and are what the costs are. You will note I have the cash and the credit price set as the same.  You can make these prices different for the different types of payment formats. It depends on what you want. In this case I want the price to be the same if you are paying with either cash or credit. Please note these settings can only be modified when the Coin-Op is in bypass mode and making changes to these settings require rebooting the Coin-Op.  This is done by pulling the power cable.


System Setup -> Com3 Parity -> Set to NONE

Print Type -> Set to Protocol 1 (Papercut Connection)

Prices Cash -> line 1 Cash cost -> $1.00 (black and white)

Prices Cash -> line 2 Cash cost -> $2.00 (colour)

Prices Credit -> line 1 Credit cost -> $1.00 (black and white)

Prices Credit -> line 2 Credit cost -> $2.00 (colour)

Coin Changer -> Return Escrow -> Anytime (cash return - coins)

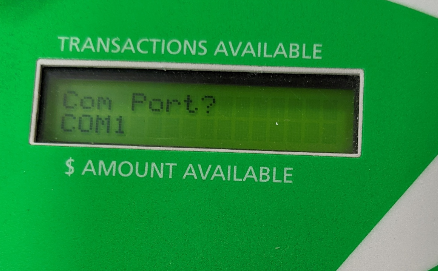
Print Setup -> Com Port? -> Com 1 (Printer Connection)


Papercut communicates with the Coin-Op though COM 3 any printer setup to charge for coping would typically use COM 1.  The papercut communication is enabled though the Print Type-> Protocol 1 which uses the COM 3 port for this post.


If you are setting up a new coin-op that you are charging people for copying/printing this should get you up and going.


Tuesday, August 02, 2022

Resetting Papercut's com port with ITC 5400 Coinop


Over the last few months I've been having an issue with a papercut print release system.  What had been happening is over a few days of running the papercut software would no longer read the coin op.  (This is happening even with rebooting the system).  Now a major caveat here is the print release system is running on a machine with VPRO which automatically removes the use of one com port typically Com 3.  Before you start your com port for Vpro should be something else so I've set the com port for VPro to COM 14.  

Inside the door of the coinop is a circuit board with 4 buttons: menu, enter, up, down.


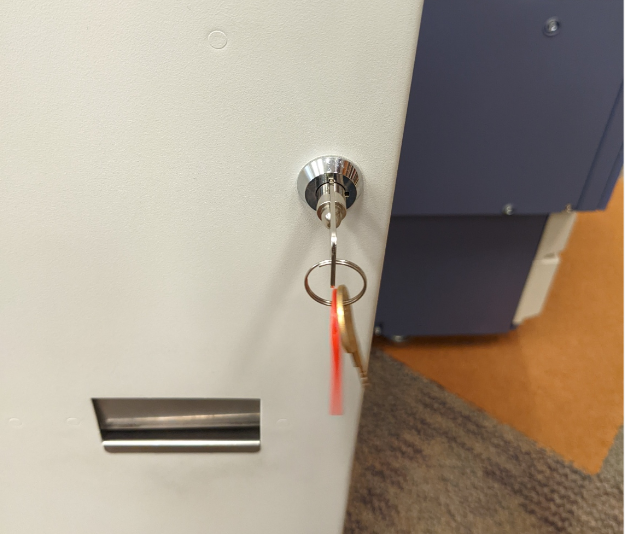
To begin to modify the settings on the coinop you need to unlock the back of the coinop and run the machine in bypass mode.

Step 1 - Unlock the device, and leave the back open


Step 2 - Put the machine in bypass mode


Step 3 - Pressing the menu button go to Print Setup Mode


Step 4 - Go to Print Type


Step 5 - using the up or down button go to print protocol 1


Step 6 - Setup the com port


Step 7 - You get an option of COM1 or USB select Com 1


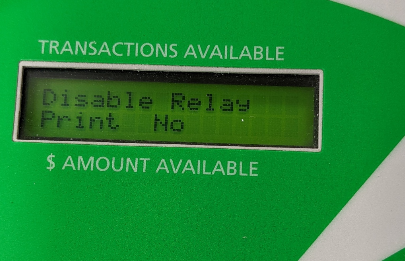
Step 8 - you will then be asked if you want to disable relay print.  Select No.


Step 9 - Reboot the coinop.  Once rebooted so long as the com cable on the computer is set to COM1 then you should be getting coin info from the Coinop.


Tuesday, January 25, 2022

Creating a mobile friendly version of Papercut User Web Print

 Papercut has a great and easy to use web interface to printing, however it isn't mobile responsive.  This post will make the papercut web interface mostly mobile responsive and I say mostly because there is some tweaking that can be done to make the web version better then what I have below.  This will give you a good start.  This is for a specific use case, in this case the organization is only concerned with printing, and does not archive or want the user to have access to the recent print jobs or summary.

Papercut's User Web Print interface is typically like this.


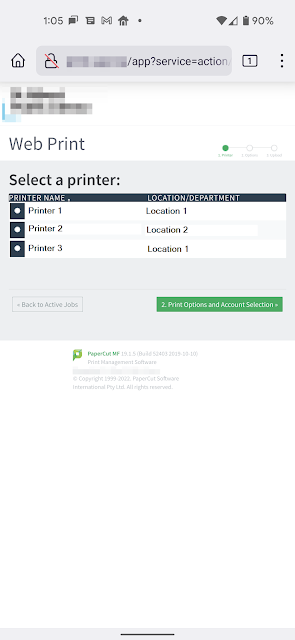
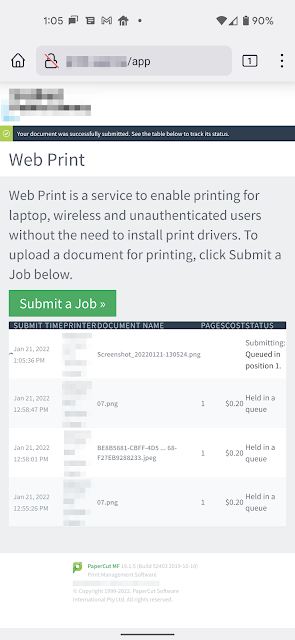
What the CSS changes I have put down below will change the look from that to this.

You will note the larger text , and buttons.  I have done away with the sidebar; making this much more visible on mobile.

Here is the CSS to make papercut user web print mostly web responsive.

The key is adding "@media (pointer:none), (pointer:coarse) {" to the user-refresh.css located typically in the $Drive\Program Files\PaperCut MF\server\webapp-52403\css\user-refresh.css

The following css will give you a good start on making the papercut web client much more accessible to the user.


@media (pointer:none), (pointer:coarse) {

#main{

margin-left:0px !important;

}

#header{

height:150px !important;

}

#header-logo{

height: 150px !important;

}

#header-logo img{

height: 150px !important;

}

#container:before{

display:none !important;

width:0px !important;

}

h1{

font-size: 48pt !important;

}

h2{

font-size:42pt !important;

}

.filter{

display: none !important;

}

.web-print-intro #web-print-intro-msg{

font-size: 36pt !important;

}

a.btn{

font-size:36pt !important;

margin-left:auto;

margin-right:auto;

padding:36px;

}

table.results th {

    height: auto;

    text-align: left;

    height: 0;

    padding: 8px 1rem;

    text-transform: uppercase;

    letter-spacing: .05em;

    color: rgba(255, 255, 255, 0.7);

    background: #293e50;

    font-size: 14pt;

    line-height: 1;

    font-weight: normal;

    white-space: nowrap !important;

    margin:0px;

    padding: 0px;

}

table.results th, table.results td{

font-size: 21pt !important;

margin:0px;

padding:0px;

}

input[type=checkbox], input[type=radio]{

background-color: #293e50 !important;

margin:4px;

padding:16px;

}

label{

overflow: hidden;

white-space: nowrap;

text-indent: -15px;

width:400px;


}

.wizard-heading{

font-size: 24pt;

}

.no-web-print-jobs{

font-size:18pt;

}

.wizard{

font-size:14pt;

}

.buttons{

font-size:24pt;

padding:12px;

margin-left:auto;

}

.wizard div.buttons input{

font-size:18pt !important;

padding:16px !important;

}

.form{

font-size:18pt !important;

padding:16px !important;

}

.form input{

font-size:18pt !important;

padding:16px !important;

}

td.fields{

font-size:18pt !important;

padding:16px !important;

}

.dropzone-div{

font-size:18pt !important;

padding:16px !important;

}

#dropzone-table{

font-size:18pt !important;

padding:16px !important;

}

#file-format-details{

font-size:12pt !important;

}

#dropzone-button{

font-size:18pt !important;

padding:16px !important;

}

#upload-from.dz-clickable{

font-size:16pt !important;

padding:16px !important;

}

th.desc{

padding:0px !important;

}

.dz-filename{

font-size:16pt !important;


}

.dz-size{

font-size:16pt !important;

}

.dropzone .dz-preview .dz-details img, .dropzone-previews .dz-preview .dz-details img{

width:200px !important;

height: 200px !important;

}

td{

font-size:16pt !important;

}

.smallText, .help-block {

    font-size: 18pt !important;

    color: #8e959e !important;

    margin: 0 !important;

}

#footer{

position: absolute !important;

}

}


Here are some screenshots with the end result.


Saturday, January 22, 2022

Setting up user print restrictions in papercut

To enable restrictions go to printers -> and select the printer you want to apply restrictions to.  In this case the Toshiba 2515AC


Select the printer then select "Filters & Restrictions"


In the Filters & Restrictions


Enable Restriction Scope, and in this case I want to limit printing to a max of $25 or 50 pages.  There are other options such as spool size (size of the file being printed), duplexing etc.


Once you have setup the rules on the printer, you can then select the user you want to restrict.  In this case Print User


Go to account details and enable the Restricted Checkbox


Once printed if your over one of the limits you will get a warning that the job was denied.


Tuesday, January 04, 2022

How to print from papercut mobile on a desktop / laptop system

This post is a guide how one would setup public style printing for an office, library, school or other print for pay, print for public user service.  The following example would be a how to print; if a generic account were setup for public printing for your network with papercut; specifically when being used with a chromebook or other desktop based browser client.


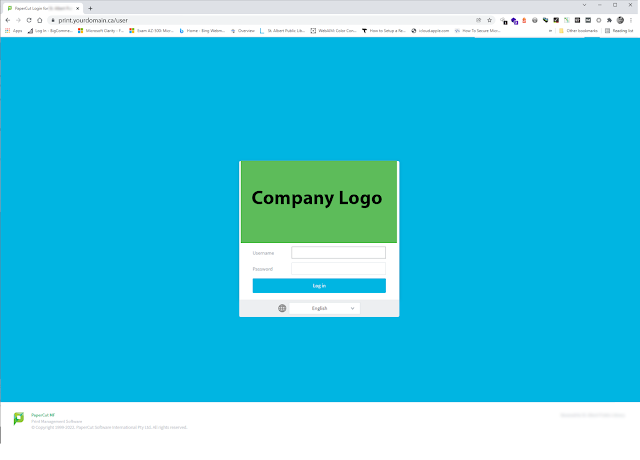
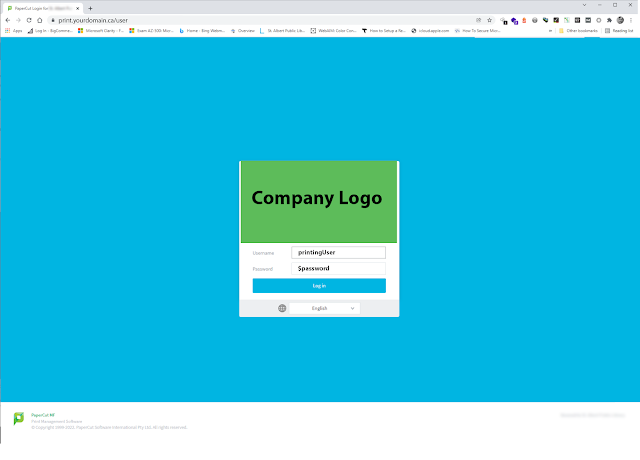
1 - When connected to the same network as the printer put in the URL for printing. https://print.yourdomain.ca


2 - Enter in the username and password (this would be the generic account for the user wanting to print)


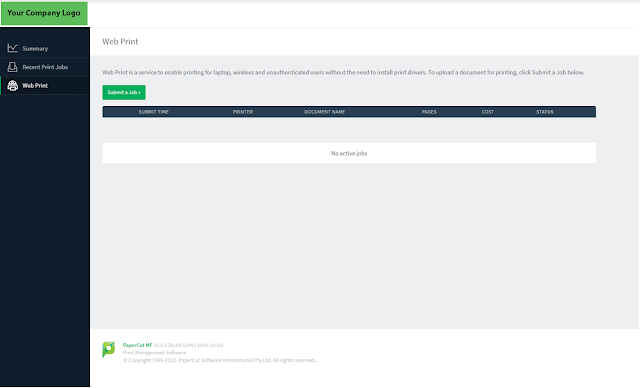
3 - you will be taken to the “Submit a Job” screen


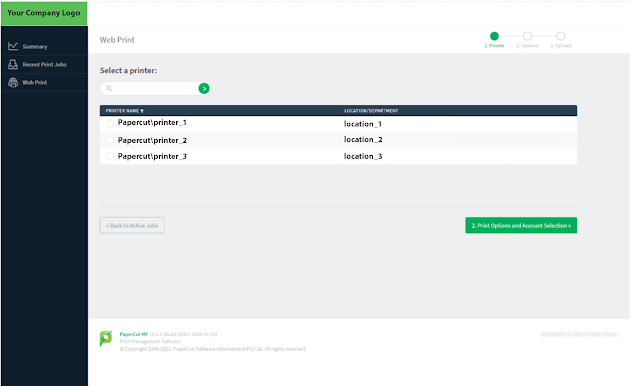
4 - Press the “Submit a job button and select the printer (in this case say printer_2)


Then press "
2. Print Options and Account Selection"


5 - Select you options then and select “Upload Documents”


6 - Select your file (This would be typically in the downloads folder)


7 - Once selected, press “upload and complete”


8 - Once Uploaded the job will sit in the queue, until released by the papercut queue release account.


Papercut queue release account view


Friday, September 04, 2020

Setting up Papercut print release system for Linux

Ramsey Public Library Envisionware Print Release System
In December of 2019 an organization was expanding and opening a new location.  This post is part 1 of a 4 part series which will go though the investigationThey offer public printing services and were using a public printing solution from Envisionware called LPTONE.  I did a previous post on this software in 2018 with setting up a release station with the Envisionware LTPONE software.    

However after investigating upgrade options and the cost for adding an additional location and coinop for the release station it was not a cost effective solution since new hardware would be required for both locations and there was just not the budget for it.  Not to mention the difficulty of managing two release systems that were non-centralized.


Ramsey Public Library uses an envisionware print release system, I know from the experience I've had with it; it's ok but it is quite lacking and expanding they system it is currently on to windows server from windows 10 pro would be quite the expense as it would require more then 2 machines with server if we ever got over 30 clients and we were right on the cusp of being.  


ITC 5400 COINOP
The organization had service contracts with Toshiba for managing the maintenance and materials of their printers which also included a ITC 5400 coinop, which was attached to one of the copiers for paid copies; so I investigated if that company had any kind of print management software that could use the same coinop and if the coinop could do double duty for the coping and the printing.  After contacting ITC and verifying that yes indeed the 5400 coinop can do double duty for the printing and coping payment; however they use a 3rd party software for the print management called papercut.

Now Papercut is a centralized print management solution, that works on Linux or Windows and is actually pretty light on system requirements.  At a glance you would think for just managing client side printing the NG version would all that is required however it didn't quite do all that was desired from the printing side so it was decided to go with the MF version.  The project started with a decision to go with a Ubuntu 18 LTS virtual server on Hyper-V to host the papercut MF software.


You can view Papercut's System Requirements I found on Hyper-V these settings work pretty good for a workgroup of of about 40 clients.


Processor: 2 Core


Minimum 4GB of Ram (max of 16GB) Dynamically Assigned


Disk Space: 
3GB for Log, 100GB free disk space, between 60 and 500GB recommended.


Here are the CDN links for the papercut software if you want to try it yourself.


Linux:

https://cdn1.papercut.com/web/products/ng-mf/installers/mf/19.x/pcmf-setup-19.1.5.52403.sh

Setting up Papercut on Ubuntu Server 18.03 LTS / 20.04 LTS


There are a couple things you need to know before you can install papercut on Linux.

  1. The "ROOT"/Administrator must be called papercut
  2. The user must have sudo access for the install
So when you install your username must be papercut, otherwise you will have serious issues with your install, with permissions etc.  

For this install I'm going to use the following credentials:

  • username: papercut
  • password: papercut
and I am installing open ssh and powershell.

Once we have finished our base install we will need to install the following (for a slimmed  down version):
  • Get and install updates
    "sudo apt-get install update"
  • Get and install upgrades
    "sudo apt-get install upgrades"
  • Install lightdm
    "sudo apt-get install lightdm"
  • Install Unity
    "sudo apt-get install unity"
  • Install ubuntu desktop
    "sudo apt-get install --no-install-recommends ubuntu-desktop"
    "sudo apt-get install compizconfig-settings-manager"
    "sudo apt-get install firefox"
    "sudo apt-get install net-tools"
If you don't want a slimmed down version just use "sudo apt-get install ubuntu-desktop"
  • restart
  • Install and configure cups
    "sudo apt-get install cups (should be already installed)"
  • add the papercut user to the printer admin for cups
    sudo usermod -a -G lpadmin "$USERNAME"
  • Install Samba
    "sudo apt-get install samba"
  • add the papercut user to the sudoers list
    sudo vi /etc/sudoers
    papercut ALL=(ALL:ALL) ALL
  • Install papercut
    chmod 777 "PATH TO PAPERCUT".sh
    sudo ./"PAPERCUT INSTALLER"
You can watch a video on the full process on my youtube channel here. https://youtu.be/9re8L6uWc94


How to make google calendar more secure

With the rash of spam and phishing attempts lately, I would recommend making the following changes to your google calendar settings to secur...