Showing posts with label Cisco. Show all posts

Wednesday, July 23, 2025

Meraki AP Management Changes

I work for a smallish organization and we have a network that is locked down that we use for managing devices, however we don't run a DHCP server on it.  The MR36 unlike the MR32 and MR33 requires a network with a DHCP server for internet access and management of the access points.  Trying to double up using an already established network you are using for wifi clients for example causes connectivity issues for the wifi clients.

In the past we would configure the meraki ap on a network with a DHCP server and change the VLAN and network settings on the AP to match the statically assigned ip we wanted for the device on our management network.  When we did that it worked just fine as shown below on an MR32.


However not so with the MR36, 
setting the VLAN's for the AP's worked the same but when I switched it back to the network without DHCP server the device became unavailable along with not routing traffic properly.  The AP goes offline.  Shown below VLAN X is a network where devices are statically assigned, and when the meraki switch has that VLAN setup for the AP the AP cannot connect, and the dashboard times out.

Switch Settings


Dashboard


But when I change the VLAN to one with a DHCP Server (VLAN A) the dashboard becomes responsive again.


To resolve the issue what I had to do was create a Management AP network for the Meraki AP's that has a DHCP Server.  So instead of using VLAN X I have it using VLAN Y for the native VLAN.   When I tried to use a network for double duty such as VLAN A, your wifi clients cannot connect and their mobile devices give a connection error.

On my firewall I created a new network (VLAN Y as described above) and I put the VLAN throughout where it is required, and will use that as the native VLAN and management network for the Meraki APs.

Thursday, September 29, 2022

Information about Meraki Licensing

 When renewing your Cisco Meraki Licensing, it should be done within a few weeks.  I have gotten conflicting information from the sellers and the technical support at Meraki.  According to the Meraki support rep, the license is active from the date of the invoice.


Hello Trevor,

As a reminder, the license key is active from date of invoice complete which was xx/xx/2022. When the license is added to the organization it will have a license start date from xx/xx/2022. If the license is added as a renewal today, the co-termination date would be xxx xx, 2025 (the organization will absorb the current remaining 88 days). I would suggest to add the license as soon as possible.

You may always contact your Meraki Account Manager if you had any questions or concerns about your licensing or order; **** ****@cisco.com

Thank you again, 

Cisco Meraki Support


So if you apply the license where can you find your keys?  Well that can be found in the change log.  When you apply your license you can restore your old license by clicking on the undo arrow at the far right (shown below highlighted in yellow).


You will get a popup with a key you can add to update your license.  If however you miss or close the popup without getting your key you can get the key from the change log.  The key is labelled as an unclaimed license.


You will want to select the latest generated value as shown below


This is an ongoing issue here is a link to a reddit thread where someone had a similar issue.

Friday, October 22, 2021

Meraki MDM - Fixing Invalid Profile when adding device to MDM

 With apple's iOS 15 update, I found I had some issues to fix with some of our organizations iPads, specifically because they are only 16 gb versions; they were out of space.  Also with the pandemic the Push cert was not kept up due to the systems being off.  Resetting and reformatting the ipads ended up being required.  Now these ipads were store bought ipads and not directly purchased from apple; which complicates things.  That caused the ipads to no longer connect to the Meraki MDM due to the bad push certificate and when I tried to re-add them using Apple Configurator 2, I got the invalid profile error.


After a lot of pain and troubleshooting, I had managed to make some progress on getting these ipads re-set up on the Meraki MDM.  After updating them to iOS 15.0.2 I ran the apple configurator which put them in the Apple Business Management center, but would not configure the ipads for use with the MDM.  

An issue that I also found which was causing me some of the grief is these ipads were somehow added to an icloud account, which I need to be removed before I could continue.  After removing the ipads from the iCloud account, I setup the ipads for automated enrollment thought Apple Configurator 2.  Doing this put the ipads into Apple Business Manager but still would not configure the ipads to use the MDM with the push certificate.  

I thought I would try and add them to the Meraki DEP, which I was able to do but this did not help me with getting the ipads setup to be used and updated with the push certificate.  What ended up being the solution was resetting all the certs (again), and setting up the ipads for just supervision with no MDM.  After the iPads were Supervised I was apple to add them to the MDM using Safari and the MDM web link.  I also had to remove the education configuration part of a profile configuration


 I thought this was odd but it was causing the following two errors in the Meraki log which you can see below.

Error: The top-level user “xxxxxxxx-xxxx-xxxx-xxxx-xxxxxxxxxx” is neither a leader nor a member.

Error: The payload “Your Meraki iPad Profile” is invalid.


Ultimately I re-did all the certs between apple business manager and Meraki
  • The Apple configurator certificate
  • the VPP certificate
  • the push certificate
  • DEP certificate.  
Then I removed the education part of the profile and setup the ipads as just supervised devices with no MDM having to add them manually after.   This worked and got the ipads back up in working order.

Connect the ipads to your mac and open Apple Configurator 2 and select the ipad or ipads and select the Prepare


Select Supervise devices and allow devices to pair with other computers.


Select do not enroll in MDM


Select the Organization 


Configure iOS Setup


After the ipad has been supervised, the ipad could be connected to the internet.
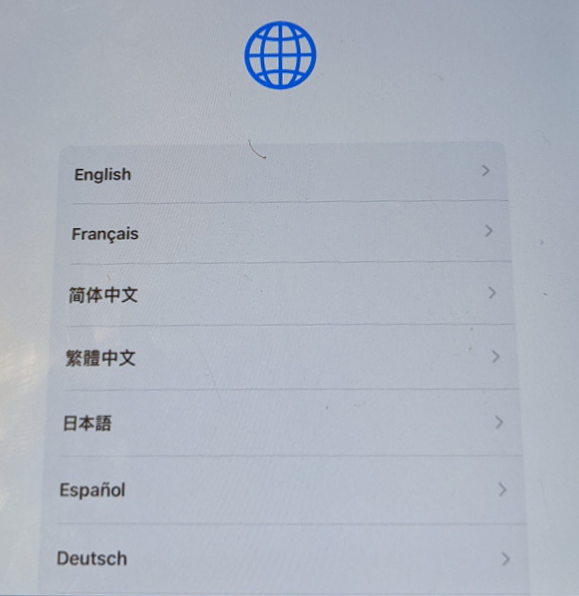
Un-Supervised Device

Once the ipad was supervised, the wifi screen shows up and when connected can then be joined to the MDM by the enrollment URL/Link.  You must use safari to connect to the MDM.

iOS Screen

I was able to use safari get to the enrollment URL/Link to join the MDM and the profiles were applied right away.  However before you do if you have apps that you will want to use that were purchased on a specific profile you will have to sign into the ipad with that account before loading the MDM.  Otherwise you will lose access to those apps.
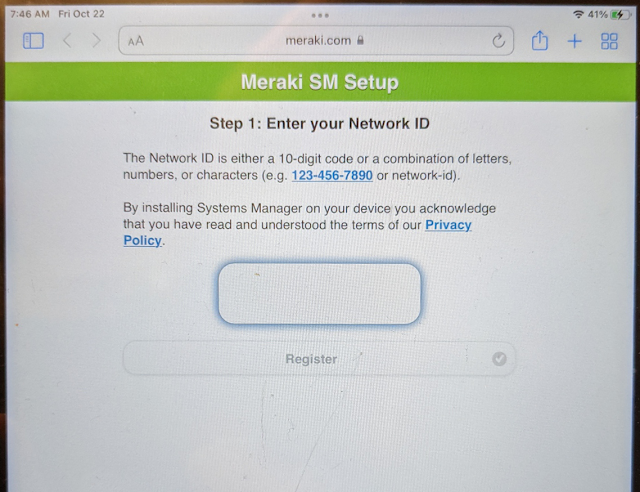
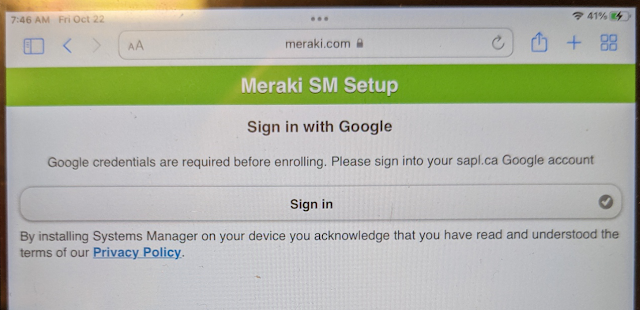
Meraki Network Registration

 
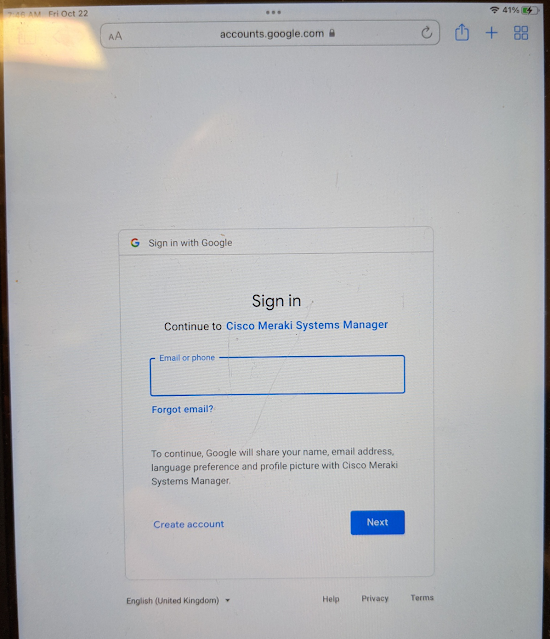
Sign in with Google

Sign in with a Meraki email.

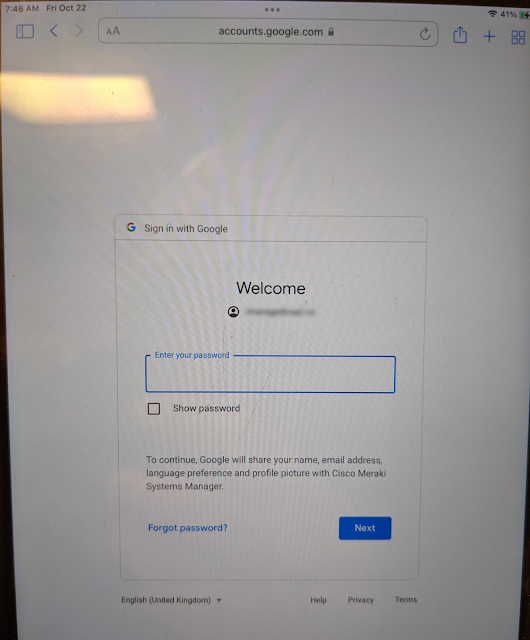
Enter the password

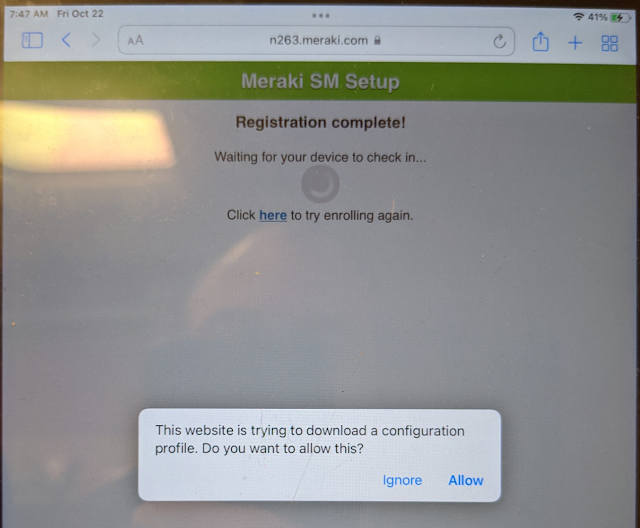
Finds The MDM Network

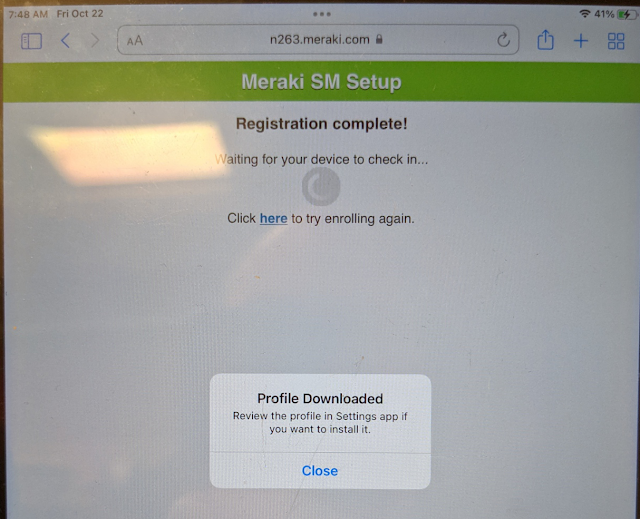
Allow the profile to download to the iPad

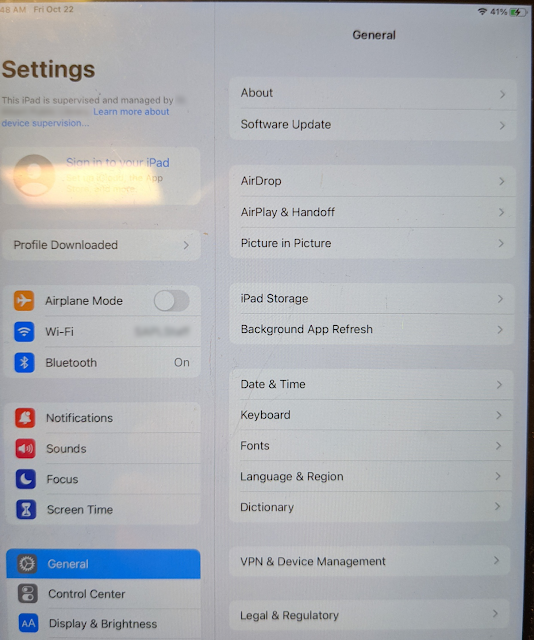
Close the alert and open the settings


Click on Profile Downloaded

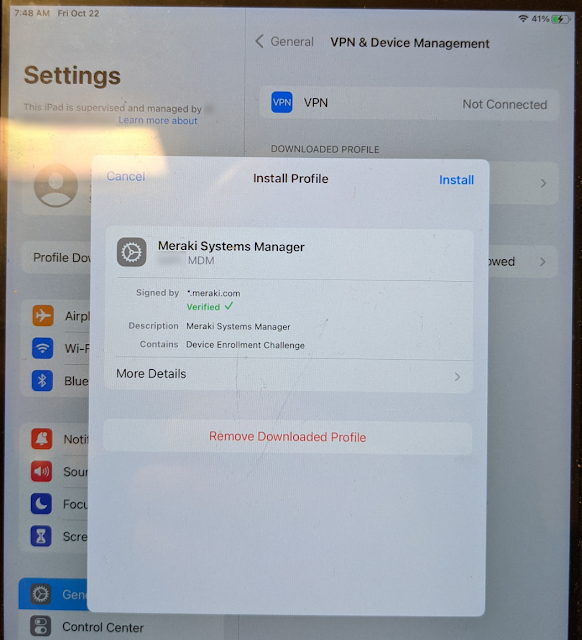
Install the profile


Trust the certificate from the MDM


Once the profile is installed, the ipad will start reconfiguring to what you have setup for the profile on the MDM.


to get the devices setup.  Once that was done.  I used apple configurator to just supervise the devices.  Then I used safari to add them to the MDM.  Once there I was able to set them up as before in Meraki, adding and removing profiles as required for apps.


Wednesday, July 14, 2021

Setting up your own VIOP System

 A while ago I had setup a voip system using Ring Central.  Now the cost of having a service like Ring Central, isn't outrageous but it isn't inexpensive either.  I also know a few people who were wanting a "LAN" line for their kids, and shaw and Telus are charging between $20 - $40 per month for a basic phone depending on what services you are subscribed to which is outrageous.  

SHAW Phone Cost

Telus Phone Costs

So I started to do some reading about opensource pbx systems, and really liked freepbx, and am currently playing with it in a VM in my Lab.  With all phones going network based with either a cellular base or an office voip phone, you don't have "lan lines" in that sense anymore.  I had the good fortune of getting a hold of a Cisco SPA504G on the facebook marketplace for $20, and they range from $20USD to $150 on ebay.  You will also need a POE injector which can run from $15 - $100 depending on what you want to buy.  I got the TP-Link 150S which worked well for this.


I intend to finish my work with freepbx, but I needed to get something up and running pretty quick and was told that in canada, VOIPMS would be a good provider to use for a cloud based PBX.  It has a great wiki for configuring devices.

To get the phone up and going you have first signup for a VOIPMS Account, and get it verified.  Once that is done to get things going right away you will want to "add funds" from the Finances tab and pick a DID number (phone number).  The minimum is $15USD purchase.


As you can see from the screen shot above, you can setup a number of settings, such as voicemail, caller id, hold music, etc.  This was a little tricky to setup, it is much simpler to use ring central for setting it up but it wasn't to bad setting up the calling features I wanted on the phone and on the VOIP.MS account.


Configuring settings on VOIP.MS also requires making changes on the VOIP phone your using, so in my case Cisco SPA504G.

So first thing is first you must setup and verify your VOIP.MS Account.


VOIP.MS has a number of tutorials which are accessible on their youtube channel; I like being difficult and read though the wiki but did get to where I needed to go.

The first thing I would recommend setting up is the cloud then configure the phone and adjust on either as you see fit.  So if you go to DID Numbers -> Manage DID, you will get options for configuring your number, such as selecting the Server for your cloud host.  I selected Vancouver because it is the closest one to Edmonton.


One thing you will want to change is the default ring time which I believe was 60 seconds, I set mine to 30, and you will want to associate the voicemail to the DID once you have voicemail setup.


To setup voicemail, you tie it to a DID, the wiki was an excellent resource for the setup, once I setup the voicemail number (it can be anything up to 10 digits) a password and you can setup if you want to skip it because I am setting this up as a home phone I did choose to skip it.


Now that your voicemail is configured you can go and associate the voicemail with the DID (DID Numbers -> Manage DID).  Save your settings.  Once configured, you go to your voip device for PBX server and configure the settings you want to use.  On the Cisco SPA504G it is accessed by the WebUI.


To make the changes you want to make to the phone you will want to click on the Admin Login 


The Admin login give you many more settings that you don't get in user mode.  We will be editing the Phone, and Ext 1-4.  In Phone we want to put *97 in the voice mail number which will take us directly to our voicemail box we configured with our voicemail box we made for our DID.  I also changed the short name for line key 1 to the phone number I am using with VOIP.MS

Then in Ext 1 I put the proxy url I want to use provided by voip.ms DID Numbers -> Manage DID (in my case vancouver2.voip.ms) and put the SIP number in the user id and your VOIP.MS Password in the password field.


Since I only have one line on my VOIP.MS account, I disabled lines 2 - 4 but that is up to you if that is something you want to do.  The end result is your voicemail button going to your voicemail without requiring a password, displaying your number. Which makes the phone easy to use for everyone.


Replacing a drive and repairing a storage spaces volume

When you have a drive fail in a storage spaces, changing out the drive isn't straight forward, however well worth the effort when you co...