Thursday, November 22, 2018

Fixing Failover Cluster DNS Error 1196 DNS Failure

From time to time you might see DNS Registration Error 1196 on your DNS for your cluster nodes.  This is caused by the network binding order getting changed up, auto configured etc.  I'm not sure how or why DNS binding orders get changed when they are manually configured but it is a pretty trivial fix.  You can do one of 2 things, manually set the DNS for networks where you don't want the host to have DNS (just blank it) or you can change the binding order.  In this post we are going to change the binding order for the DNS on the cluster nodes.

You will see dns errors much like what is shown below in your Failover cluster manager.


To change your binding Order on Server 2012R2 is pretty simple.  First make sure you have show menus turned on in your folder options.


Then go to your "Network and Sharing Center"

Select "Change adapter Settings" once you see your list of network adpaters select from the menu Advanced -> Advanced Settings


You will see a window popup with your network adapters.  Change the order so that the network you want to be accessed first is at the top of your list.


Once you have the networks in the order you want close the window by hitting ok.  As you can see by the powershell window below, we had issues finding a server node on our cluster and after the changes we were able to get a full listing.


In server 2016, to change the binding order is in the IPV4 metric Properties.  The lower the number the high the binding order.  So for example if you have 3 networks,

  • Intranet - Metric 1
  • Web App - Metric 10
  • Internet - Metric 20
The network Intranet gets priority over Web App and Internet, so if you have a DNS server on your network the client checks Intranet for any DNS lookup first before trying the other 2 networks if a DNS server is supplied.  Intranet also gets all network priority over the other adapters.


Interesting Reference Information.

Tuesday, October 30, 2018

Unknown Error Deleting Files and Folders on Windows Server 2012R2 on a DFS Share


I had an issue where a couple of users were trying to delete a folder called collections. Typically this isn't a hard issue you hit the delete key and it's gone. However we have a bit of a mixed environment with Macs and some Linux workstation accessing an assortment of files and folders, not to mention we do have live thumbnails in our environment being used as well. So as you know that means issues with the thumbs.db hidden file.

What is thumbs.db file?

A thumbs.db file used to quickly display thumbnail images inside a given folder. It is a hidden file so you can't see the file unless you set Windows/File Explorer to show hidden files. Even then depending on the system that last access the .htaccess file you may not see it. Mac OS has a bad habit of writing bad .htaccess files on windows shares especially in a domain environment. They have gotten better over the years, but occasionally you do get a malformed one. A thumbs.db file can keep Windows from letting you delete a folder, change permissions or ownership of files in a directory because Windows is keeping the thumbs.db file open.

https://www.pcworld.com/article/2999243/windows/manage-thumbs-db-files-in-windows-and-on-the-network.html

Typically if this were a windows problem you do the following
  1. Press Windows + C and Type Control Panel
  2. Click "Appearance and Personalization"
  3. Click "Folder Options"
  4. Open the "View" tab
  5. Uncheck "Display file icon on thumbnails"
  6. Click OK, and exit control panel. You should now be able to delete the folder and the thumbs.db file.
https://answers.microsoft.com/en-us/windows/forum/windows_8-files/unable-to-delete-thumbsdb/476dbfa7-6cd8-43a7-b162-c9228edd3049

As you can tell from the beginning of my post this wasn't going to work, and it didn't.  My problem was a legacy file from 2015, it was not visible or accessible in Windows Explorer even with show hidden files and folders enabled. This file was causing failures for removing the folders and changing ownership and permissions from the folder root.

Error when trying to change security permission/ownership

Error trying to change ownership

For me I am well aware of this issue and the fix is easy, but you need a unix/linux system to connect to the share to remove the file.

Problem Thumbs.db File

You need to connect to the share folder with the linux/unix system.  I am using a Ubuntu 16.04 VM on Server 2016 to do this.  Go to File -> Connect To Server... -> then put in the name or ip of your server.


You will then be prompted for the username and password of the server (in this case it is just our domain login credentials)

List of Windows Shares
When you mount the share by default you can see all hidden files and folders.  When you go to the directory where your having the issue you can try delete the problem file.  If you have an issue move the problem file to another directory you create using your linux client.  When you do that Windows Explorer shouldn't have enough time to make the thumbs.db in use and you can then delete the folder.

Linux SMB View


This is how I typically get rid of problem files like this.  It is usually garbage left over and it is annoying but easy to fix, and you don't have to do this to often.

Wednesday, October 17, 2018

Installing powershell 6.1 on openSUSE Leap and Tumbleweed

Installing powershell on openSUSE Leap and Tumbleweed is relatively straight forward with the exception of a few issues. 

1) adding the repository doesn't work though their command line that they have issued on their powershell instructions

2) They neglected the instructions for adding OpenSSL 1 which is required

If you go to the Powershell Repository on github there are a set of instructions to install powershell on openSUSE and we are going to follow them and I will add the deviation points so you can get powershell running on openSUSE.  The link for the original Microsoft instructions are https://docs.microsoft.com/en-us/powershell/scripting/setup/installing-powershell-core-on-linux?view=powershell-6

You can view a 12 Minute video of the procedure on my youtube channel. https://www.youtube.com/watch?v=8yzDH0v99Us

Open a Terminal Window and Copy and Paste the following

# Register the Microsoft signature key
sudo rpm --import https://packages.microsoft.com/keys/microsoft.asc

Now we want to add the repository to our openSUSE system.  Open Yast and Open Software Repositories.


Select Add


Select Specify URL


Name and Add the Repository URL listed below

# Add the Microsoft Repository
https://packages.microsoft.com/rhel/7/prod/


You will get a warning about the Repository not being digitally signed.  If you want to use powershell I would add the Repo.


Once complete go to your terminal and run a zypper update

# Update the list of products
sudo zypper update

Then in the terminal in stall powershell using the command below.

# Install PowerShell
sudo zypper install powershell


You will get the error below

Problem: nothing provides libcurl needed by powershell-6.1.0-1.rhel.7.x86_64

 Solution 1: do not install powershell-6.1.0-1.rhel.7.x86_64

 Solution 2: break powershell-6.1.0-1.rhel.7.x86_64 by ignoring some of its dependencies

Select Option 2.

Once the install is down in Terminal you can start powershell but you will get an error about libssl that no usable version is found like the image below.

# Start PowerShell

pwsh


To fix that we go back to YAST and we need to go to Addon Products -> software manager and do a search for libssl


You will want to add libopenssl1_0_0 and libopenssl1_0_0-32bit


Once the install is done you can now run powershell!  You will know this by the

PS \Home\$USER (in this case administrator)


Friday, October 05, 2018

Storage Spaces Lost Communication or IO Error and Intel SSD Event ID 129

I had a major issue with our company's primary Hyper-V Server.  It was housing our primary AD controller, User Storage and Share, along with 2 other VMs.  The symptoms were major IO read/writing, reports of disconnects, and a loss of access to the AD, and user files.  According to our log files we were getting iANSMiniport, and Intel Nvmestor errors.

Here are some log file samples


According to the logs the system starting giving Event ID 129 warnings and this continued to happen every 10 seconds and affected our DHCP, DNS and user logons.  After a forced shutdown everything was fine according to the logs until later that morning when users started to have lag and login issues.


You can read more about Event ID 129 Here

We sent the server in for diagnostics and according to the Authorized Service Depot, they could not find anything out of date except for the bios.

Since this was a "Main Production Server" it was decided that we would move the virtual ad controller from the production server to a dev server to run until the failure of the drive could be determined so the organization could continue to run.

After doing a second forced shutdown and boot up I was able to shut down the virtual machines running on the servers and did a full export of the data to an external drive.  This made sure we did not lose any data but it did inconvenience some users as the data had to be copied back from the dev server.

Unfortunately I didn't find the Microsoft article about Event ID 129 until about a week after our issue at that point I had  destroyed the storage spaces volume, but I did find it useful as I installed some additional software which seemed to help the server recognize the NVMe drives better.  For that you need to install not just the Intel SSD Toolbox, but also the SSD Data Center tool and the Data Center NVMe SSD Drivers.  The errors in the Event ID 129 before the Maintenance 8 release seemed to be a little too coincidental to what we were experiencing.

Symptoms


When this issue occurs, your cluster may experience any of the following symptoms:
  • Slow workload performance
  • Virtual disks in the cluster that have an Operational Status value of Detached or No Redundancy.
  • Physical disks that report a status of Lost Communication or IO Error.

I haven't had a chance to verify the issues have been 100% corrected but from the testing I have done some major stress testing on the storage spaces setup using hyper-v to do mass exports of VM's to the storage array with no issues at all, HD tune and crystal disk mark have also shown the Storage Spaces Array to be in good shape.


Wednesday, October 03, 2018

Using, Adding and Changing VLANs on Windows 10

To use vlans under Windows 10 you need to use powershell and the setup is pretty simple. Open powershell as an administrator type in the following

Set-NetAdapter –Name "Ethernet Adapter Name" -VlanID XXX where "Ethernet Adapter Name" is the name of your ethernet adapter and xxx is the VLAN ID number in this case 99

If your ethernet adapter supports VLANS you will get asked to apply the vlan to the ethernet adapter much like the image below


Otherwise you will get an error like this


If your successful then you can get DHCP if it is enabled on the network or make changes to your IP address with what ever you need.  As you can see below I have a .97.83 address from a DHCP server on VlanID 99


I had 2 different laptops I tested this with a Lenovo Y580 with a Qualcomm Atheros AR8161 PCI-E Gigabit Ethernet Controller (NDIS 6.30), and a Lenovo ThinkPad E570 with a Realtek R8111GUS PCI-E Ethernet Controller.  The Realtek did not seem to support vlan tagging though windows but you can try installing the Realtek diagnostic toolkit and see if you can get vlan tagging enabled.  This was a test just with straight Windows 10.  

Friday, September 21, 2018

Updating Let's Encrypt Certificate for SirsiDynix Horizon Web Services

How to update the a Letsencrypt Certificate on Apache Tomcat for SirsiDynix Horizon Web Services.  If you went though my post on Adding Let's Encrypt TLS Certificate to SirsiDynix Horizon Web Serivces Tomcat Server you will like this post.  It takes about 10 to 20 minutes to do and is pretty quick for having to do a manual update.


There are a couple of things that you will want to have handy to make this process sing.
  • Logged in to The windows Apache Tomcat server with a view of the desktop 
  • Access to the Lets Encrypt Key and CSR 
  • Logged into your DNS Provider 
  • Passwords required for your tomcat keystore

Environmental Variable Verification:


Keystore Details

Alias: KeystoreAlias FileName: $KeystoreFileName Password $KeystorePassword!


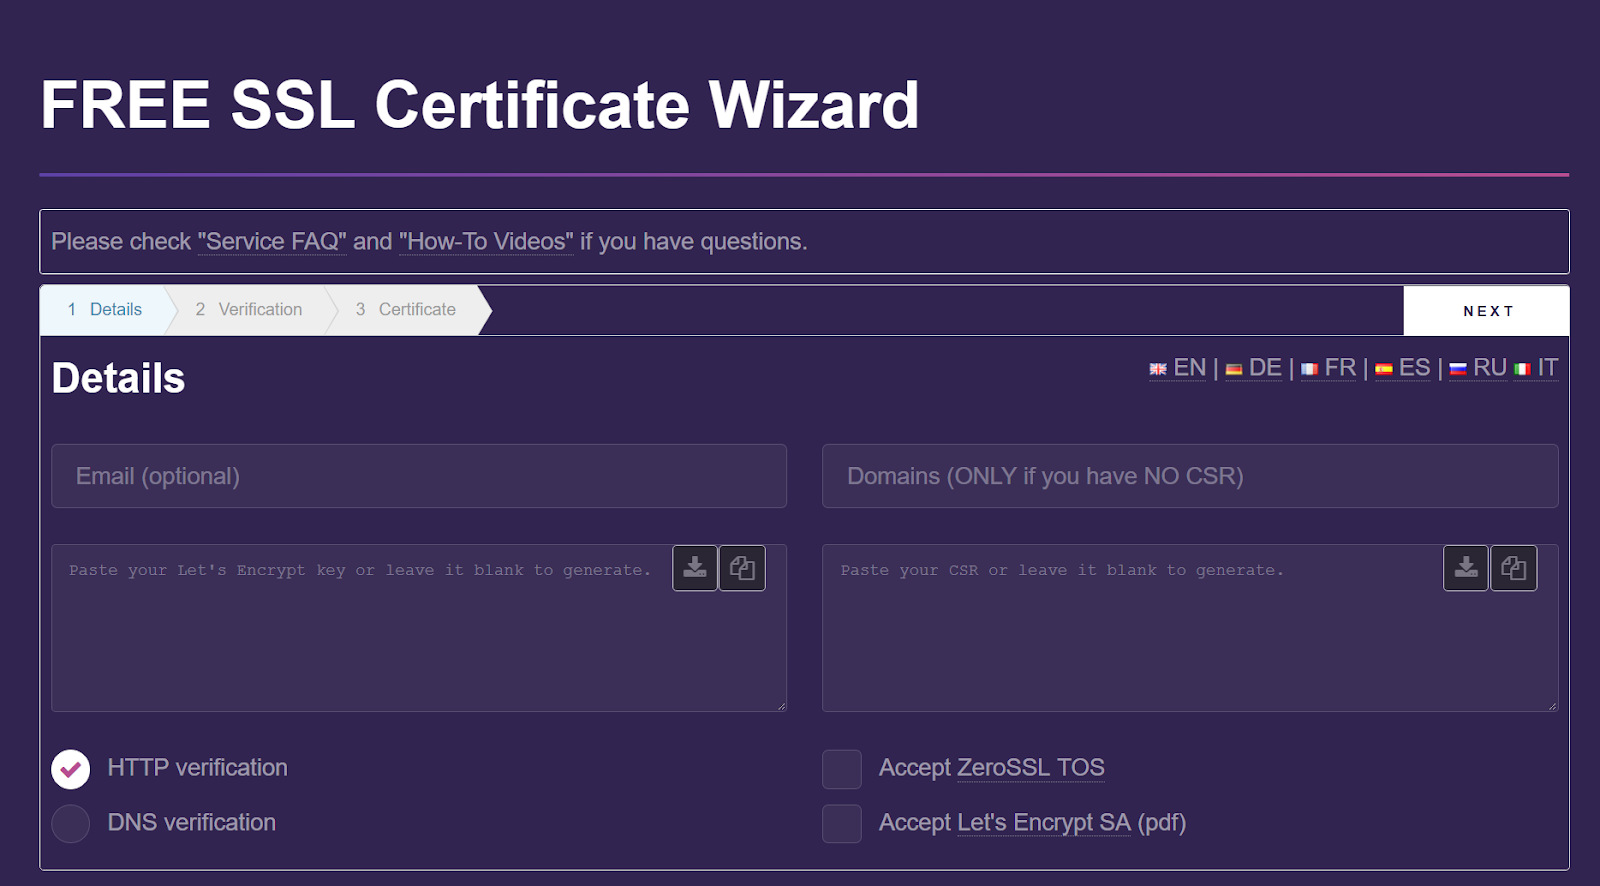
From your windows server running Apache Tomcat go to zerossl.com


Put in the email you have setup your tomcat server account, you will also need your account key and domain CSR.


Select DNS Verfication, Accept TOS, Accept SA and hit next.

This will take you to the DNS ACME-Challenge page. You will need to copy and paste the challenge and update the challenge in the TXT field in our Zoneedit account under the _acme-challenge.$yourdomain value.


Once Verified it will allow you to download your new domain and intermediate cert.

Save the downloaded file to the documents folder. Then open it up in sublime text edit and split the certs appart. The top certificate one is the domain cert which we need the other is the intermediate certificate. Save them in the following format. Copy and paste them into

Domain-cert-renewal-$TodaysDate.crt
Intermediate-cert-renewal-$TodaysDate.crt

Copy and paste the files into the apache tomcat directory. C:\Program Files\tomcatserver

Run CMD as Administrator and go to cd “C:\Program Files\tomcatserver” this will make things easier.

Type in “$JAVA_VAR”\keytool -import -alias $yourkeystorealias -trustcacerts -file domain-cert-renewal-20180919.crt -keystore $yourkeystorefilename

Then it will prompt you for a password:

Enter the password for the keystore.

Then it will ask you for a new password. You can continue to use the one that you have, so if you change it update the documentation!

You will get a warning about PKCS12 you can ignore it but that is it your done. Your SSL Cert is updated. Restart your apache tomcat server for the certificate updates to take effect.


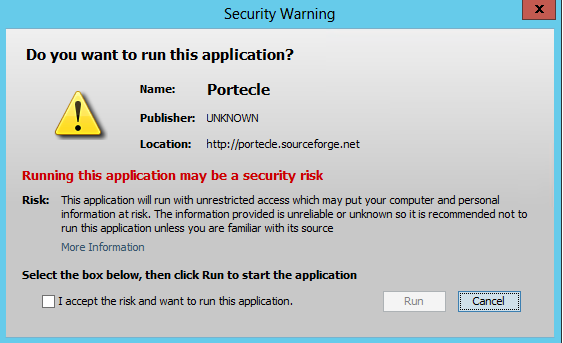
If you want to verify the certificate there is a java program loaded called Portecle
http://portecle.sourceforge.net/


Once the Program is open you can open the keystore file by going File -> Open Keystore File -> “C:\Program Files\$pathtotomcatdirectory” or by Opening the file from the drop down as shown below.


You will then be prompted for the Keystore Password: $KeystorePassword!
Once that is done you can see the certificates in the keystore as shown below.


Thursday, September 20, 2018

Setting windows server network binding/priority order

In Windows Server you can have multiple networks "VLANS" connected to your computer.  Windows will randomly setup the priority of your virtual networks which can cause a problem for you especially in a clustered hyper-v environment.  You can set the network priority of your virtual networks in two ways in server 2012R2 but is a little bit different in 2016.

In server 2012R2 go to network and sharing

Press the "ALT" Key and the advanced menu will be displayed.


Under advanced select "Advanced Settings"


You can then set the order of what networks get priority.  With the top most being the highest priority.


In Server 2016 this has changed a bit where you set the metric for the binding priority.

If your using Hyper-V you need to select the vEthernet interface -> Right Click and get properties -> Select Advanced TCP/IP Settings and deselect "automatic metric" and put a metric with the lower value gets the binding


Reference:

https://docs.microsoft.com/en-us/powershell/module/netadapter/set-netadapter?view=win10-ps
https://www.mssqltips.com/sqlservertip/4928/configure-network-binding-order-for-a-windows-server-2016-failover-cluster/
https://labs.supinfochina.com/en/change-network-card-priority-in-windows-server-2012-r2/
https://social.technet.microsoft.com/Forums/windowsserver/en-US/da2cebda-4ead-401e-a821-3330eb5d4988/change-network-binding-order?forum=windowsserver2008r2networking
https://social.technet.microsoft.com/Forums/windows/en-US/cb8dac7f-5f04-42b1-8065-a95c946f6ec2/change-network-adapter-priority-order?forum=ws2016

Thursday, September 06, 2018

Setting up Mitel VOIP phones using PFSense and Active Directory


At my office we were using a Mitel Phone controller that used streamline adapters for connecting our phones to the VOIP system.  At the best of time the system required a weekly reboot otherwise phones would randomly drop off the system and need to be rebooted.


Mitel Streamline Dongle

So we had a bit of a panic, on a Friday before the long weekend near closing time; Mitel Streamline system decided to die.  


About the Organization:


So we have 2 locations about 500 meters apart lets call one SAP and the other LMC; they are connected by a high speed fiber link.  So what was done is we were asked to pass two different VLANs though the network VLAN 11 for LMC and 210 for SAP.  Our LMC network was already getting the VOIP system though the DHCP on our Active Directory Controller.


Here is some of the info for the single DHCP Server:  192.168.1.0/24 on VLAN 100 and we are using option 43 to pass VLAN 11 to the phones.


To add or modify the Mitel string you need to go to DHCP Server -> Server Name -> IPV4 -> Scope -> Scope Options


Find 043 put a good name and description then add the following String:


id:ipphone.mitel.com;sw_tftp="$YOURSRVIP";call_srv="$YOURSRVIP";vlan=11;dscp=46  


example:

id:ipphone.mitel.com;sw_tftp=10.12.0.10;call_srv=10.12.0.10;vlan=11;dscp=46  


Active Directory Mitel Scope Option
With our two locations we know LMC is setup on a 192.168.1.0/24 network and we have Mitel phones working and being passed though on option 43 on our DHCP Server.

We need to add the phones at SAP to the network and to do that we need to setup another virtual network with a DHCP server so it can pass the Mitel info but still connect to the active directory controller.


Since we use PFSense and Cisco switches adding another virtual network was pretty easy and we are going to use PFSense.  So we added 2 new VLAN to the switches VLAN 210 and 200 and we also added it to the PFSense firewall.


So we are going to setup the following on the SAP network:


Vlan 200 - 192.168.200.0/24 - 210 in the Mitel DHCP Options


Adding vlan 200 to the PFSense Firewall to allow users to connect to the domain and keep using their Mitel phones.  Please note this is a redundant firewall so everything goes though CARP.


Go to Interfaces -> Assignments.  Press the add button and add the new network VLAN (You might want to make sure you've added the vlan to all relevant switches)

VLANS
be sure to add the new network in your interface assignments for carp.

Then go to Firewall -> Virtual IPs


Press the Add Button.  Below is a sample of the settings that might be used in the new network.

VIRTUAL IP Settings
Enable the network interface and set the IP for the PFSense firewall on the network
SAP Network Interface Settings

Now that we have the Gateway and the Interface setup now we can enable the DHCP Server.   Under Services -> DHCP Server.  Select the network you want to enable the DHCP server on and fill out your settings you want for your DHCP Server


DHCP Range


***IMPORTANT***

Here is where we add the option 43 Type is Text and the value for our Mitel phones is the same as what we have for our AD DHCP Option with the exception of the vlan (Unless you are obviously using a different server)

Press the add button and fill out 43 in the number field, should be a text type and copy/paste or type the value listed below for your mitel phone option.

id:ipphone.mitel.com;sw_tftp=10.12.0.10;call_srv=10.12.0.10;vlan=210;dscp=46  


With that done now we can configure our firewall rules for SAP Network so we can talk to our AD controller on the LMC Network so our users can login and use the network resources with the appearance that nothing has changed.  We have 3 different rule sets that we have to setup, the LMC interface (which were already done)


LMC interface:


We have an open rule for an SMTP mail forwarder on port 587
Access for "CatMan" which is allowed to go through to anywhere
A block for any thing from getting to the SuperSecret_Network
A Pass for anything on the LMC_Network to be allowed anywhere

SAP Interface:

A block for any thing from getting to the SuperSecret_Network
A Pass for anything on the SAP_Network to be allowed anywhere


Floating Rule:


This makes the whole thing work properly.  On our selected network interfaces we want to make sure we allow all traffic to the network our domain controller is on.  This lets us get our DNS for our clients from our domain server while they get a different DHCP address from our PFSense firewall and the proper Mitel information for the phones.

Floating Rule that allows the pass from one network to another

List of the floating rules

Now there is obviously more happening with this firewall then meets the eye but this is essentially what you need in a nutshell.  On our LMC network we have our computer clients on Vlan 100 with a subnet of 192.168.1.0/24. The Mitel Phones work using vlan 11.  Our SAP Network on Vlan 200  clients are on a subnet of 192.168.200.0/24 using vlan 210 for the Mitel phones.  


All clients can access network shares and login to the domain with no issue.  Below is a ping test from a machine on the SAP Network to another machine on the LMC Network and it also works from LMC to SAP.

Verification that the network passes though.

Reference Documents Mitel VOIP Phones:
http://edocs.mitel.com/UG/Apps-Solutions/MiCollab%207.2/MiCollab/MiCW%20Help/forms/dhcp_options.html

http://www.mitelforums.com/articles/option-128-missing.php

Fix a windows network printer that is offline

How to fix a network printer that get's installed and shows offline. By default SNMP is set to public, so when you are installing a netw...