Thursday, June 13, 2019

Configuring Android Devices with Cisco Meraki

A while ago I did a post on how to setup iOS with the Cisco Meraki MDM, and now I'm going to setup 16 Azus Zenfone 4 Max with the Cisco Meraki MDM.  I did do a post on how to setup android for work with the Feronics Deep Freeze MDM; Now given the major issue with this MDM that we found is it would take hours for the MDM to sync changes if it did at all.  My organization thought we could save some money by going with them and it was ok at first taking about 15/20 minutes for changes to sync.  After a while though it turned into hours.  The differences in the Meraki MDM settings between Android and iOS are determined by the nature of the platforms such as the close source nature of iOS; there are things we can do to iOS that we can't on android so it takes a little bit more time to setup android devices.  However for 80% of the features everything we need is there in Meraki, and the rest of the options that we want are local to the phone so it takes more of my time to setup but once setup and properly documented should be very manageable.

The setup for the android phones are for the purpose of being able to add and remove applications quickly, and these devices are to be used for makerspaces, and by non device owners, so we want to make sure organization information and accounts can not be used or accessed unless it's something we want them to be able to allow.  IE - No email access via app, restricting add/removing accounts.  Allowing the use of the camera and connecting to a computer to transfer video/pictures.

First I'm going to go over the settings for the Cisco Meraki

first follow this guide Cisco has created.  It is great documentation for setting up Android for work, up until you choose using a Google Managed Domain.  This guide will cover setting up a Google Managed Domain with Meraki.

Step 1 - Go to Orgainization → MDM


Step 2 - Generate and Android EMM Provider selecting Google Managed domain.


Step 3 - To get the token you will need to login to your google admin and generate the token.  Once you have done that you will add the domain and the token to your Meraki.


Step 4 - Then setup your meraki with the info provided and enroll your organization.


Step 5 - Configure Meraki Settings for Android.  Go to System Manager → Settings


Step 6 - Add Profile


Step 7 - Add Device profile (default)

Step 8 - Configure the Profile.  For the Android setup I have 8 different settings for the Android profile


Step 9 - Restrictions


Step 10 - Passcode Policy

Step 11 - WiFi Policy (you can have as many as you need)


Step 12 - Privacy

Step 13 - Android Device Owner

Step 14 - Android Restrictions


Step 15 - Android System Apps

This can be setup to be black or whitelist.  For the purposes I need using the whitelist is preferred.


Step 16 - Setting Up Devices

You have 3 options when configuring Android Devices.
https://developers.google.com/android/work/overview

  1. A work Profile (typically used when a user has a personal device)
  2. Device Owner (typically used for devices owned by the organization)
  3. Knox Enrollment (More info here)

Now the one I'll be using for these devices are device owner because I want complete control of the device (please refer to the Android Enterprise Deployment Guide for exact differences).  When you go to assign the phone an account type in afw#meraki then put in the 10 digit code or scan the QR Code.  This will add the device to the Meraki MDM.  You will be prompted to add an account; the default will be Android Enterprise, but because this is not a meraki managed account, we need to use a different account to adding the device to the MDM which I have pre-configured in the Google Admin Console


Step 17 - If the device is not new Factory reset the device.  Select the language as English US and English Canada

Step 18 - Set Internet Connection for Only WiFi Connection

Step 19 - Connect to a network

Step 20 - Accept Privacy Rights Terms

Step 21 - Setup As a New Device

Step 22 - Put in afw#meraki for the Google Account.  This will start the android for enterprise enrollment.

Step 23.  Sign in with an domain account you want associated with the device.

Step 24 - Accept the terms from the Google Device Admin and Install

Step 25 - Accept all elevation permissions from meraki and google device admin.  Go to Settings -> Accounts and Remove the Android enterprise account.

Step 26 - Run all system updates applicable and install

Step 27 - Double check the keyboard by going Settings -> Language and Input -> Virtual Keyboard.  You should See ZenUI Keyboard.  Go to Manage keyboard and Disable Google Voice Typing. (This you will have to fix after security patches seems to been a ZenUI issue with Meraki)

Step 28.  Disable Notifications by going to Settings -> Sound & Vibrartion -> enable do not disturb.  Set to Until you turn this off.  Disable - all from the allow list.  Enable - Block when screen is on.  Disable Notiification.


Wednesday, May 15, 2019

How to install Office using the Office Deployment Tool

This post about how to install Office 365, 2019 or 2016 using the Office Deployment Tool.  A view of this can be found on my youtube page https://www.youtube.com/watch?v=AywCRnXGjkA

Office 365 and 2019 now only come with one click Office Deployment Tool (ODT).  This is a command-line tool that you can use to download and deploy Click-to-Run versions of office to your client computers.  Typically most admins install office by downloading the MAK key with an ISO; this change starting with office 2016 where the office deployment tool was provided.  Now Office 2019 only allows you to install via the office deployment tool.


Microsoft Volume Licensing Service Center - Office 2019 Download 
So what you now need for Office deployment are essentially two files.  The Office Deployment Tool which can be found here https://www.microsoft.com/en-us/download/details.aspx?id=49117 and the configuration.xml file.  You can read about the full details here https://docs.microsoft.com/en-us/deployoffice/office2019/deploy

***UPDATE July 10, 2019***

Now you don't have to hand code your configuration any longer.  Microsoft has released a Office Customization Tool for creating your click to run configuration file.

https://config.office.com/deploymentsettings

It is simple and easy to use.  It also solved an issue I was having with office displaying the error on the install run "this product cannot be installed on the selected update channel"

***End of Update***

Here is the easy how to do this.

Create a file called configuration.xml  Below is the XML required to run the ODT.


Office ODT Configuration XML File
  

The parts your will want to edit are the SourcePath="Path to save downloaded office files (can be network or local)

ID which can be any of the following

  • - ProPlus2019Volume
  • - Standard2019Volume
  • - ProjectPro2019Volume
  • - ProjectStd2019Volume
  • - VisioPro2019Volume
  • - VisioStd2019Volume

PIDKEY (Your Office MAK Key)

The ODT is run from the cmd prompt as administrator.  For simplicity I put everything in C:\office

cd to the directory with the setup.exe and if you haven't downloaded office run

setup.exe /download configuration.xml

once that has completed run

setup.exe /configure configuration.xml

you should see an output similar to the one shown below.


CMD Prompt Commands for running ODT

when you run the setup.exe /configure configuration.xml because we have   setup you should see the office install splash, and this can be changed so it installs office silently.

You can now customize your install using the Office Customization Tool available at https://config.office.com/deploymentsettings


Monday, March 25, 2019

Fixing a backup or failover DHCP Server in Active Directory

I had an experience where an active directory controller was forcibly removed from the domain, fortunately it didn't have any FSMO Roles associated to it but it was setup as a backup/failover DHCP server.   This assumes you have a backup or secondary AD Server and it is authorized to be a DHCP server.

First you have to create all scope options from your primary DHCP server to the backup/failover dhcp server.  If you try to run failover without setting up custom options then you will get Error 20010. The specified option does not exist.

Active Directory DHCP Error 20010. The specified option does not exist
You will have to login to your failover (or secondary) AD controller and replicate the options.  This is pretty straight forward except for the Mitel Phone Config on option 43.  On my post about Setting up Mitel Phones with PFSense I have all the info here for doing that but with AD it's a bit trickier.


Replicate DHCP Scope options from the primary DHCP server to the backup.  Must be done by hand.
Select your IPv4 and right click and select "Define Vendor Classes..."

Define Vendor Classes...

Select Add

Display Name - "Mitel IP Phone Options"

Description: Mitel Specific Options for IP phone provisioning

in the ASCII type without quotes

"ipphone.mitel.com"

in the binary add 00 after the 6D.  If you don't you'll have problems because the phone is looking for that null value.

Create Mitel IP Phone Class
Next go back to your IPv4 and right click and select predefined options as shown below.

Set Mitel Predefined options

In "Option class", drop down "Mitel IP Phone Options"

"Option class", drop down "Mitel IP Phone Options"


Click [Add]

For name, enter "Mitel Phone Config"
For data type, choose String
For Code, enter 43
For description, enter "Mitel configuration string"

Mitel Predefined Options and Values


Click [OK] to commit

You can now add the Mitel Scope Options to the scope by going to "scope options" right click select "Configure Scope Options" then go to advanced and select the vendor class we created called "Mitel Phone Options" and make sure it is checked and add your Mitel Configuration String.

Mitel Scope Options
Mitel Scope Options
Once we setup all our scope options on the failover/secondary AD controller we can then run the failover and it should succeed.


Now in this instance I had an issue with the reconcile database but if you didn't have a failover dhcp server before you should be good to go.  Below I go over how to fix the an issue with the DHCP database where it is not reconciling properly.

Fixing the Reconcile Database

The Primary DHCP server was still trying to reconsile to the old failover DHCP server, as shown below.

Reconcile DHCP Database

DHCP Reconcile IP
DHCP Reconcile IP

To fix this (because our scope won't properly reconcile) we need to use netsh.

go to the netsh prompt by typing "netsh" without quotes then press enter.

netsh list command
netsh list command
Once you verified the list and you can then remove the offending ip by using

netsh> dhcp server scope $youripscope delete lease $ipaddress

netsh delete cmd
now do a netsh list command to verify the offending IP is gone


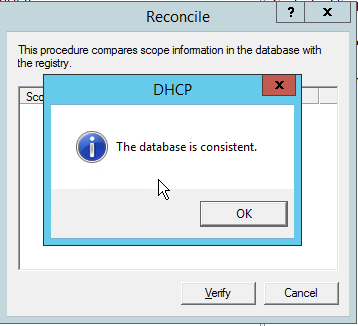
Once verified you can go to your DHCP server and reconcile your DHCP and you should get a message "The database is consistent"

Error is removed database reads on consistent.


Sources:
http://blog.solar.co.uk/dhcp-options-for-mitel-phones
https://docs.microsoft.com/en-us/previous-versions/windows/it-pro/windows-xp/bb490941(v=technet.10)
http://www.unixwiz.net/techtips/mitel-ipphone-networking.html


Sunday, February 24, 2019

Performing a Rolling Upgrade of Windows Server 2012R2 to 2016

In January I performed a rolling cluster upgrade on my organizations Microsoft Hyper-V cluster going from server 2012R2 to server 2016.  I highly recommend reading the following resources as they were a great reference for me.

https://docs.microsoft.com/en-us/windows-server/failover-clustering/cluster-operating-system-rolling-upgrade
https://redmondmag.com/articles/2016/12/15/clustered-hyperv-deployment.aspx
https://redmondmag.com/articles/2016/12/19/hyperv-deployment-2.aspx

There were a couple of caveats with the upgrade as outlined below.
  • Move from seven clustered nodes to a two node failover
  • Consolidate 19 VMs to 12
  • Upgrade NAS and Cluster Servers to 10 Gig networking
  • virtualize all AD controllers
What is being kept:
  • 2 X FreeNAS storage Servers
What is being removed:
  • 6 X AMD Piledriver 15H Microcloud Server
What was being upgraded and kept:
  • 2 X AMD Bulldozer 1U Servers
Upgrading the core to 10 gig

The migration to the 2X AMD bulldozer 1U servers was due to a lack of availability of getting new hardware ordered and a urgent need to remove the Microcloud system.  I felt it was a good idea to start with the storage as I had 4 servers I needed to upgrade with 10 Gig and with Freenas it is pretty straight forward.  We went with Intel X540 T2 cards because they were within our project budget and with having purchased Meraki MS350 24X which have 10 Gig, I though it was best to make use of them.  Unfortunately they don't support iWARP/RDMA but we were running 19 virtual servers off 2 freenas boxes on dual gigabit LACP LAGG.  Any limit we would reach I would think should be caused by disk (spinning rust) as they are not high speed SAS or NVMe but Enterprise SATA drives.

The upgrade on the FreeNAS servers went great all that was really required was having good documentation for any IP addresses on the storage and that the switches had all the required networks.  On the cluster management part it was a matter of shutting down the VM's, off-lining the cluster storage (maintenance mode), popping in the new network cards and configuring the networks to what they were everything came back without a hitch.  For verification we ran with the 10 gig in the systems for a month with no issues.  We then started with the Rolling upgrade

Step 1. - Run a cluster validation report.

It's hard to see where you're going without knowing where you've been and where you are.  This is why I recommend running a cluster validation report before you start anything.  This way you know what errors you were getting before hand and you will be able to know if something happened because of the upgrade or because there was a mistake or that you fixed something that might have been broken.  As shown below is a validation report before I started the upgrade from 2012R2 to 2016


Server 2012R2 Cluster Validation Report
As you can see I have several warnings on the validation report.  The errors included some network issues of dropping packets and other things such as the Cluster Aware Update Service being configured to be run in a separate monitor as shown below.


With that report being done, we can now start our Rolling upgrade.

Rolling Upgrade

I had to come up with a plan of more or less what I was going to do for the rolling upgrade.  This is it in a nutshell.


<!--IMPORTANT NOTE--!>


When the first Windows Server 2016 node joins the cluster, the cluster enters "Mixed-OS" mode, and the cluster core resources are moved to the Windows Server 2016 node. A "Mixed-OS" mode cluster is a fully functional cluster where the new nodes run in a compatibility mode with the old nodes. "Mixed-OS" mode is a transitory mode for the cluster. It is not intended to be permanent and customers are expected to update all nodes of their cluster within four weeks.


Cluster Upgrade Process
  1. Disable Cluster Aware Updates (CAU), verify if CAU is currently running by using the Cluster-Aware Updating UI, or the Get-CauRun. Stop CAU using the Disable-CauClusterRole to prevent any nodes from being paused and drained by CAU during the Cluster OS Rolling Upgrade process. This really depends on how many resources you have to keep the cluster going in this case we have enough resources so it is not required.
  2. Backup Cluster Database (requires third party software)
  3. Remove/Drain Rolls from from cluster being upgraded for use in 2 node cluster Backup (Full Export) of Workload DATA (VMS)
  4. After moving the VMs off of server, upgrade RAM and Reconfigure disks 1 SSD OS MIRROR and 1 HDD MIRROR for DATA reinstall with server 2016
  5. Upgrade and Configure networking
  6. Add Hyper-V and cluster rolls
  7. Add node to the cluster 

Verify cluster rolls and nodes in hybird 2012r2 and 2016 setup. Once verified evict the other 6 2012R2 nodes ensuring all rolls are transferred to new 2016 nodes and verify the cluster is operating properly.   Then upgrade the Cluster Functionality level

  1. Re-Enable CAU, restart it using the CAU UI or use the Enable-CauClusterRole
  2. Open Powershell -> Run the Update-ClusterFunctionalLevel cmdlet - no errors should be returned. Fix any errors.
  3. Upgrade the VM’s Hyper-V VM Configuration (Version)

Upgrade the Hyper-V Storage-Pool. Storage pools can be upgraded using the powershell command Update-StoragePool which is an online operation.


Cluster Changes


It is always easier and safer to start new or fresh, however this is not possible at this time.  When we go to upgrade the cluster infrastructure we will be doing a Mixed OS cluster until we remove all 2012R2 servers and upgrade the cluster functionality level. When the first Windows Server 2016 node joins the cluster, the cluster enters "Mixed-OS" mode, and the cluster core resources are moved to the Windows Server 2016 node. A "Mixed-OS" mode cluster is a fully functional cluster where the new nodes run in a compatibility mode with the old nodes. "Mixed-OS" mode is a transitory mode for the cluster. It is not intended to be permanent and customers are expected to update all nodes of their cluster within four weeks.


The two nodes I am upgrading to server 2016 from 2012R2 are almost identical, with two major differences. 2 X 2.8 GHZ quad core processors vs 2 x 3.2 GHz quadcore processors and one requires an old adaptec raid driver vs a dothill raid controller. Both machines have 80GB of DDR3 ECC RAM.

TIPS

  • All Nodes need to have the exact same software installed.
  • All Nodes need to have the exact same Virtual Switches and Named the same.
  • All Nodes Should Have RDS Enabled
  • Virtual Network Adapter TEAM: AdapterName ( I typically put the Cluster/Client communication on the default VLAN)
  • Cluster Name: $CLUSTERNAME


Cluster Upgrade Process


Step 1 . Disable/Stop Cluster Aware Updates
  • If you are running Cluster Aware Updates (CAU), verify if CAU is currently running by using the Cluster-Aware Updating UI, or the Get-CauRun. Stop CAU using the Disable-CauClusterRole to prevent any nodes from being paused and drained by CAU during the Cluster OS Rolling Upgrade process. This really depends on how many resources you have to keep the cluster going in this case we have enough resources so it is not required.
  • Backup Cluster Database (use Veeam, Altaro, Windows Server Backup)
    Backing Up Failover Cluster Configuration
  • Drain the rolls from cluster node being updated. Ensure all rolls from node have been removed and transferred then evict from cluster
  • Upgrade Node to Server 2016. I made sure that I had as many of the rolls and features that were on the other nodes re-setup on the new 2016 node.
  • Rolls Required
    • File and Storage Services everything but work folders
    • Hyper-V

  • Features Required
    .net 3.5
    .net 4.5
    Client for NFS
    Data Center Bridging
    Enhanced Storage
    Failover Clustering
    Ink and Handwriting services
    media foundation
    multipath io
    Remote Admin Tools
    Hyper-V management
    File services
    Failover cluster tools
    SMB1
    SMB Bandwidth limit
    User Interfaces
    Windows Internal Database
    Windows Server Backup
    Windows server migration tools
    Windows Standards-based storage management
    WoW64 Support
  • Setup network. (Intel network setup) Cluster only allowed on cluster network. To do this we are setting up NIC Teaming to have easy access to VLAN Tagging.

Once done create the LAGG adding the active NIC to the team.
Repeat the steps for as many times as you need until you have all the VLANS you need for the server.

  • Add the Hyper-V Switches to the network. I setup only one network for VM and Cluster Traffic. It is recommended that you have more then one network for doing this. Make sure you match the proper Microsoft Multiplexor adapter with the proper vlan you have setup on your host interface, otherwise your VM's won't be able to communicate with anything.

VM and Host Network for cluster communication

VM network.  No Host/Cluster Communication Permitted.


    • Re-Connect the iSCSI targets on the host node after all networking is setup and configured.
      iSCSI Initiator
      IP: PORT -SSD
      IP: PORT -HDD
      IP: PORT - Quarcom
      IP: PORT - SSD
      IP: PORT - HDD
      IP: PORT - Backup Quarcom
      • Rejoin cluster
          Verify cluster rolls and nodes in hybird 2012r2 and 2016 setup.  Once verified evict the other 6 2012R2 nodes and verify the cluster is operating properly. Transfer Rolls such as the Cluster Core Resources and ensure are not running on nodes that you are decommissioning.
        1. Re-Enable CAU, restart it using the CAU UI or use the Enable-CauClusterRole
        2. upgrade the Cluster Functionality level
        3. Open Powershell -> Run the Update-ClusterFunctionalLevel cmdlet - no errors should be returned. Fix any errors.
        4. Upgrade the VM’s Hyper-V VM Configuration (Version)

        Upgrade the Hyper-V Storage-Pool. Storage pools can be upgraded using the powershell command Update-StoragePool which is an online operation.

        Verify Cluster Operating Level
        Get-Cluster | Select ClusterFunctionalLevel (Server 2016 and above only)
        https://serverfault.com/questions/848529/hyper-v-2012-r2-cluster-functional-level-missing

          Run cluster verification and fix any issues that crop up.


          Some tips from my Server 2012R2 to 2016 Upgrade:

          • I had to limit the number of networks the cluster host runs off of due to some DNS resolution issues that worked using server 2012R2 but not under 2016.  I had to remove the cluster host from using these networks due to DNS Error 1966 showing up and under server 2016 causing cluster communication problems.  To do this I disabled the communication using the Hyper-V switch manager with the setting shown below.

          • I did have to remove and re-add the cluster auto-update roll. 
          • Cleanup the AD and remove any cluster nodes that did not get automatically removed.
          Other then that I had a really successful cluster update to server 2016 and everything has been working well since.

          Tuesday, January 22, 2019

          Veeam Certificate Expiration Date Check Error


          Updating Veeam Backup Server Certificate

          Veeam uses certificates to secure backup communications between your backup component. In this case I am having Veeam use a self-signed certificate, but you can select your own from the certificate store or import a pxf file that you have from somewhere else like Let’s Encrypt or another certificate authority.


          Go to the menu - > General Options


          Select the security tab


          If you click on the self signed cert link you will get the cert info as shown below.


          To update the certificate press the install button


          Select generate new certificate


          At the Generate Certificate step of the wizard, specify a friendly name for the created self-signed TLS certificate.  (I’m just staying with the default) Veeam Backup Server Certificate


          Once that is done the install the certificate your given the option of installing on the localmachine or for the user; I installed it on the local machine and upon closing and relaunching Veeam, the error was resolved.  When using self-signed certificates with Veeam, the Veeam server is suppose to automatically renew the certificate every 12 months.  However a bug introduced in v9.5 U3a, caused an issue with the certificate renewal. 

          If you ignore this message, agent management functionality and granular restores will start failing.  The fix is to generate a new certificate as described here and in the reference link below.  When updating your certificate disable all backup jobs and update the certificate; then re-enable your backup jobs.  You want to do this because when you update the certificate the Veeam Backup Service restarts.  If you do the certificate update process with jobs running you could cause the jobs to fail or corrupt data.


          You can also refer to veeam 


          How to make google calendar more secure

          With the rash of spam and phishing attempts lately, I would recommend making the following changes to your google calendar settings to secur...