This is a tutorial on how to deploy Windows 10 on clients that were running windows 7 using WDS. Though there are no specifics on how I made the image in this post rest assured that post is coming. This process should be pretty similar on any system that was running Windows 7 and has UEFI capabilities. I have not had time to investigate doing a unattended.xml file to more automate the process but it is at the point where I will spend as much time looking into how to set it up with an unattended file as it would be to just run the install. This process takes about 30 minutes per machine to install, and you can do a bunch at once if you want. I've done up to 4 at a time, but that is due to user scheduling and verification of the process then it is just not doing many clients at once.
When you go to install Windows 10 from windows 7 you need to disable the CSM (Compatibility Support Module) that allows you to boot to a legacy OS. You will also want to enable pxe boot and make sure it is enabled for IPV4/IPV6 which ever you happen to be using. On this system pressing F1 when the system is booting up will get you into the bios.
 |
| System Bios |
While the system reboots pressing F12 will bring up boot options - select the network boot option, select the network adapter and hit enter.
 |
| WDS Boot Image |
When correctly setup you will see a network boot screen with the IP of the WDS server as shown above. If there is more then one image and boot image enabled you will be given a list of images to boot off of and deploy.
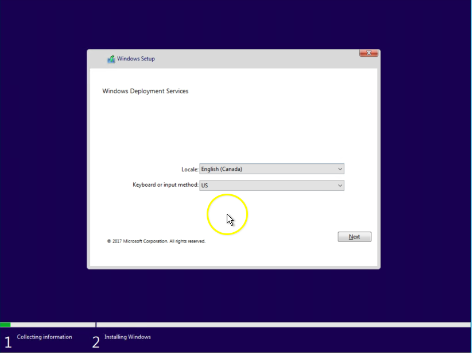
When we are booted we are prompted for our language and location.

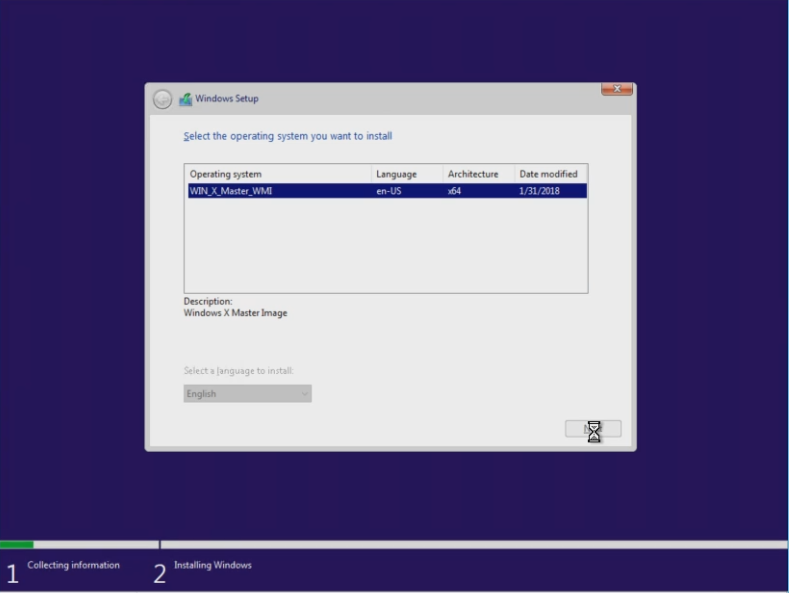
Sign in with a DOMAIN administrator username and password then you will be prompted with selecting the image you want to install (In this case WIN_MASTER_WMI). This is so you can get the image from the WDS Server
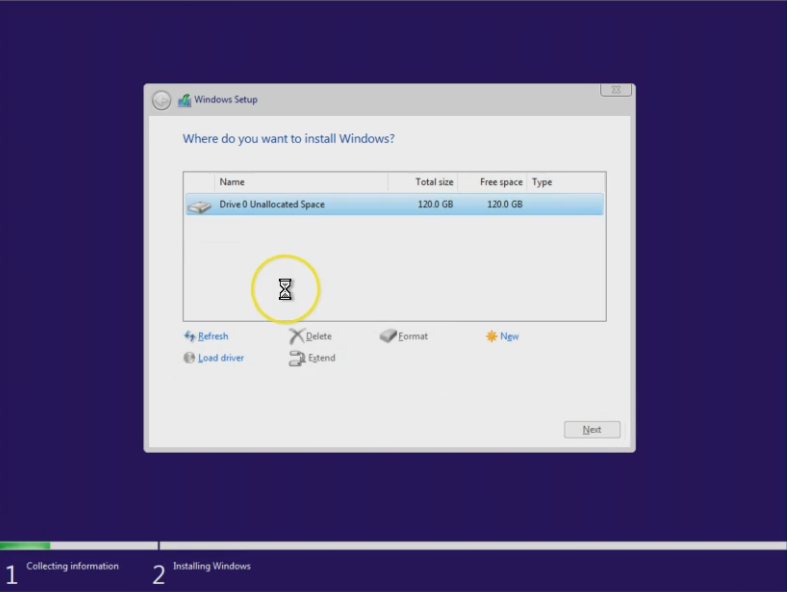
It is best if you delete all partitions and allow WDS to format the entire drive, once done the install takes about 20 minutes on our 1 Gpbs Network.

After the install you will be prompted to do a few finishing touches
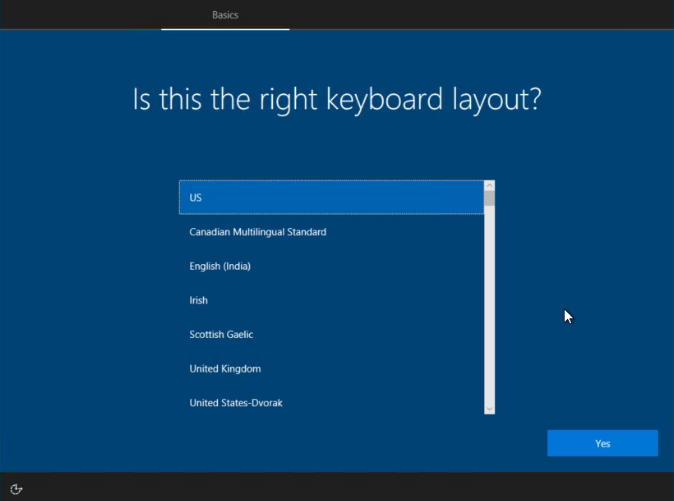 |
| Select your keyboard layout |
 | ||
Select if you want a second keyboard layout
|

 | ||
Setup for an orgainziation
|

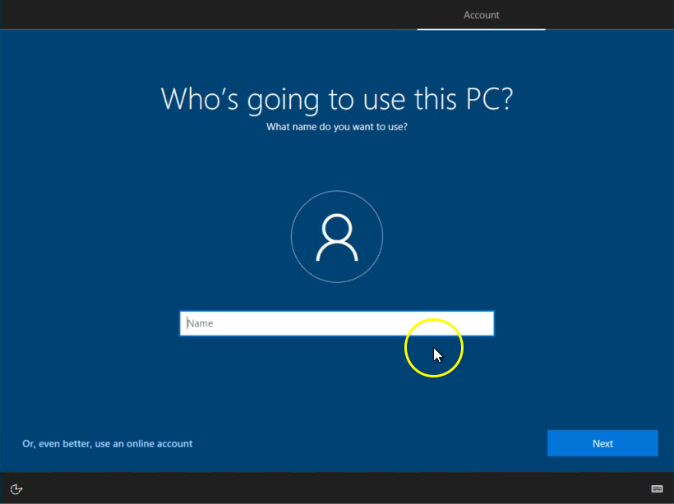 |
| Create a local user account |
 |
| Create a password for the local account |
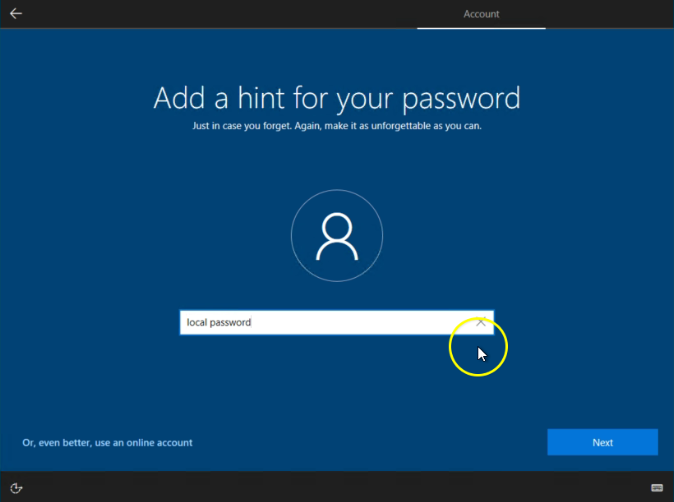 |
| Add a password hint for your account |
 |
| Disable Cortana |
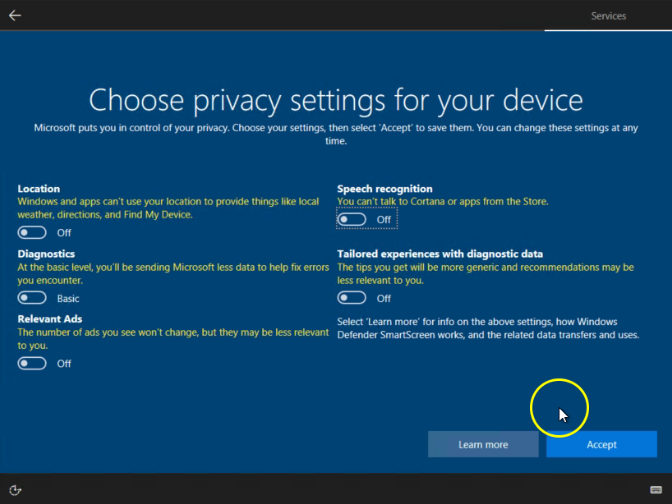 |
| Select your privacy settings |
I typically use the following credentials for creating the local user
Username: $yourlocaladmin
Password: $yourpassword
Hint: I like using a phrase like "local password"
Username: $yourlocaladmin
Password: $yourpassword
Hint: I like using a phrase like "local password"
 |
| Windows 10 Desktop as configured in the image with no Group policy |
Now a couple of house cleaning items. It is easiest if you do this logged in as the local admin you created and change the name of the machine to what you need it to be. Continue to work in the local administrator account until you have moved the computer into the proper windows 10 OU and have updated the the group policy settings on the server and the client.
Activate Windows 10
Open Explorer -> Right Click on This PC -> Properties -> Select Change Key and input your windows 10 key:
Activate Office 2016
Open Word or another office program, Select the Install Updates Only Option and accept -> Create a document then under File -> Account -> Change Product Key and input the key.
Install your vendor specific system software (if required) I like loading the auto detection for registering the device and the vendor system update app. I then run the system update to get any drivers that might have been updated after the image was created.
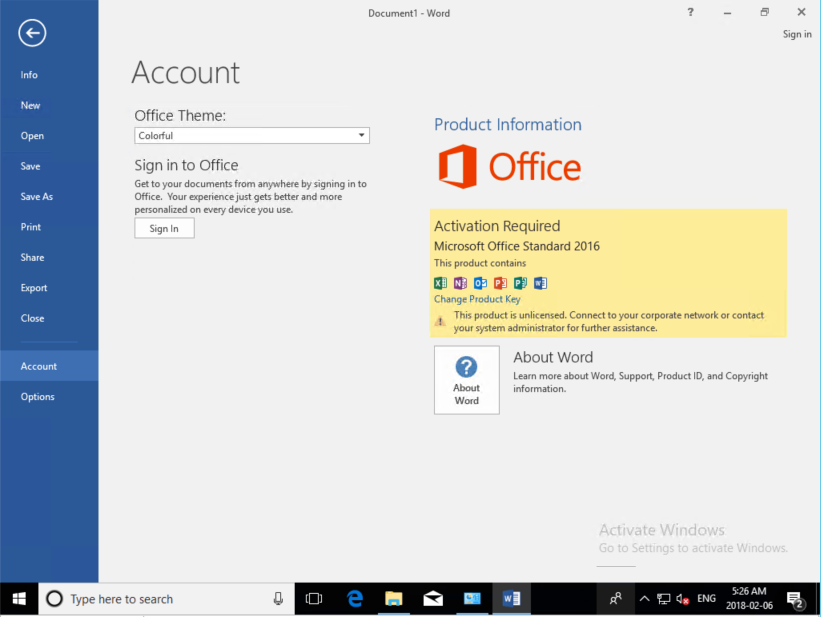 |
| Office 2016 Activation Screen |
Then log into your active directory server and move your new Windows 10 machine into your Windows 10 OU. After moving the computer into the Proper OU under the Win10 OU in AD and perform a gpupdate on the server and the client.
I typically have a test user I login as $TestUser to verify AD Settings such as the startmenu. If confirmed. If properly deployed your Windows 10 system could look like this when finished with a customer start menu. An interesting thing to note is that once you have deployed with WDS and activated your Windows 10 you won't have to reactive the system again. Your activation is tracked by your WDS Server.
I typically have a test user I login as $TestUser to verify AD Settings such as the startmenu. If confirmed. If properly deployed your Windows 10 system could look like this when finished with a customer start menu. An interesting thing to note is that once you have deployed with WDS and activated your Windows 10 you won't have to reactive the system again. Your activation is tracked by your WDS Server.
 |
| Windows 10 System with Customized Startmenu and restricted universal apps |


